Instructions: Rose Calyx
This is my design for a base for the modified version of Kawasaki's rose that I show on this site. If you have a copy of Origami for the Connoisseur, you will probably notice that at least part of the process is similar to Kawasaki's spiral snail shell design on Pages 140-143. It struck me at one point in the process of making the shell that it would work well as the base of a rose if I went another direction about halfway through the process.
This base will not attach to the 'new' Kawasaki rose.
Design, photos, and descriptions ©2018 by DofTNet Enterprises is licensed under CC BY-SA 4.0
 Step 1
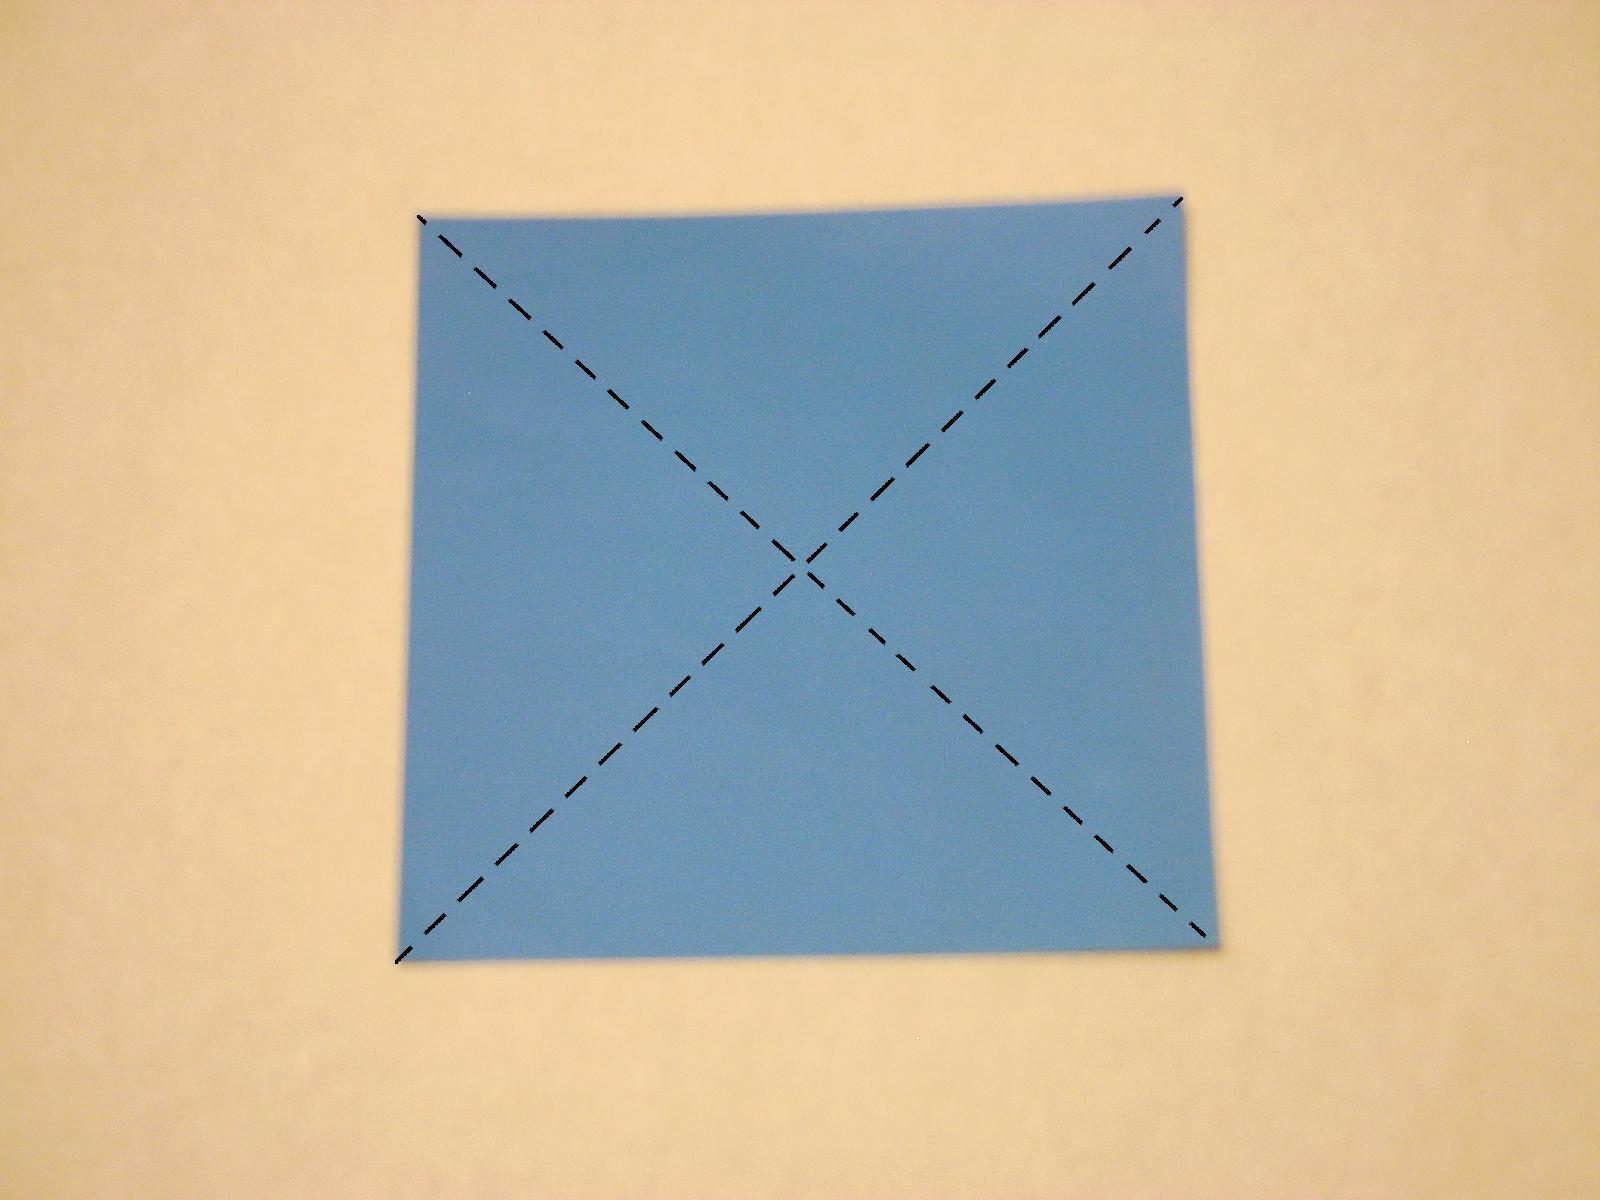
First, start with a square that is the same size as the square that you made the rose with. Starting with the colored side up, valley fold across both diagonals and unfold.
 Step 2
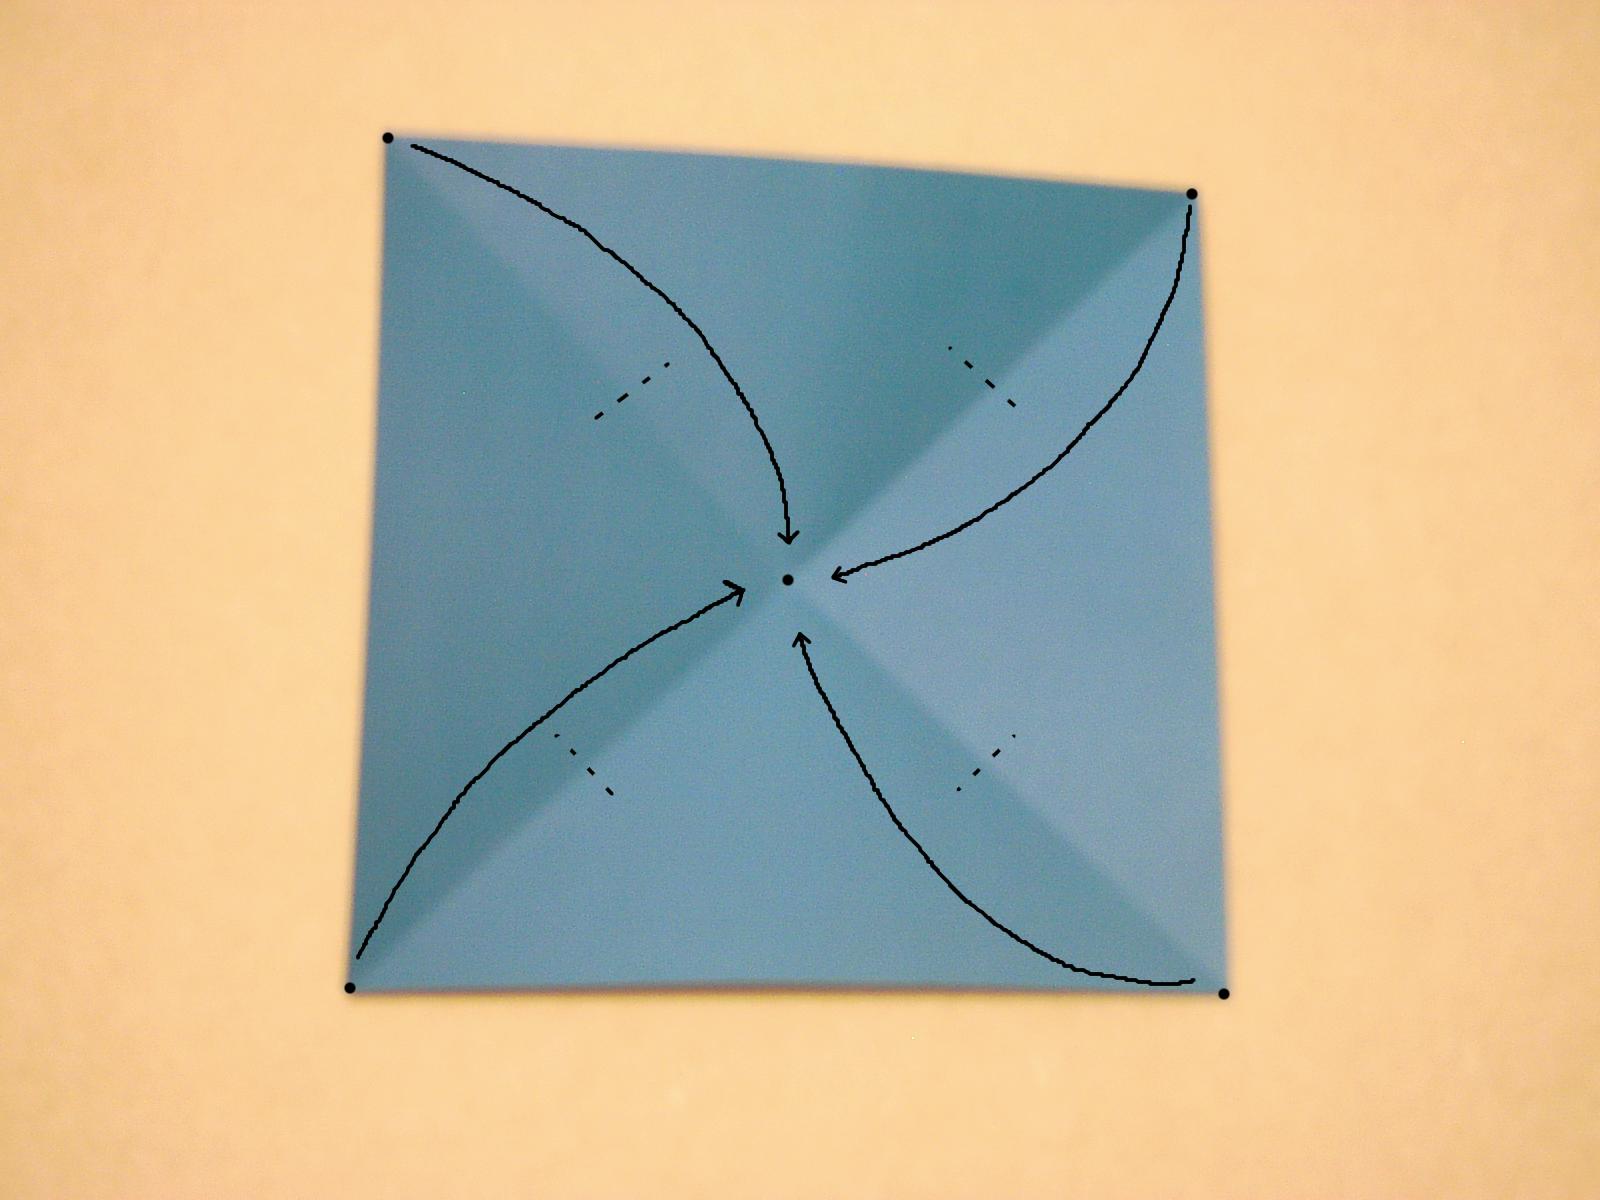
Next, find the midpoint of each crease by folding the corndes to the center and creasing just the center.
 Doing Step 2
Marking the midpoint with a short crease.
 Step 3
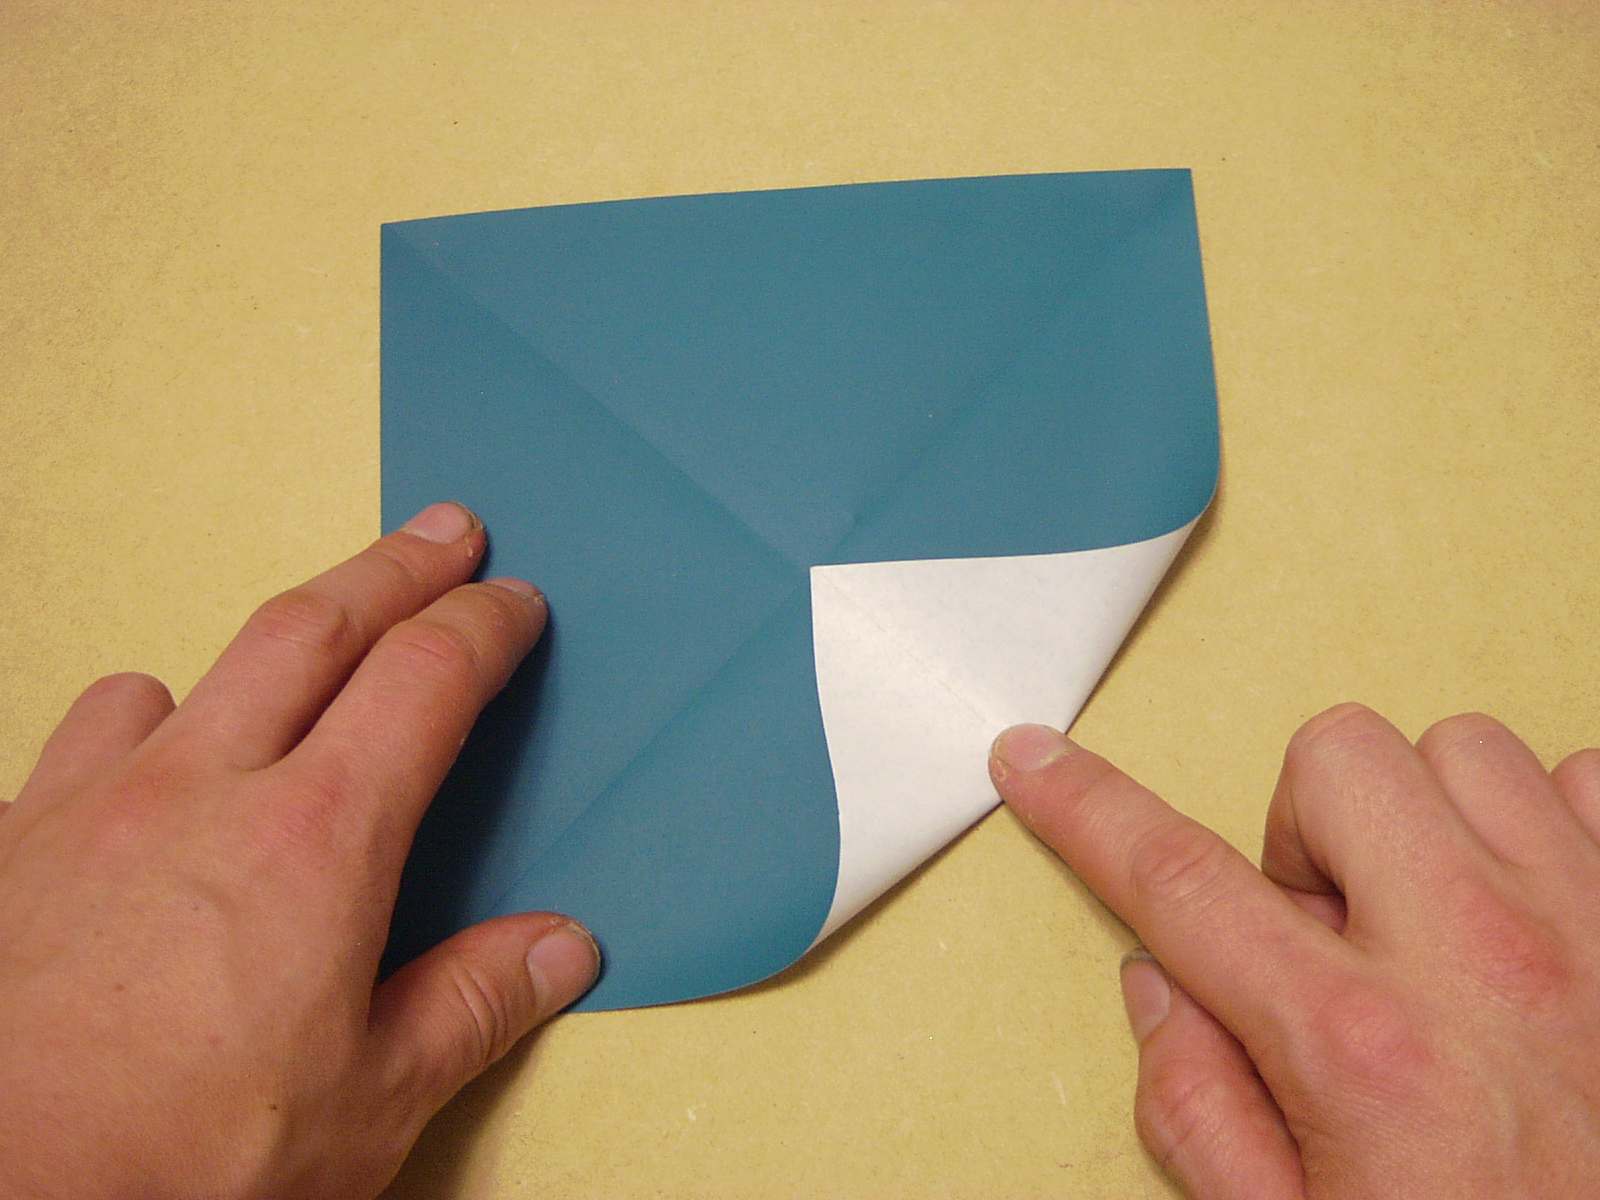
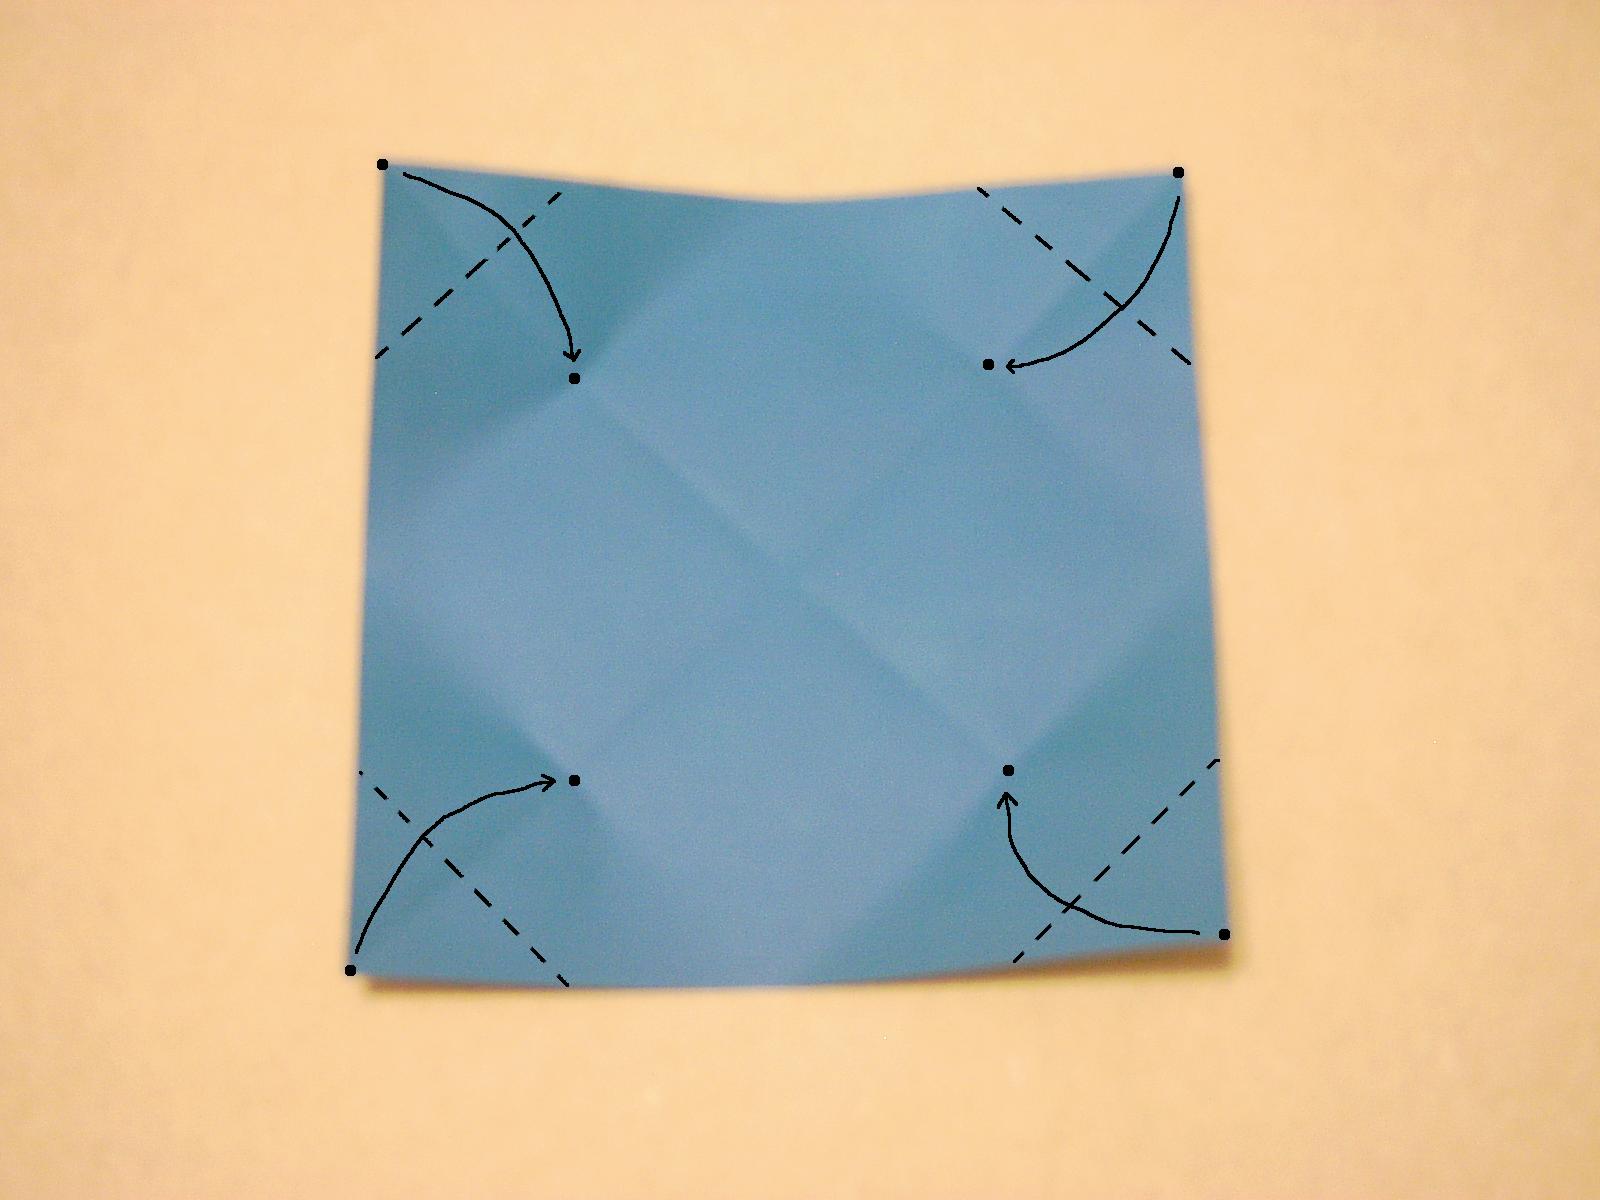
Valley fold the corners to the point marked in step 2.
 Doing Step 3
Basicly the same as step two except the crease goes all the way across.
 Step 3 - Result
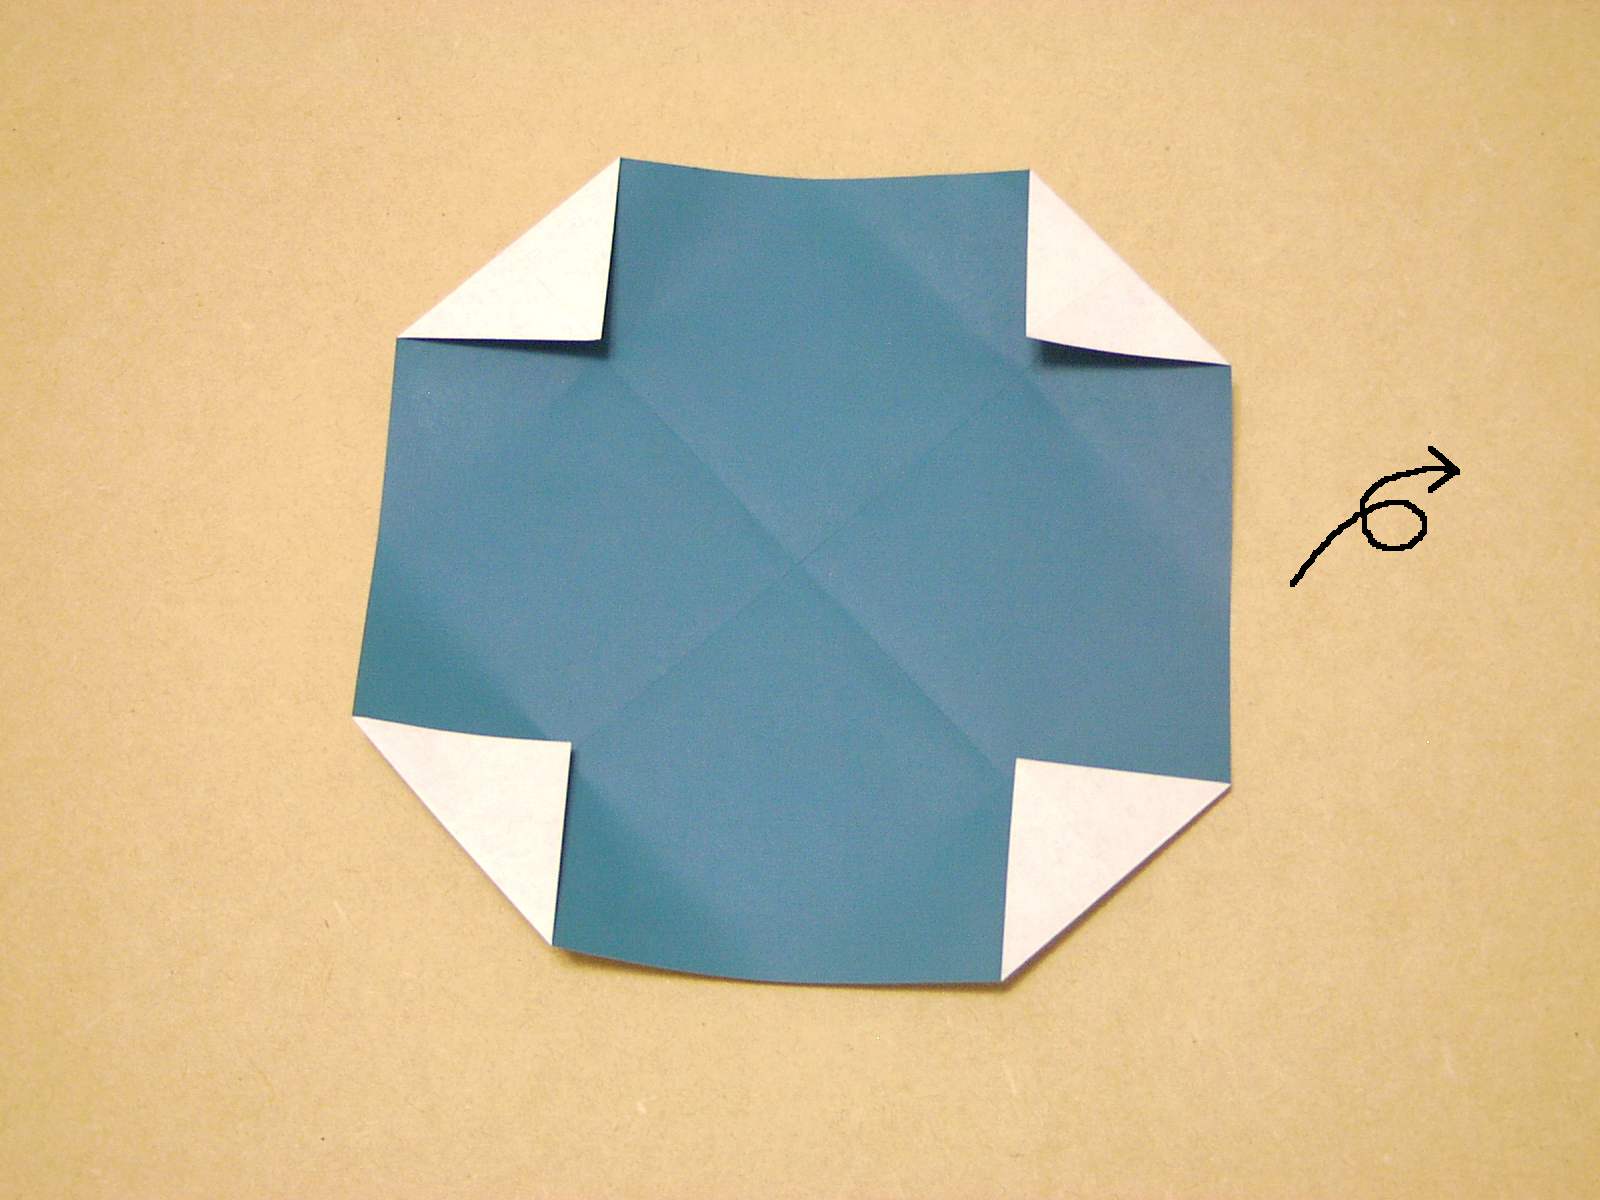
This is what you should end up with. Unfold the corners and flip the paper over.
 Step 4
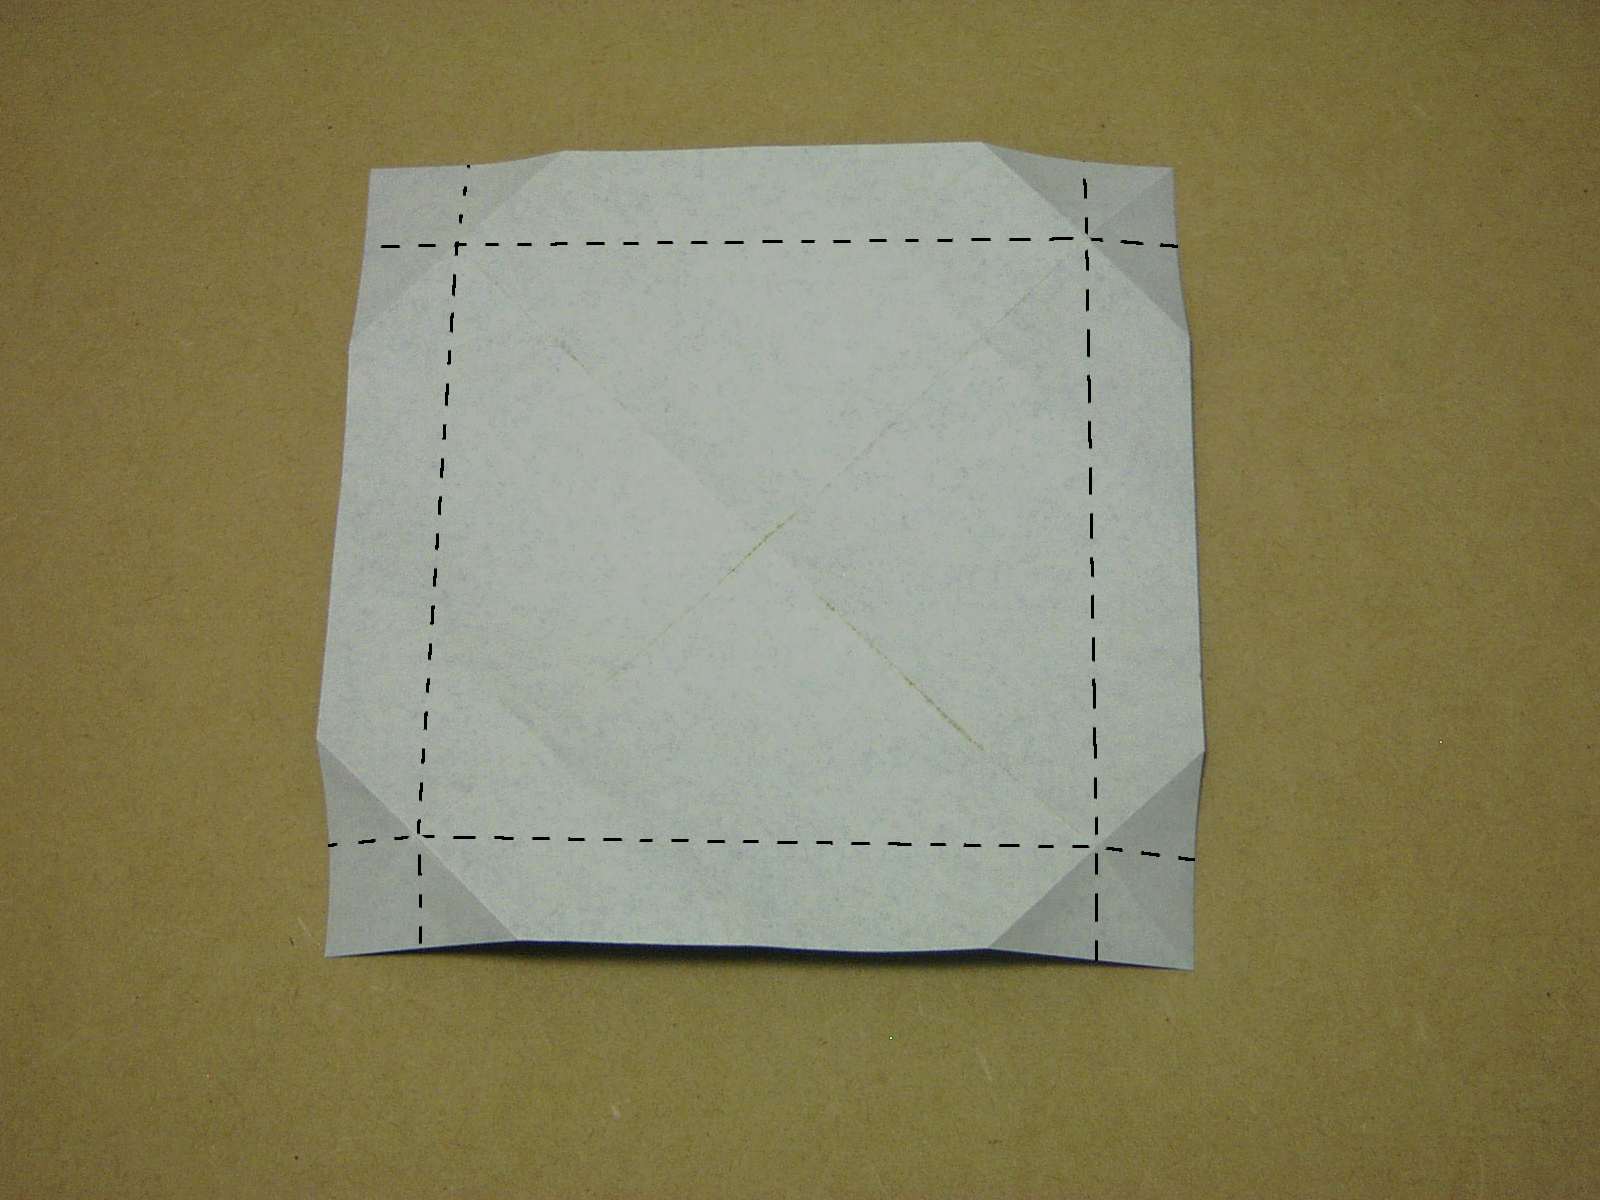
With the colored side down, valley fold all four edges in so that the creases cross the intersecting creases from step 3 and then unfold. This works out to 1/8th of the square.
 Doing Step 4
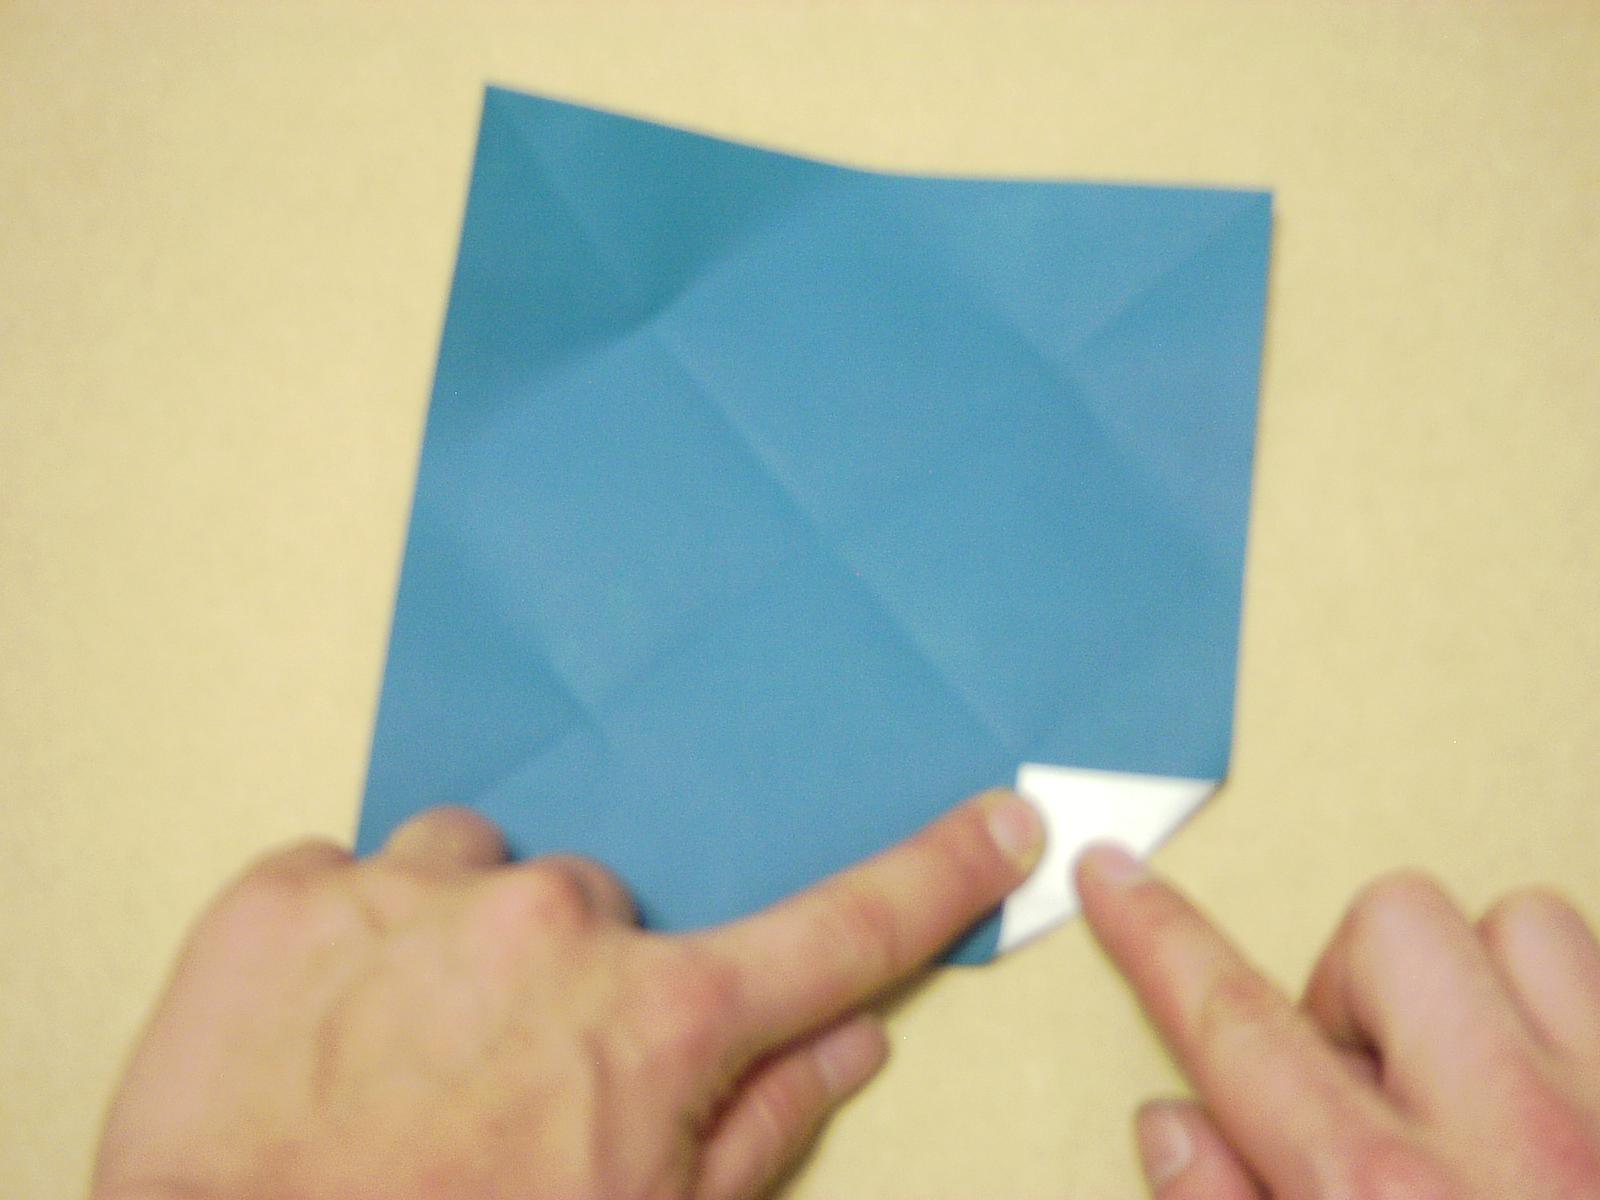
You should also notice that the edge lines up with the short marker creases that you made in step 2.
 Step 5
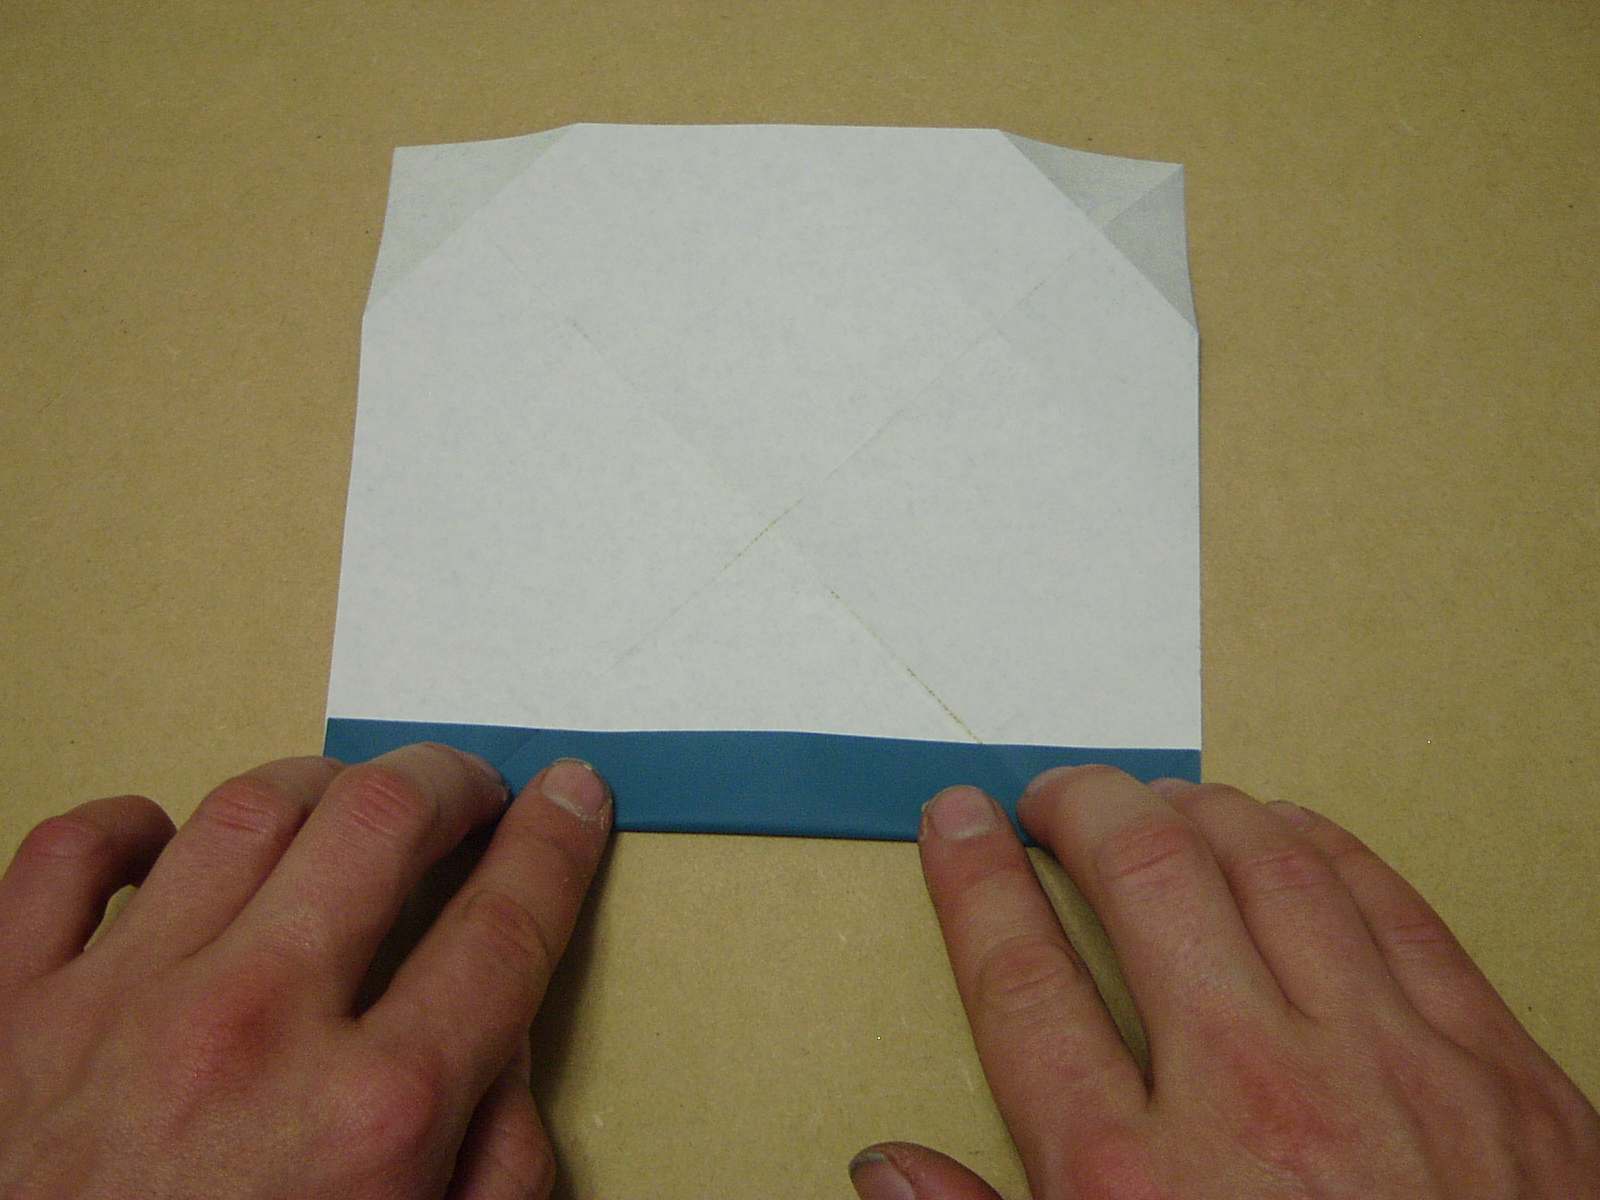
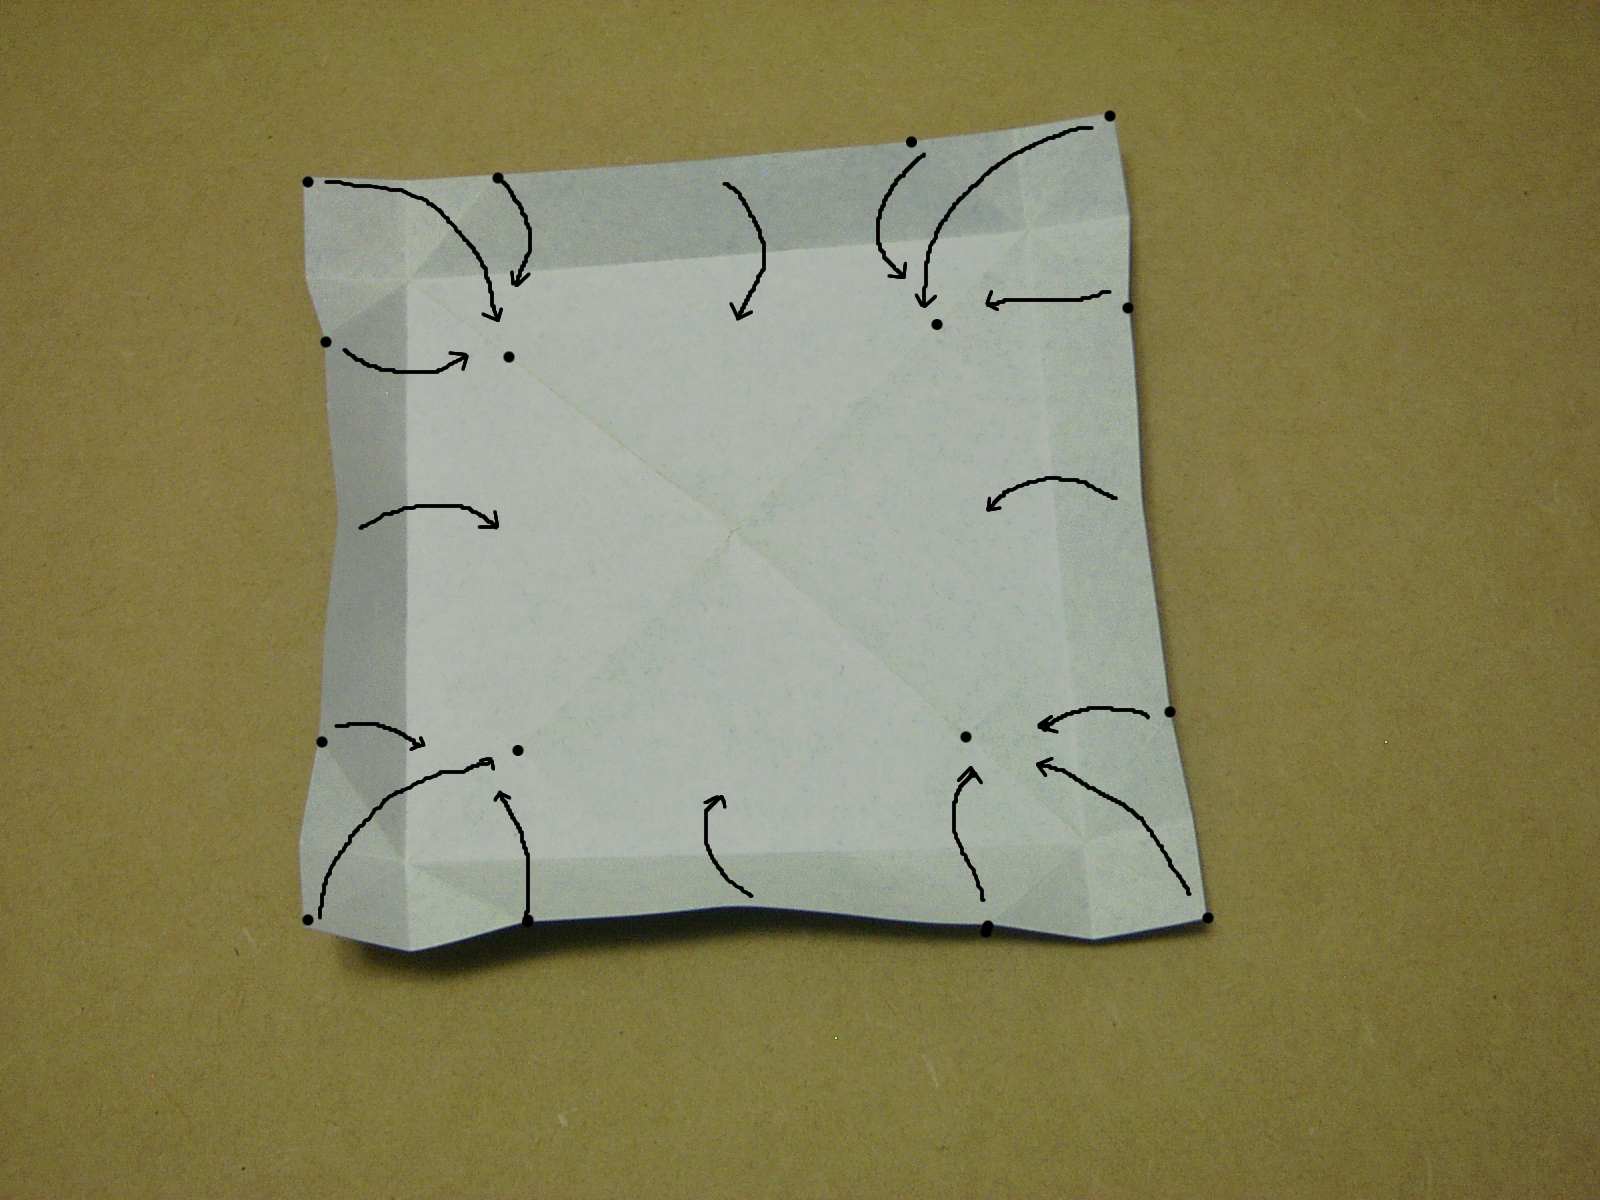
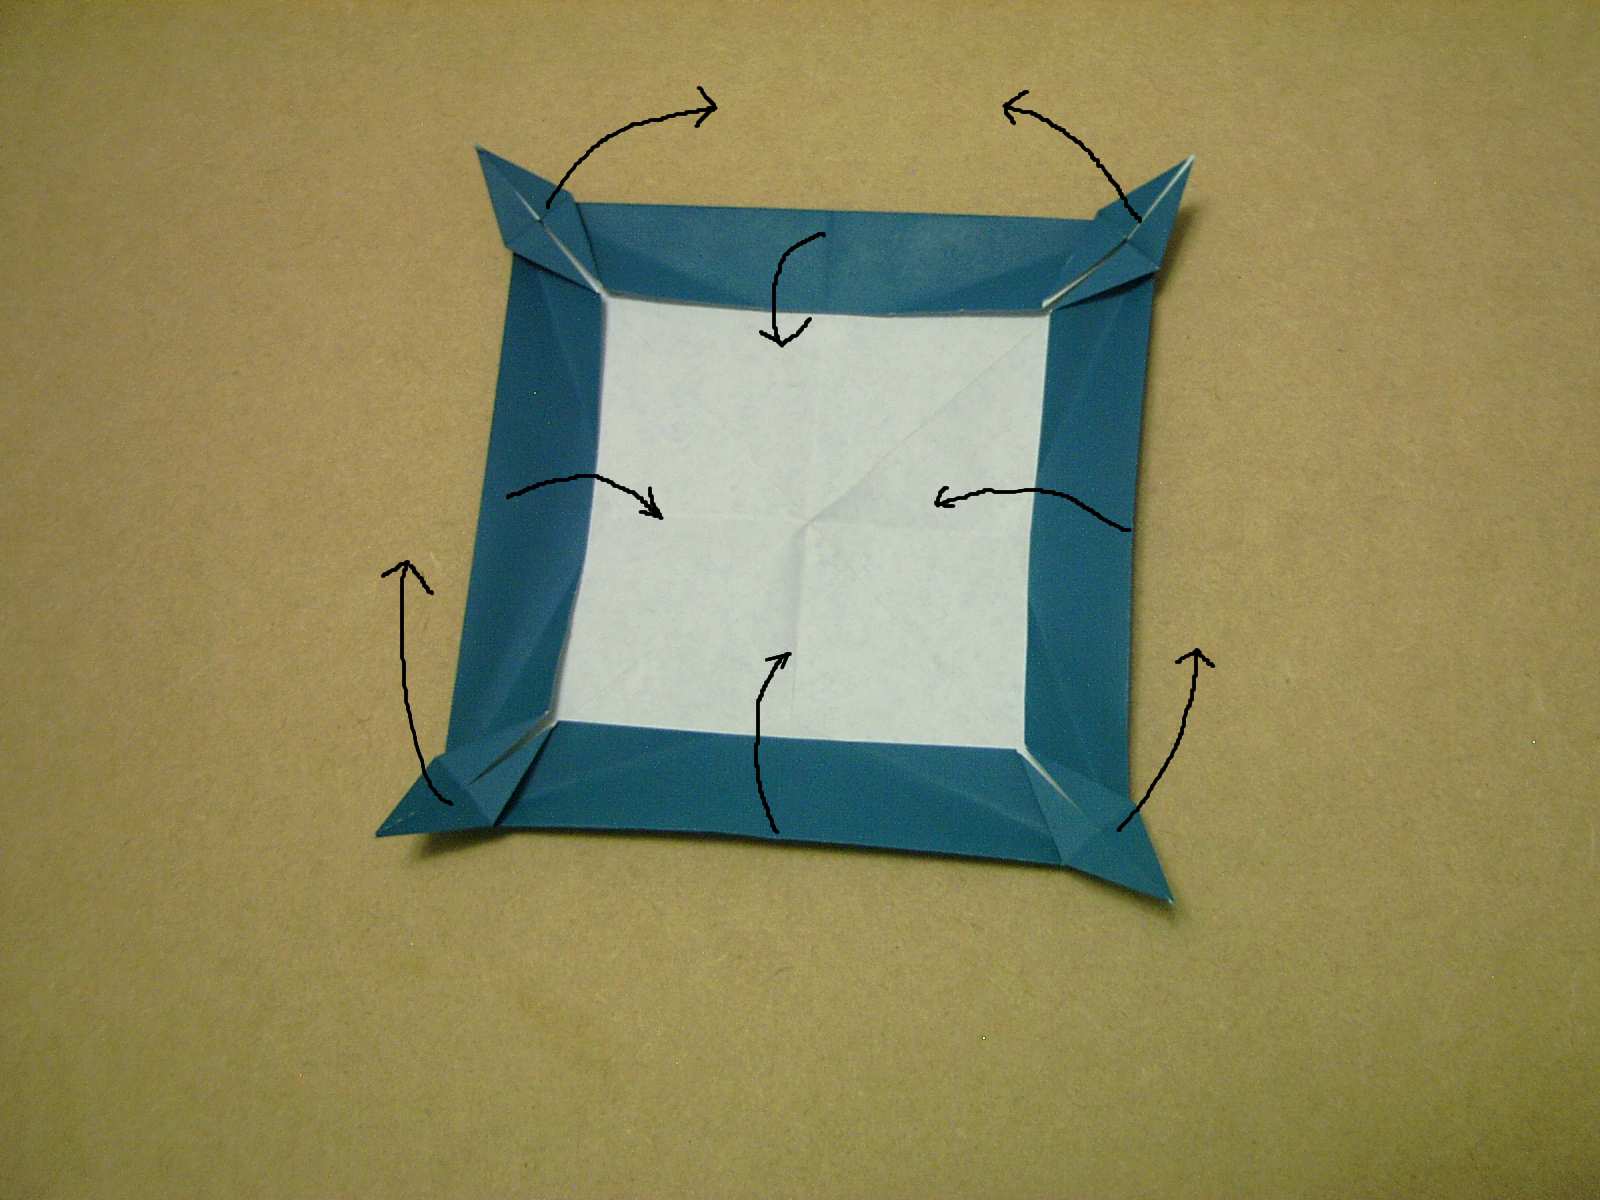
Fold all four edges in at once, letting the creases from step 3 fold inward. Check the next image to see what you're supposed to end up with.
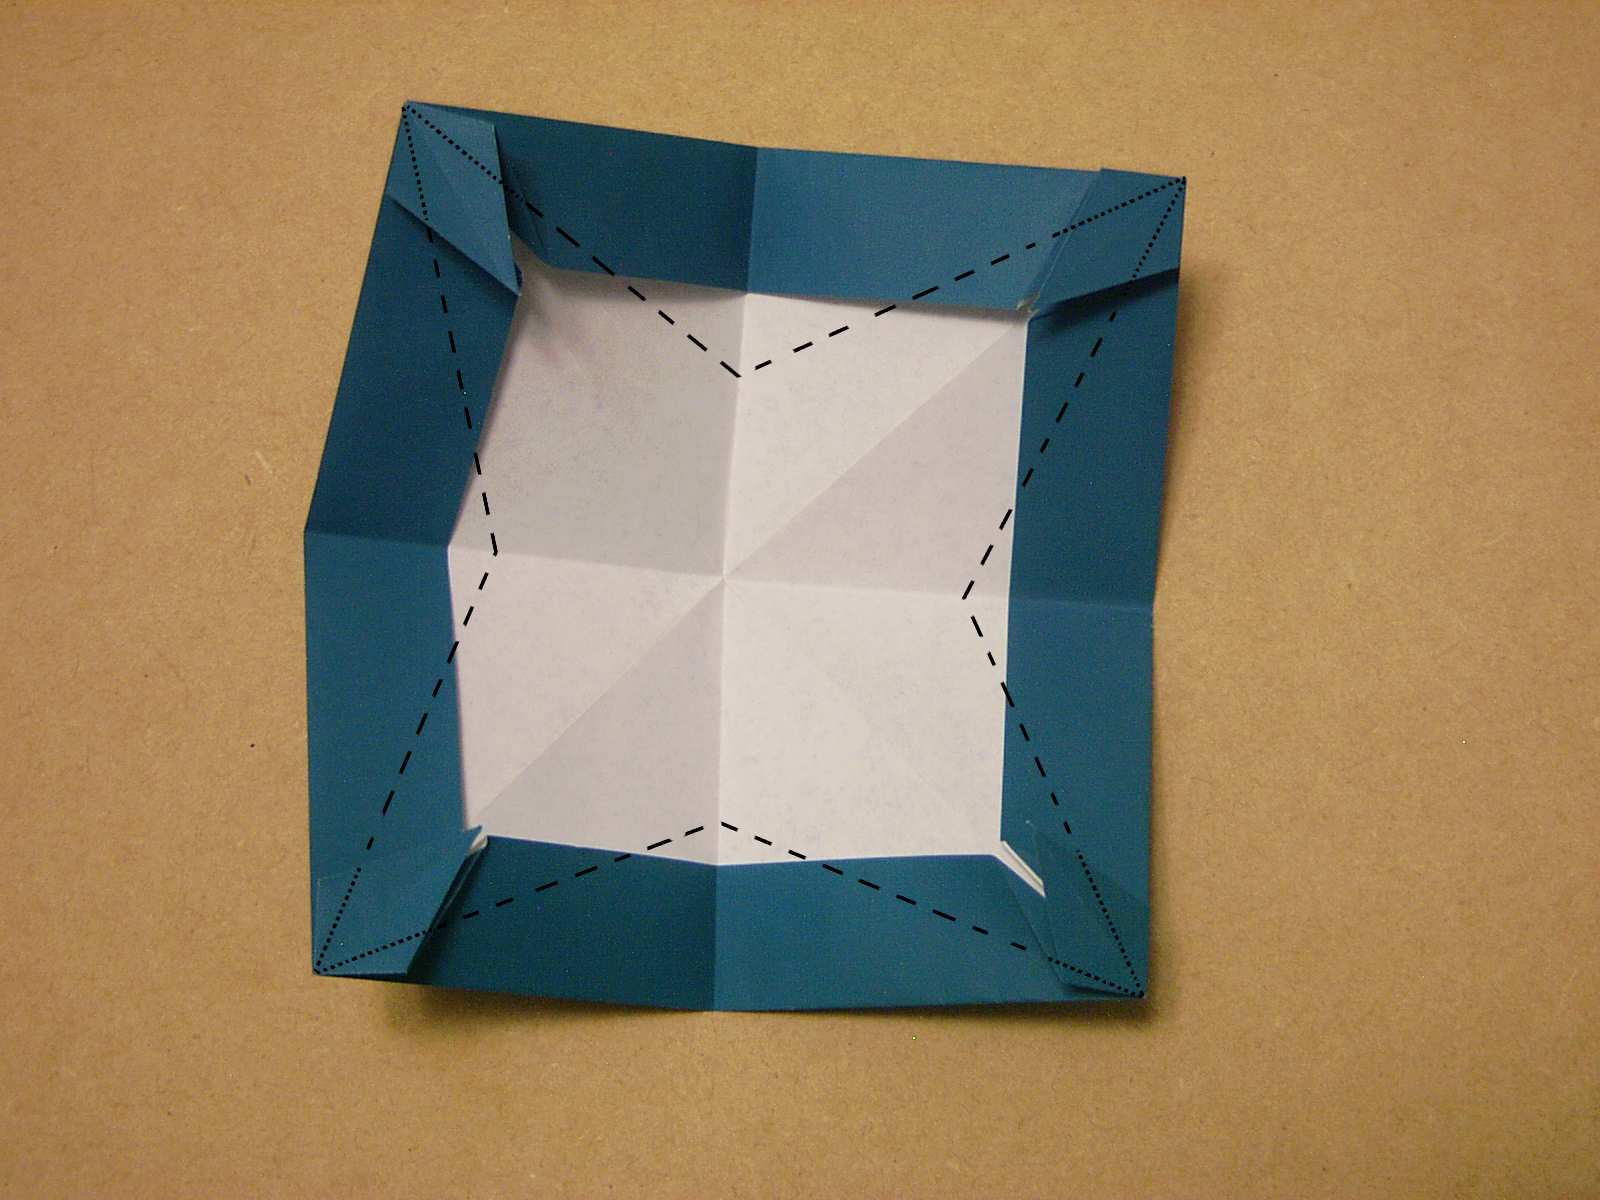
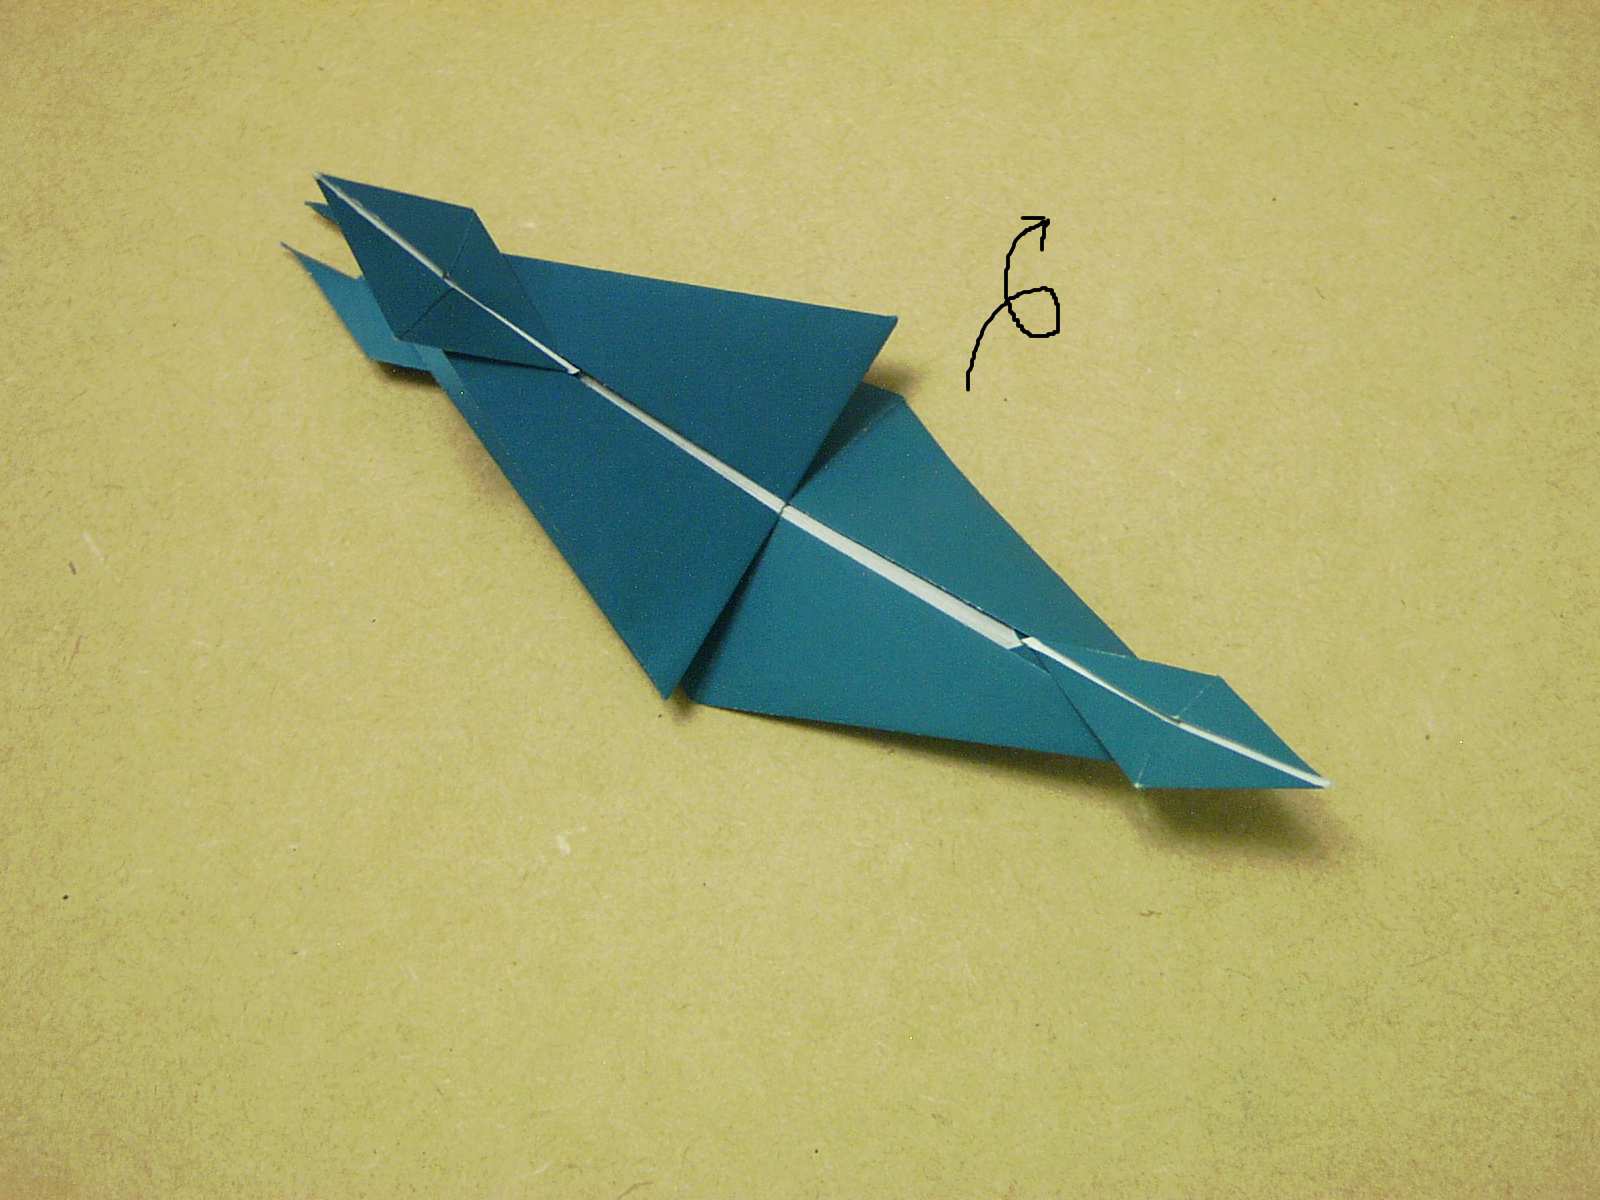
 Step 6
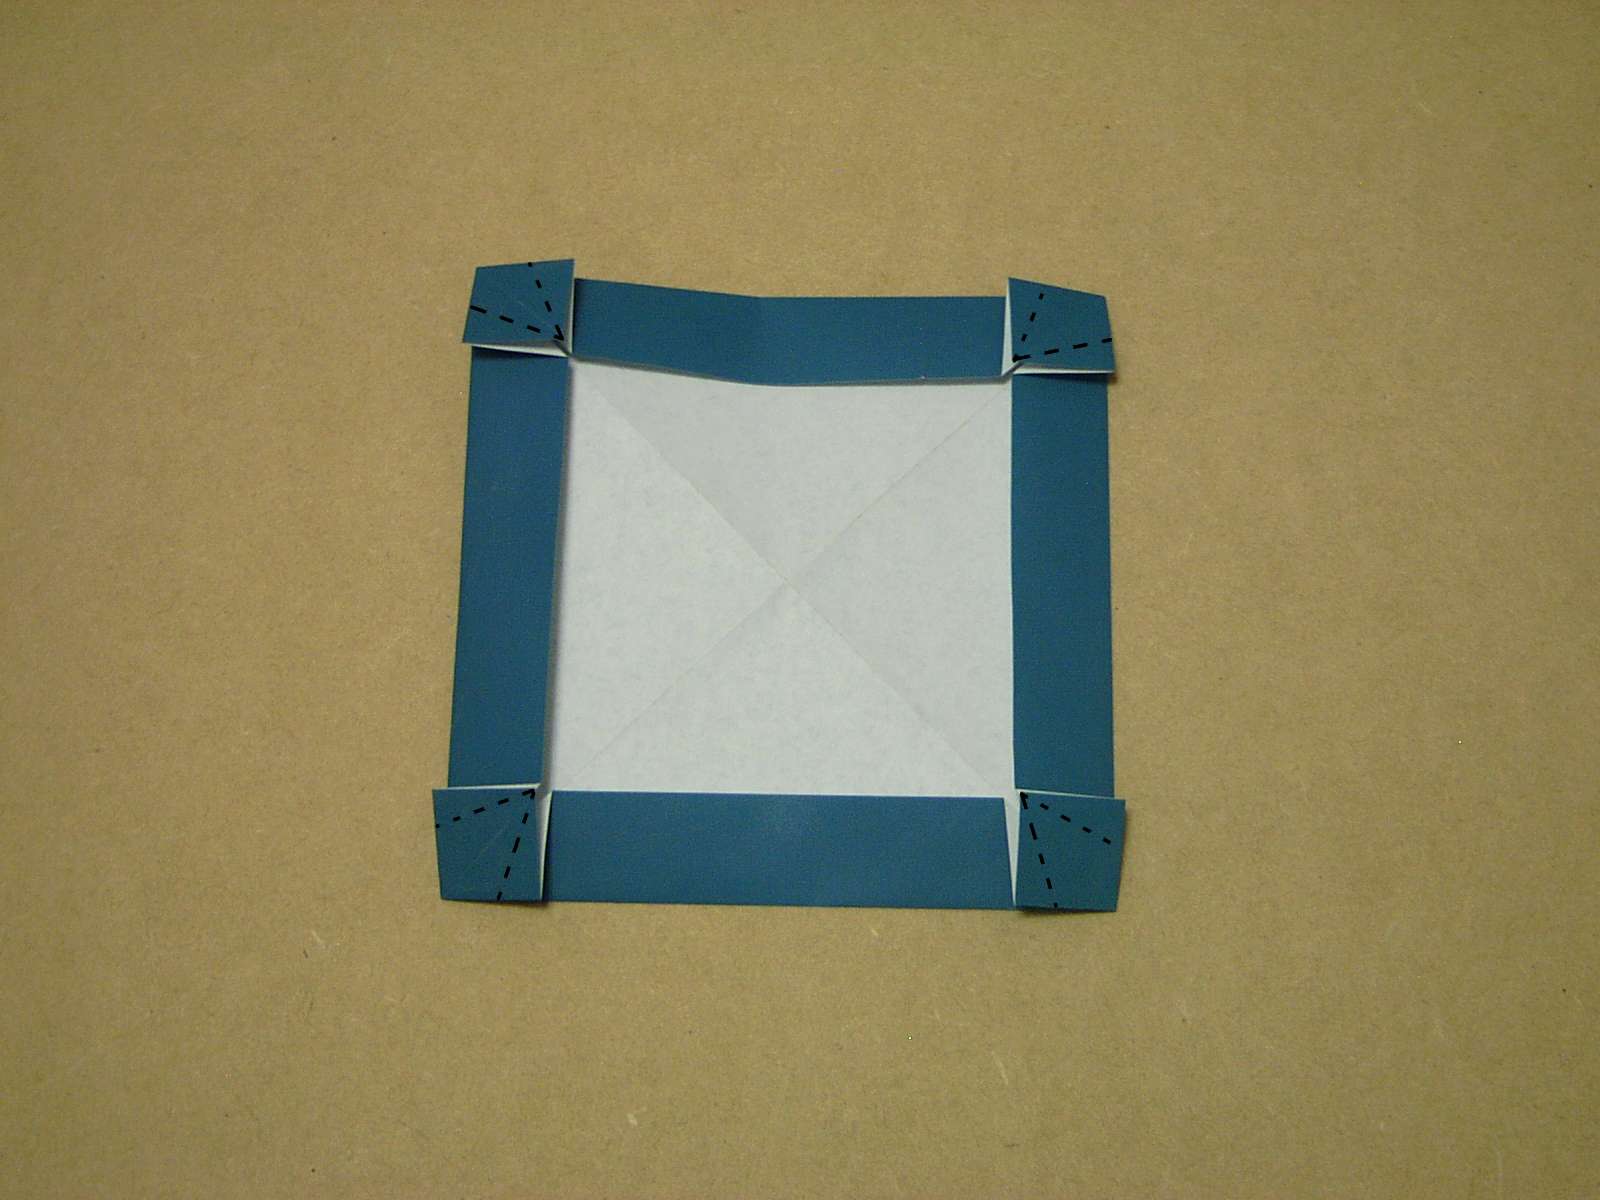
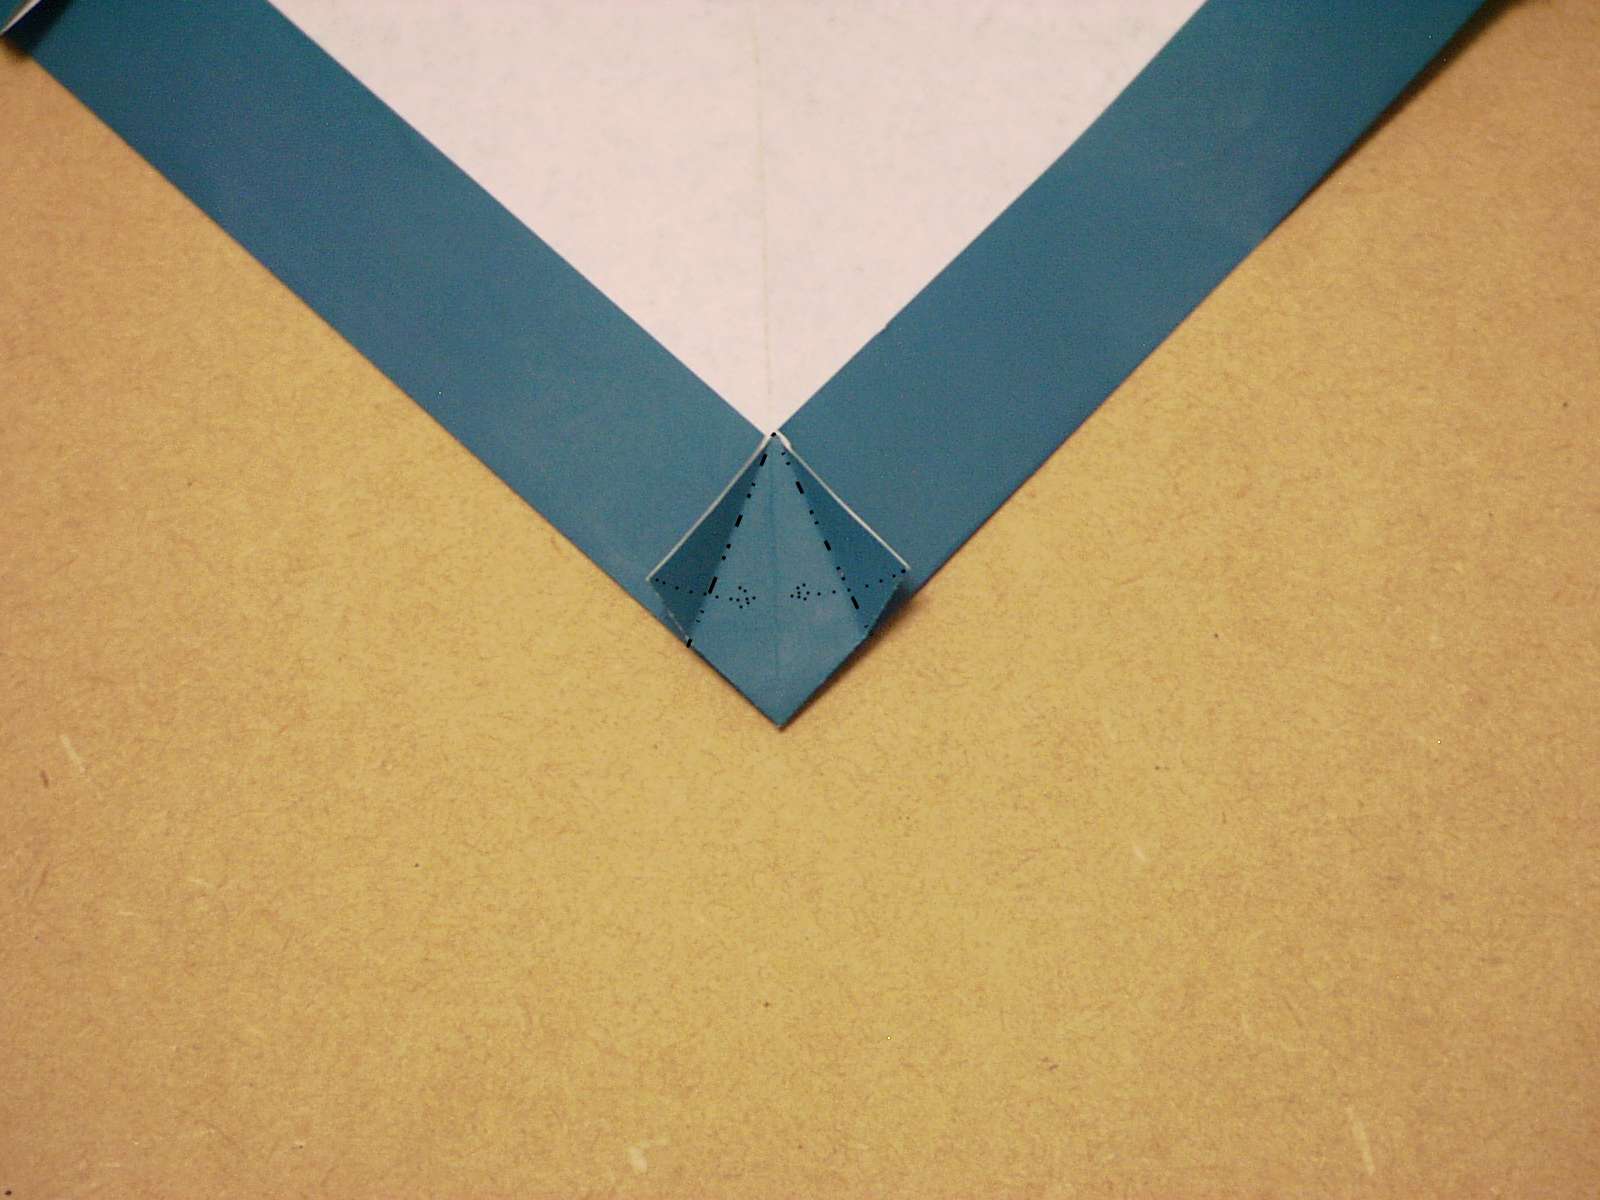
All four corners should have what ammounts to a preliminary fold. Valley fold where shown. It's hard to see the marks in the image so if you don't see the marks on the corners, click on the image to bring up the full size image.
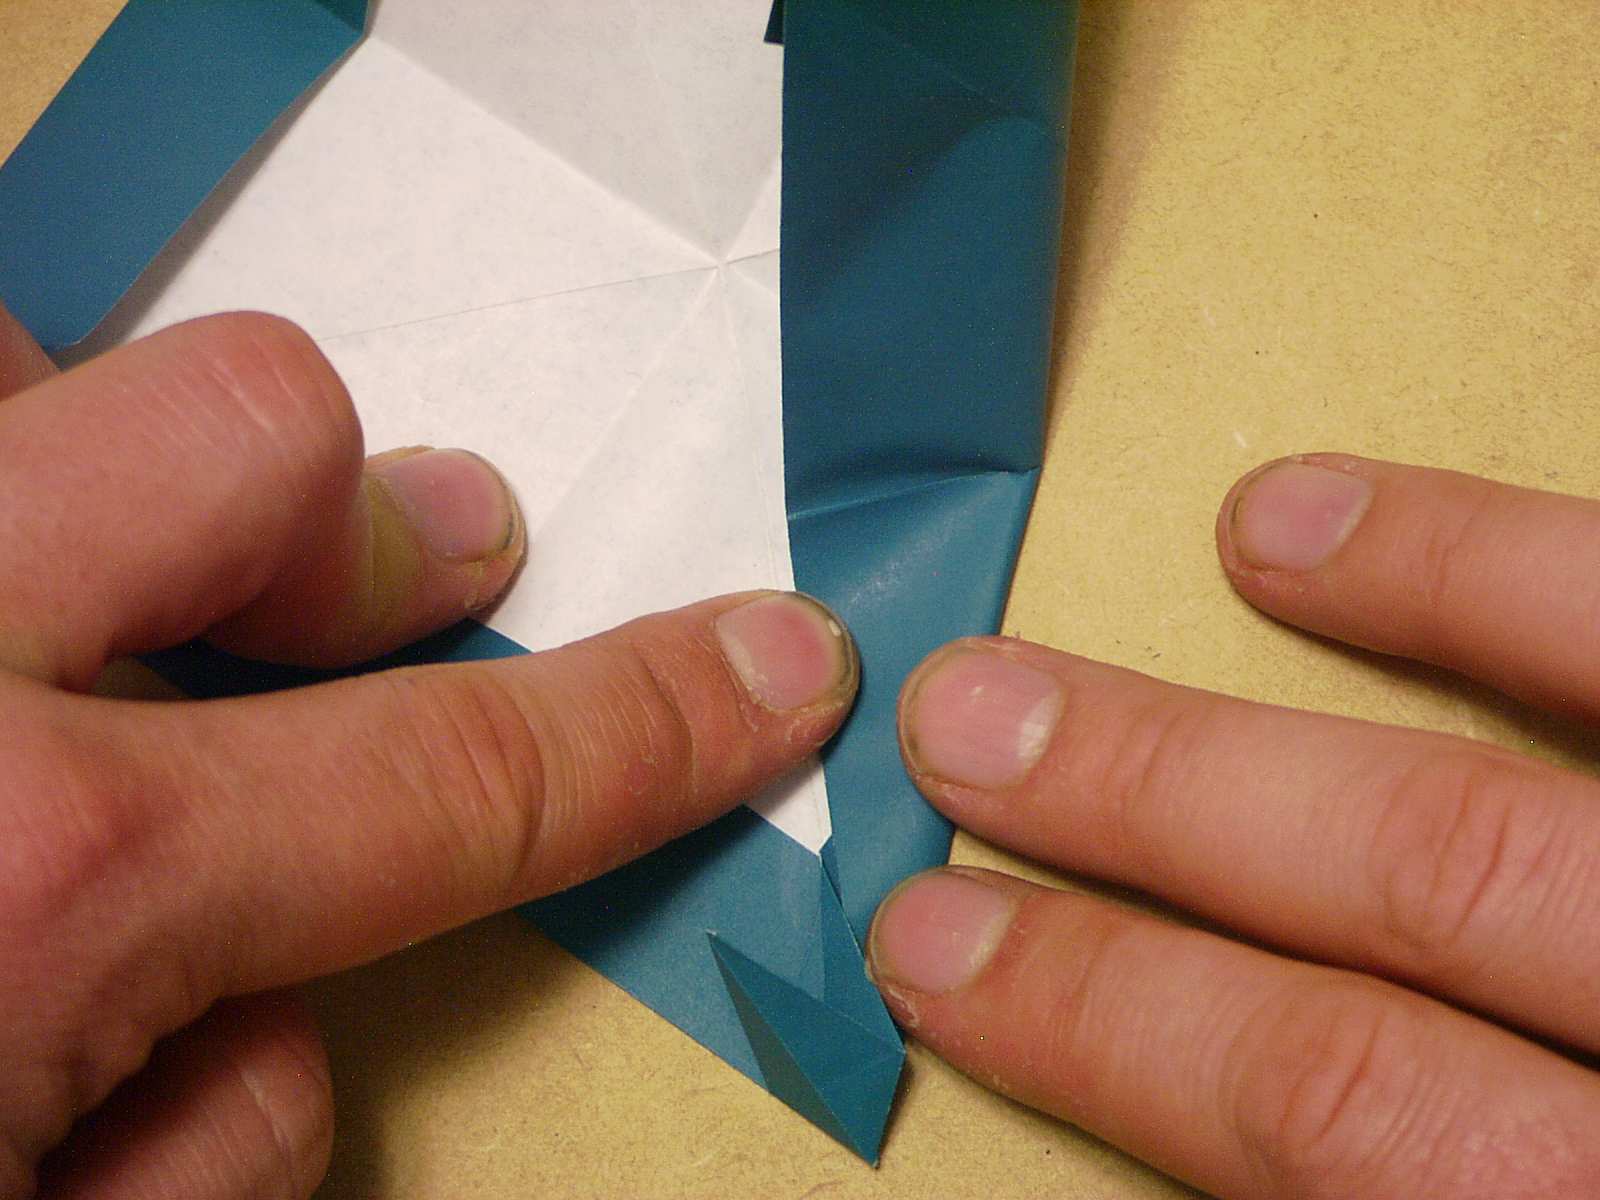
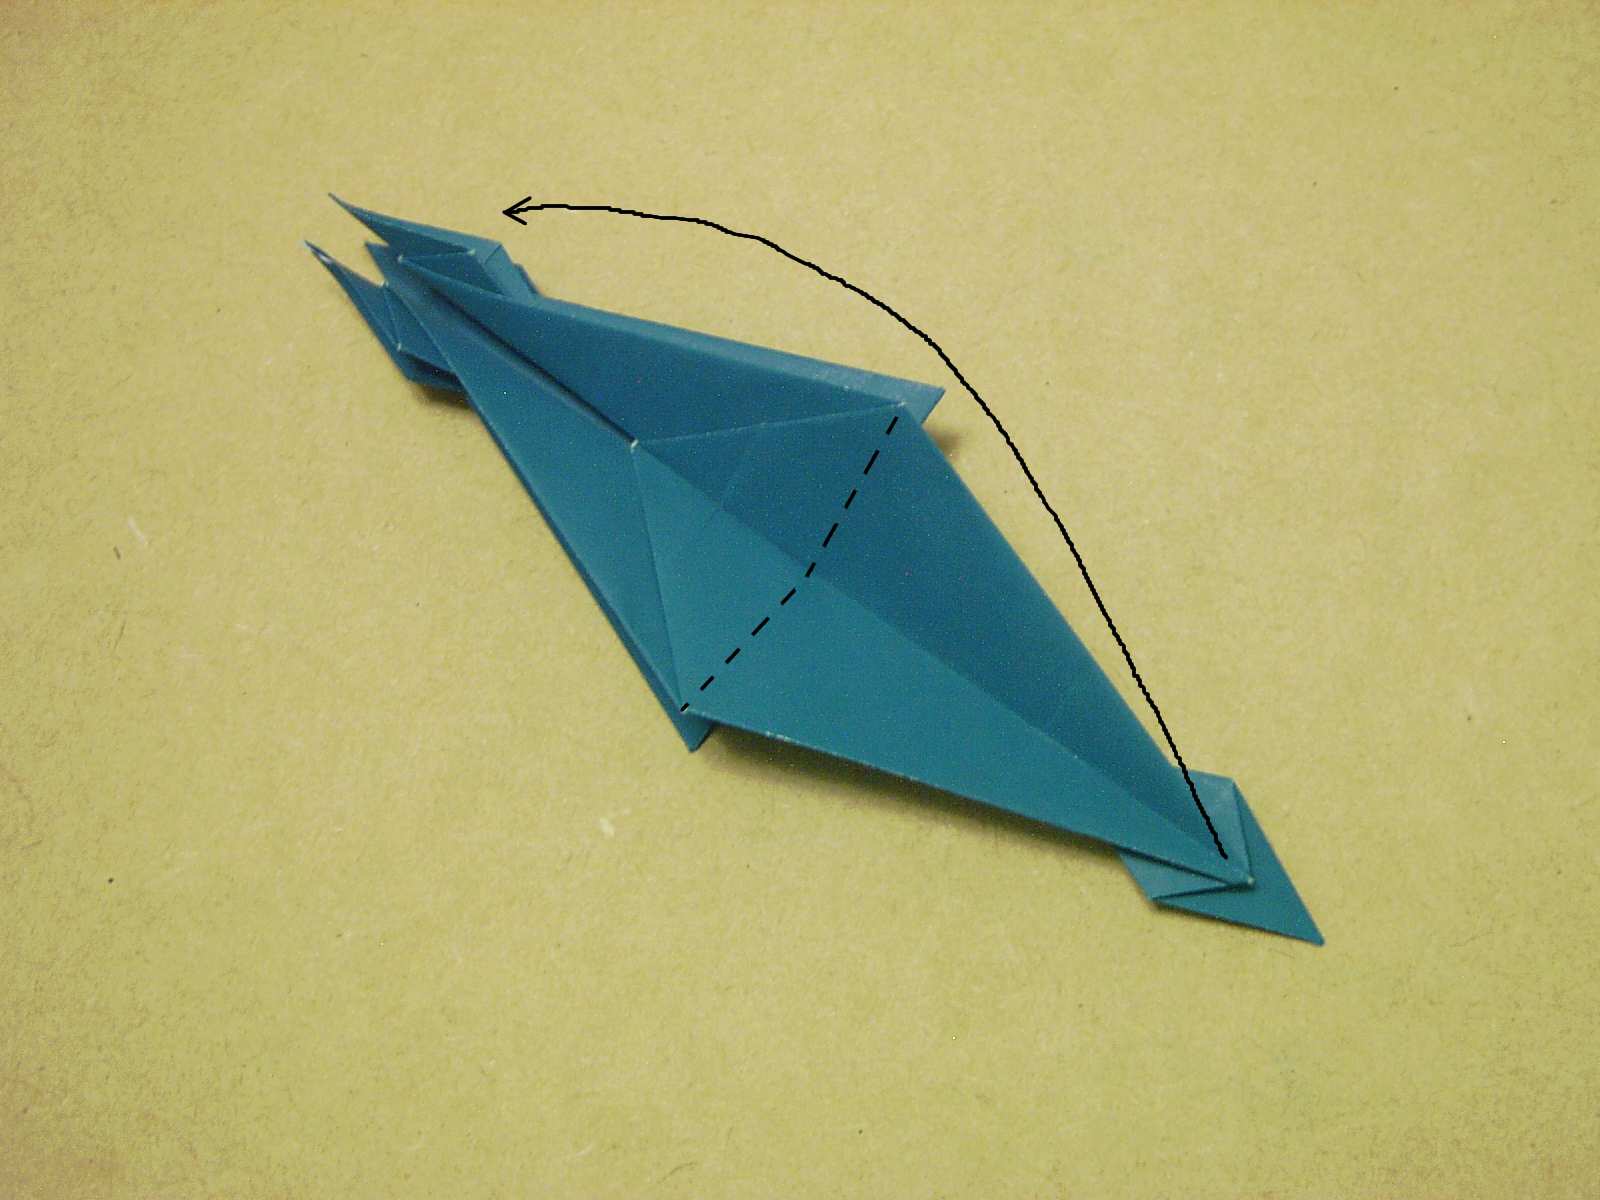
 Doing Step 6
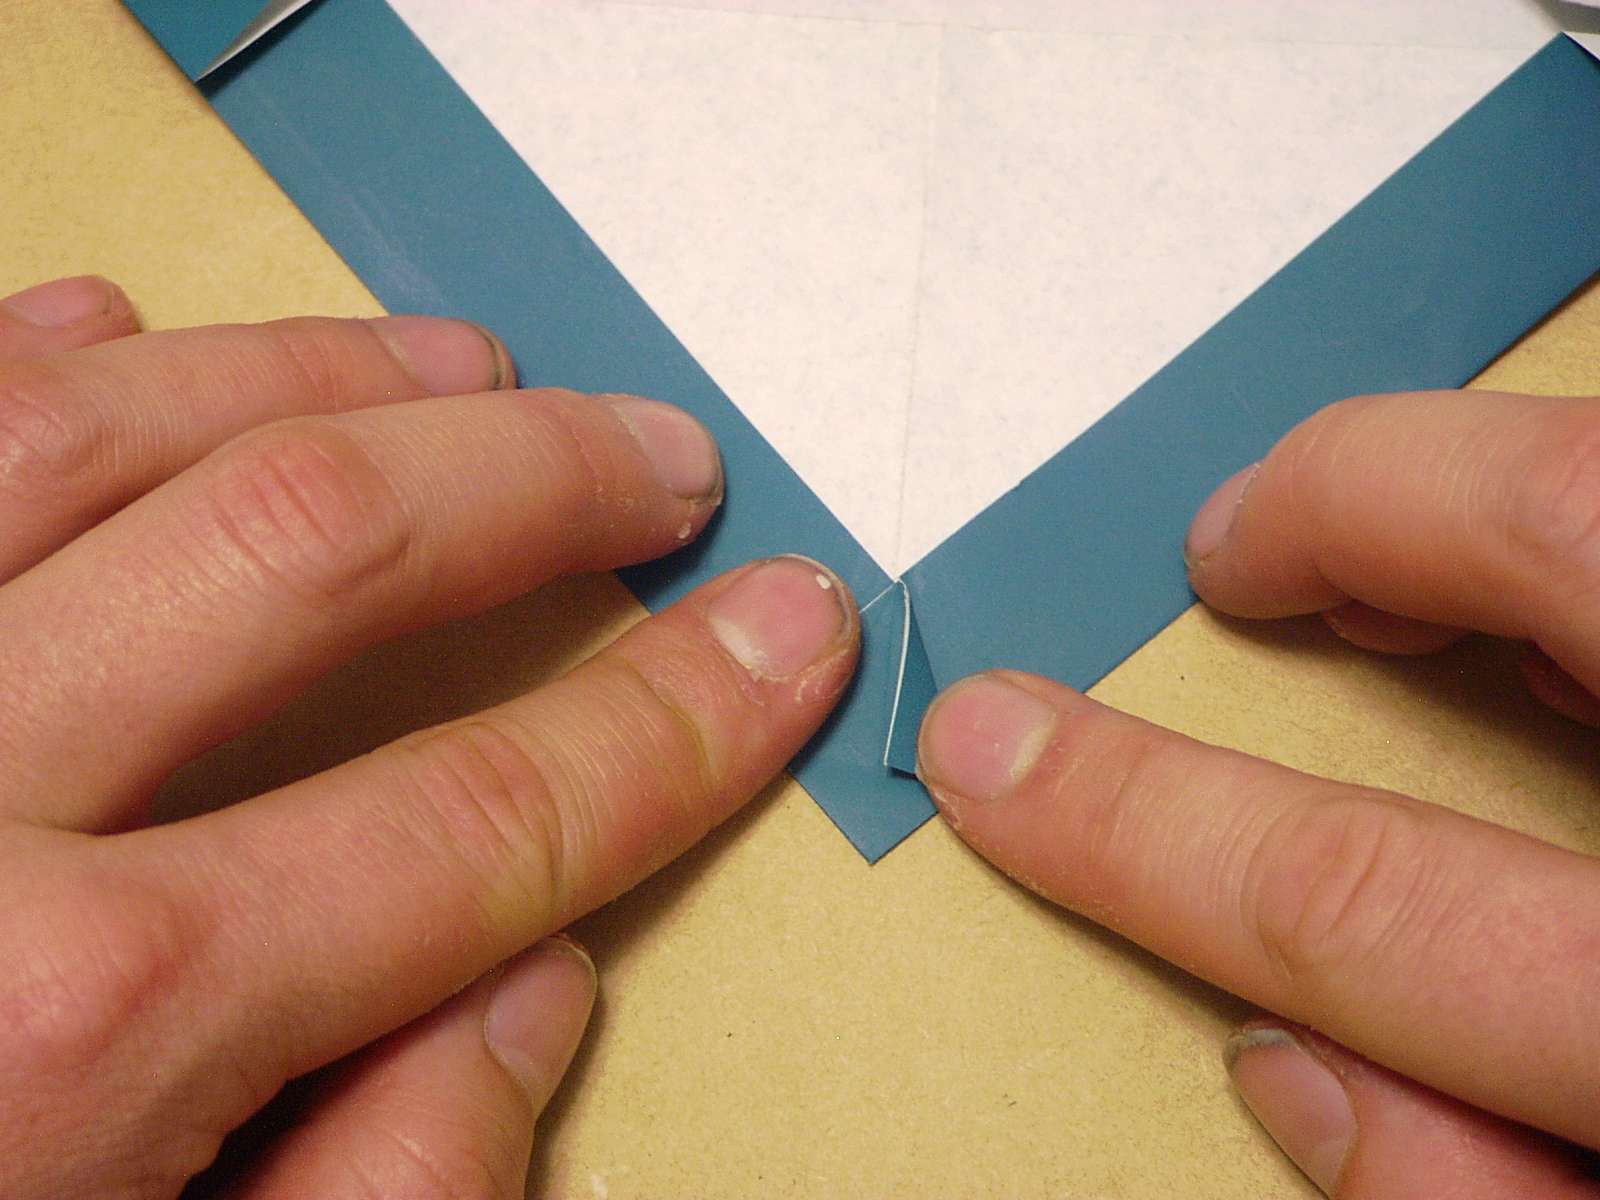
In case you had no idea what I was talking about in the description of the previous photo, this should clear it up a bit.
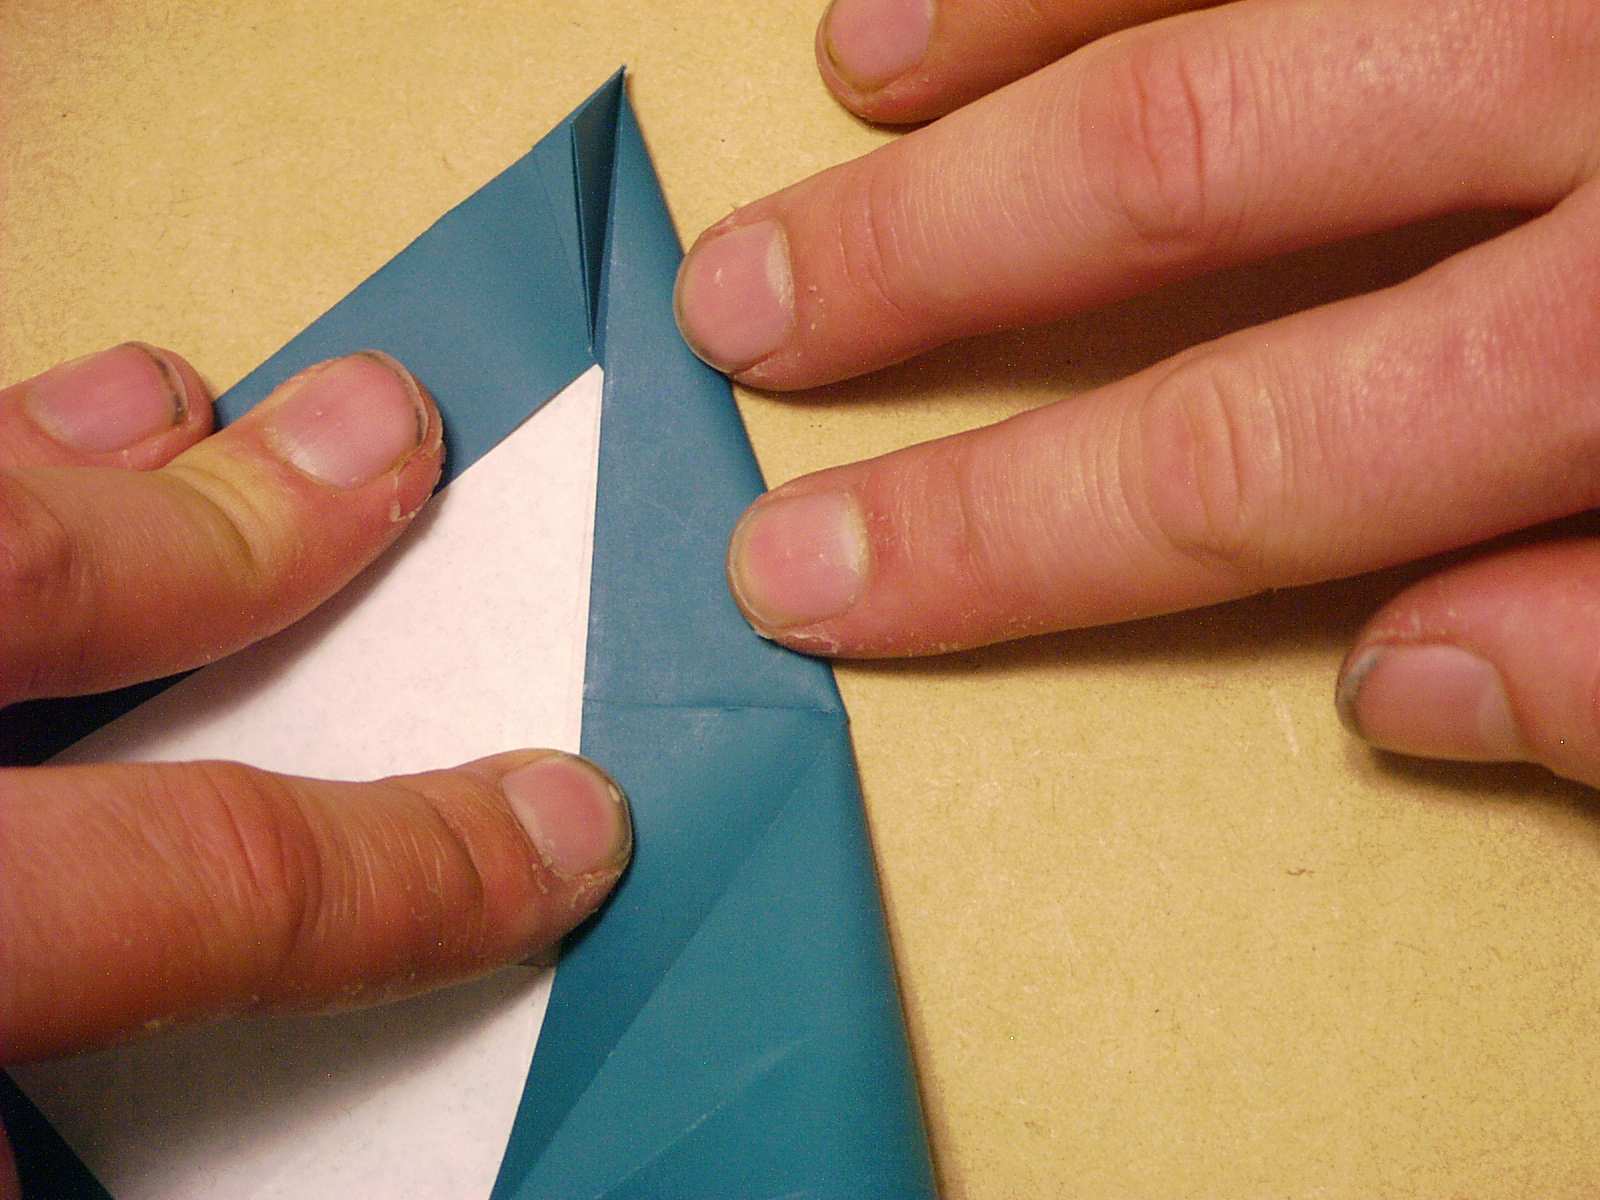
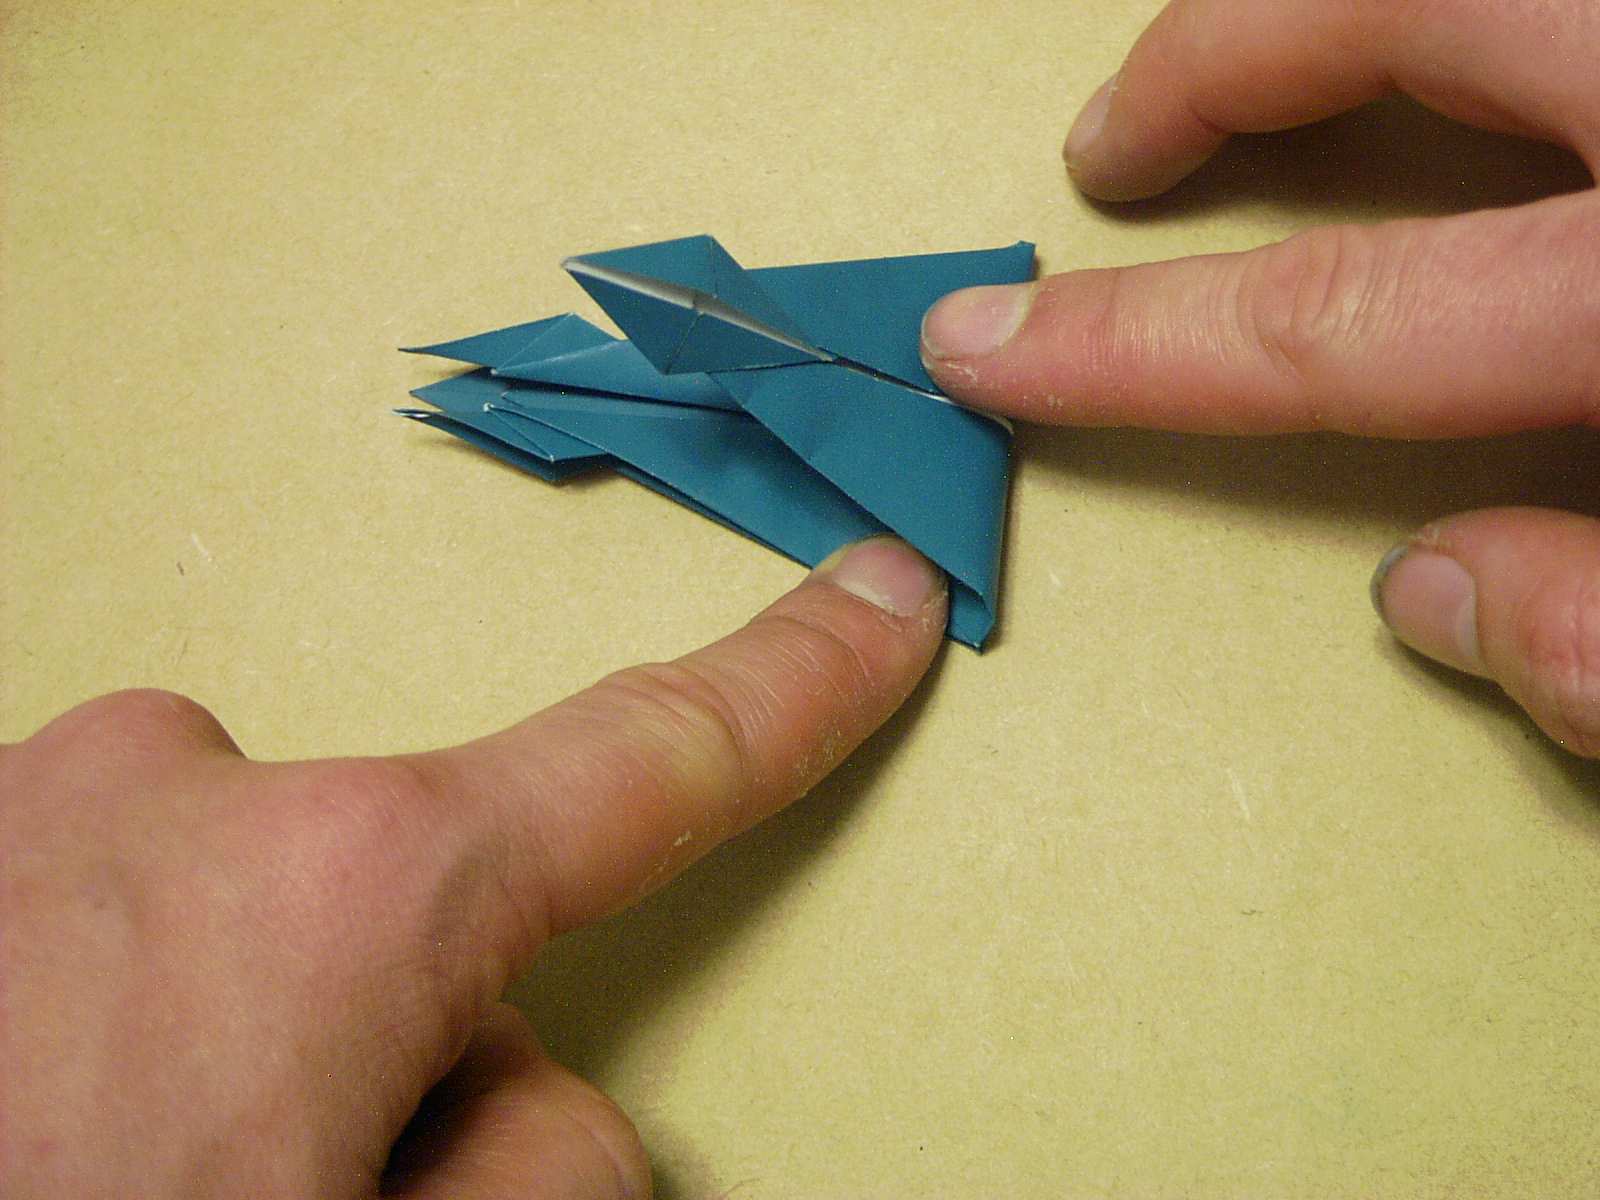
 Step 7
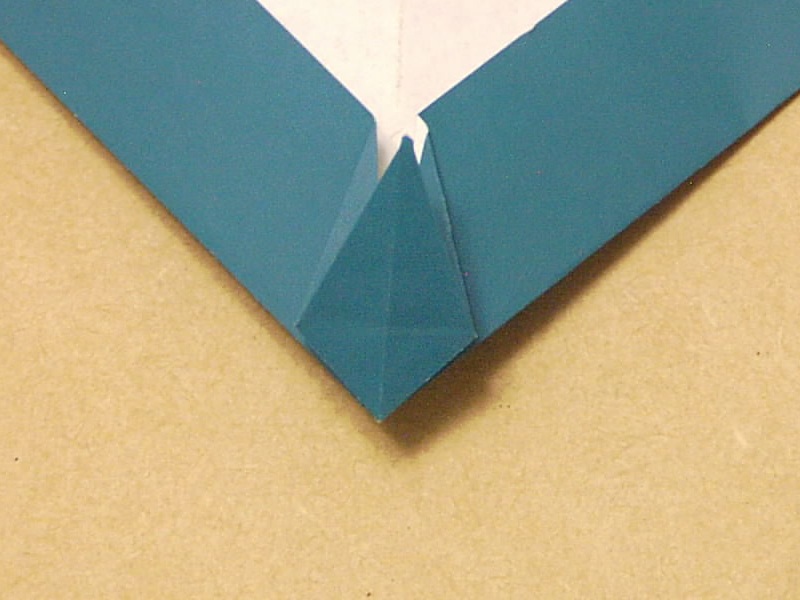
Now inside reverse fold the corners from step 6, following existing creases.
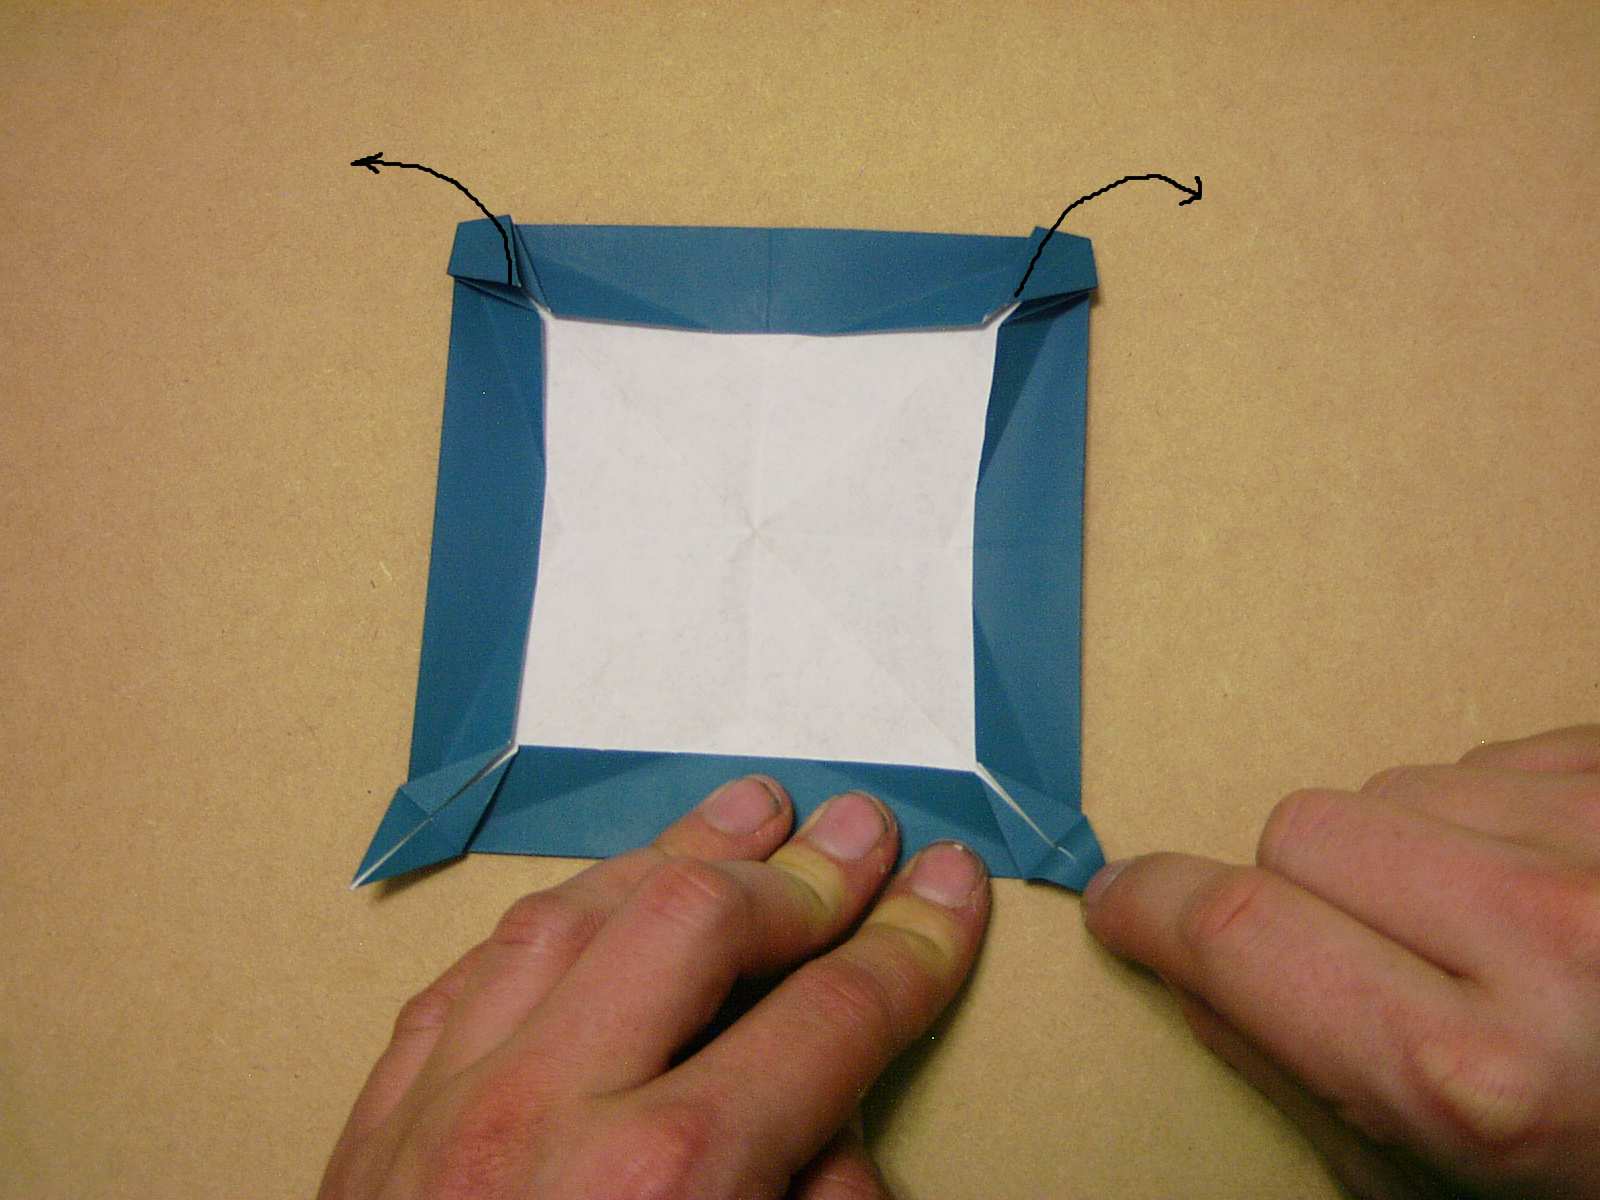
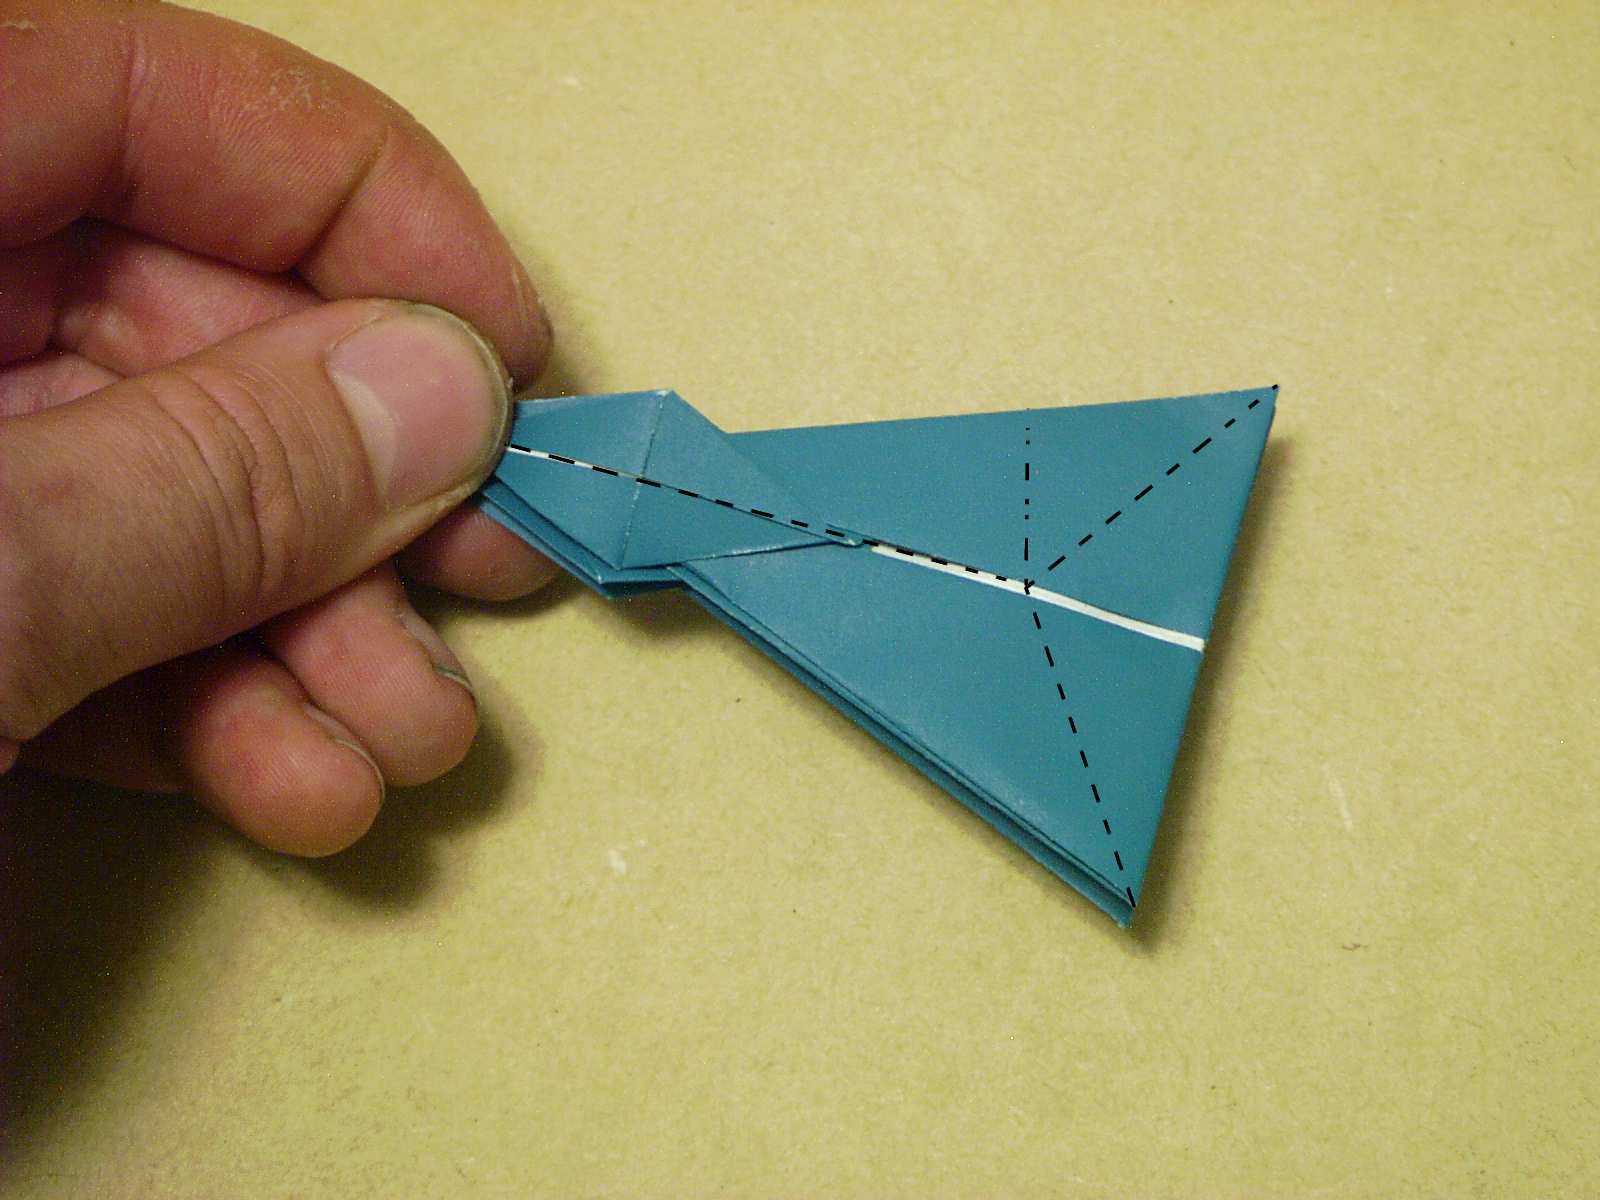
 Step 7 - Result
It should look like this on all four corners when you've completed step 7.
 Step 8
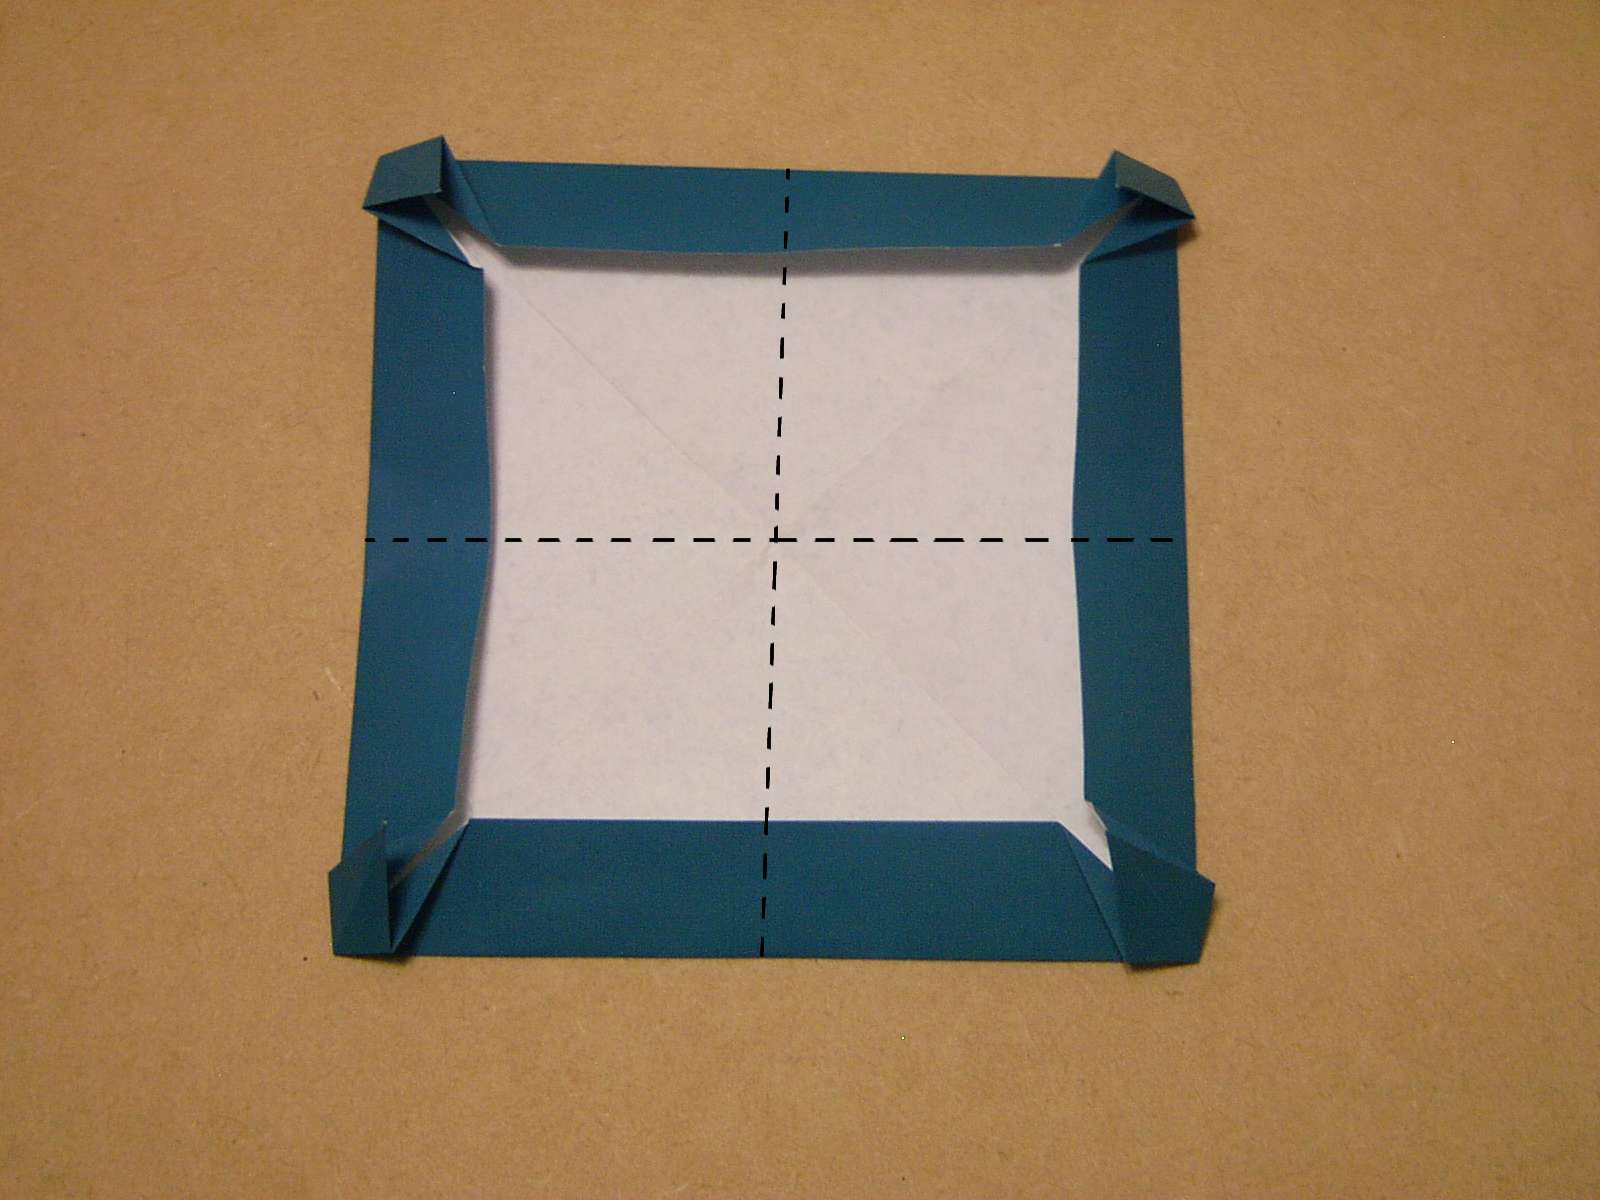
Valley fold in half both directions.
 Doing Step 8
I guess this photo isn't really necessary but that's ok. Moving right along....
 Step 9
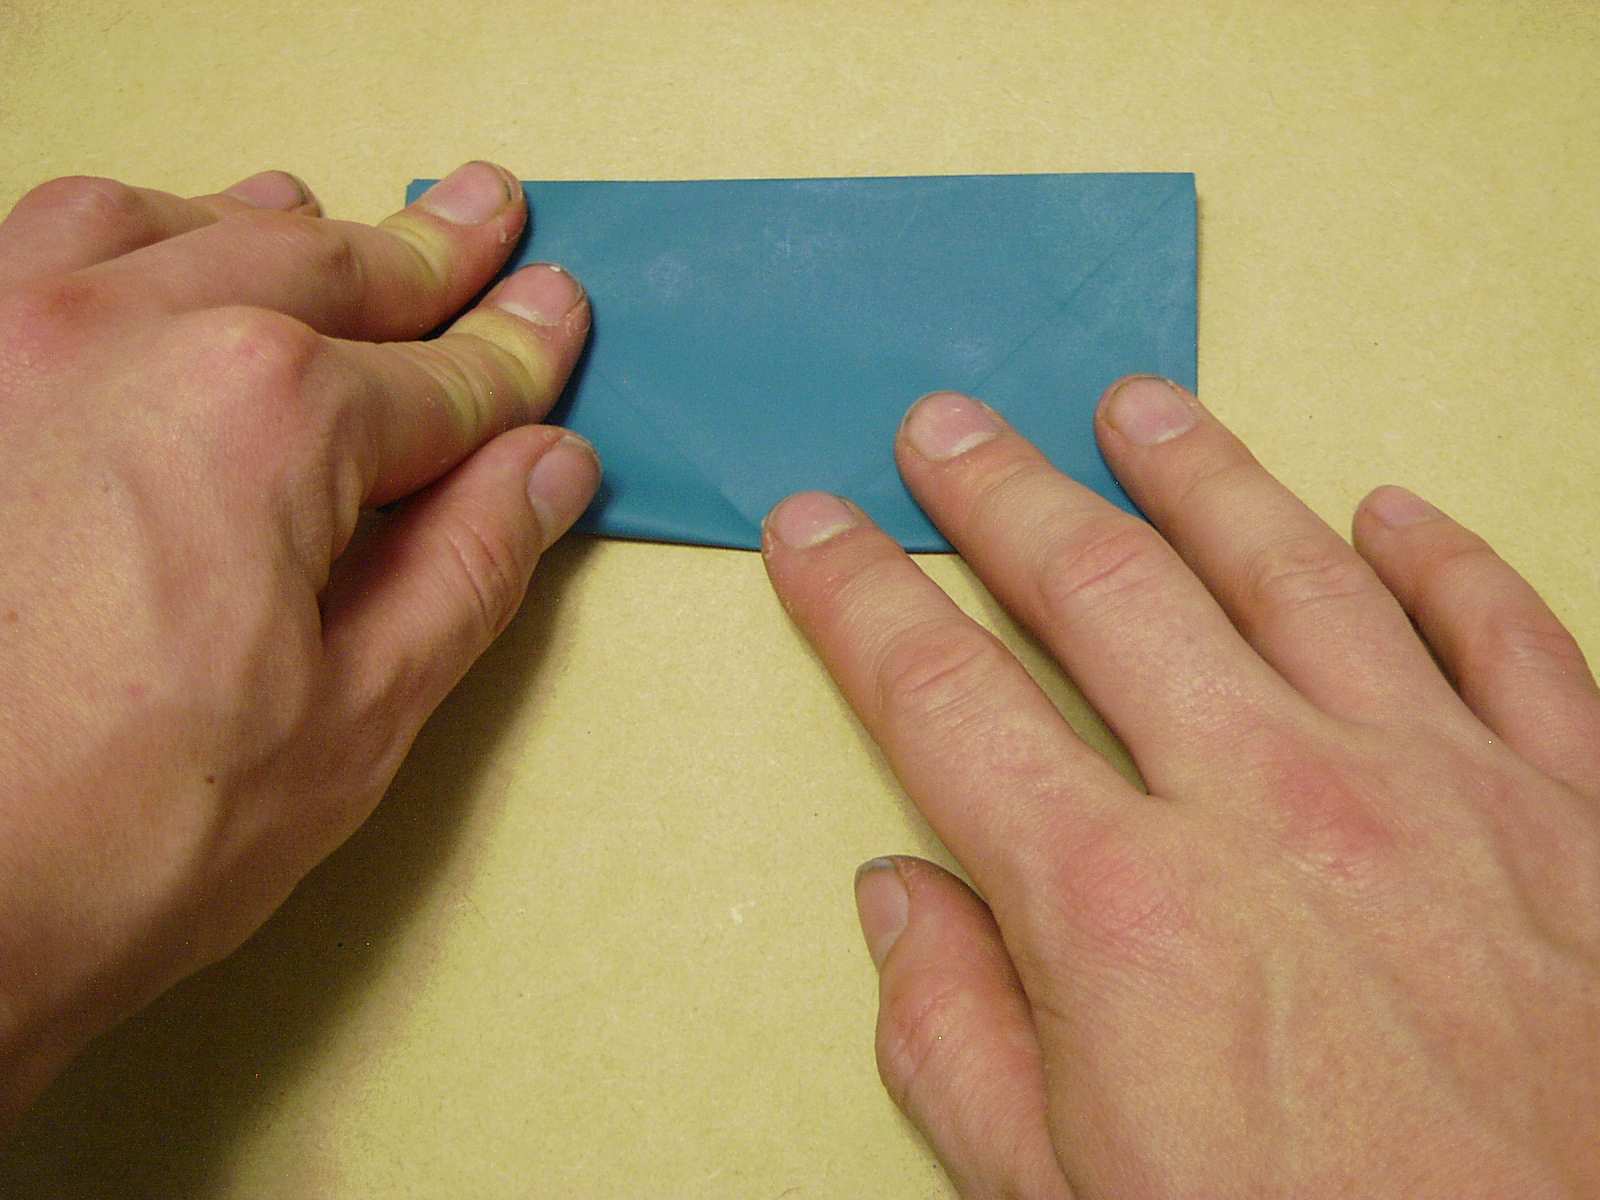
Valley fold where indicated. The next few steps serve to put the paper into a bird base form. If you don't know exactly what that means, take a look at the next couple of photos to see how everything lines up.
 Doing Step 9
Line up one edge of the paper with the diagonal crease from step 1, then crease from the corner to the center crease from step 8.
 More Step 9
Same thing on all of the other corners.
 Step 10
Fold all four of the points out.
 Step 11
Following existing creases, fold the corners up and the edges in... if this doesn't make sense, look at the next image.
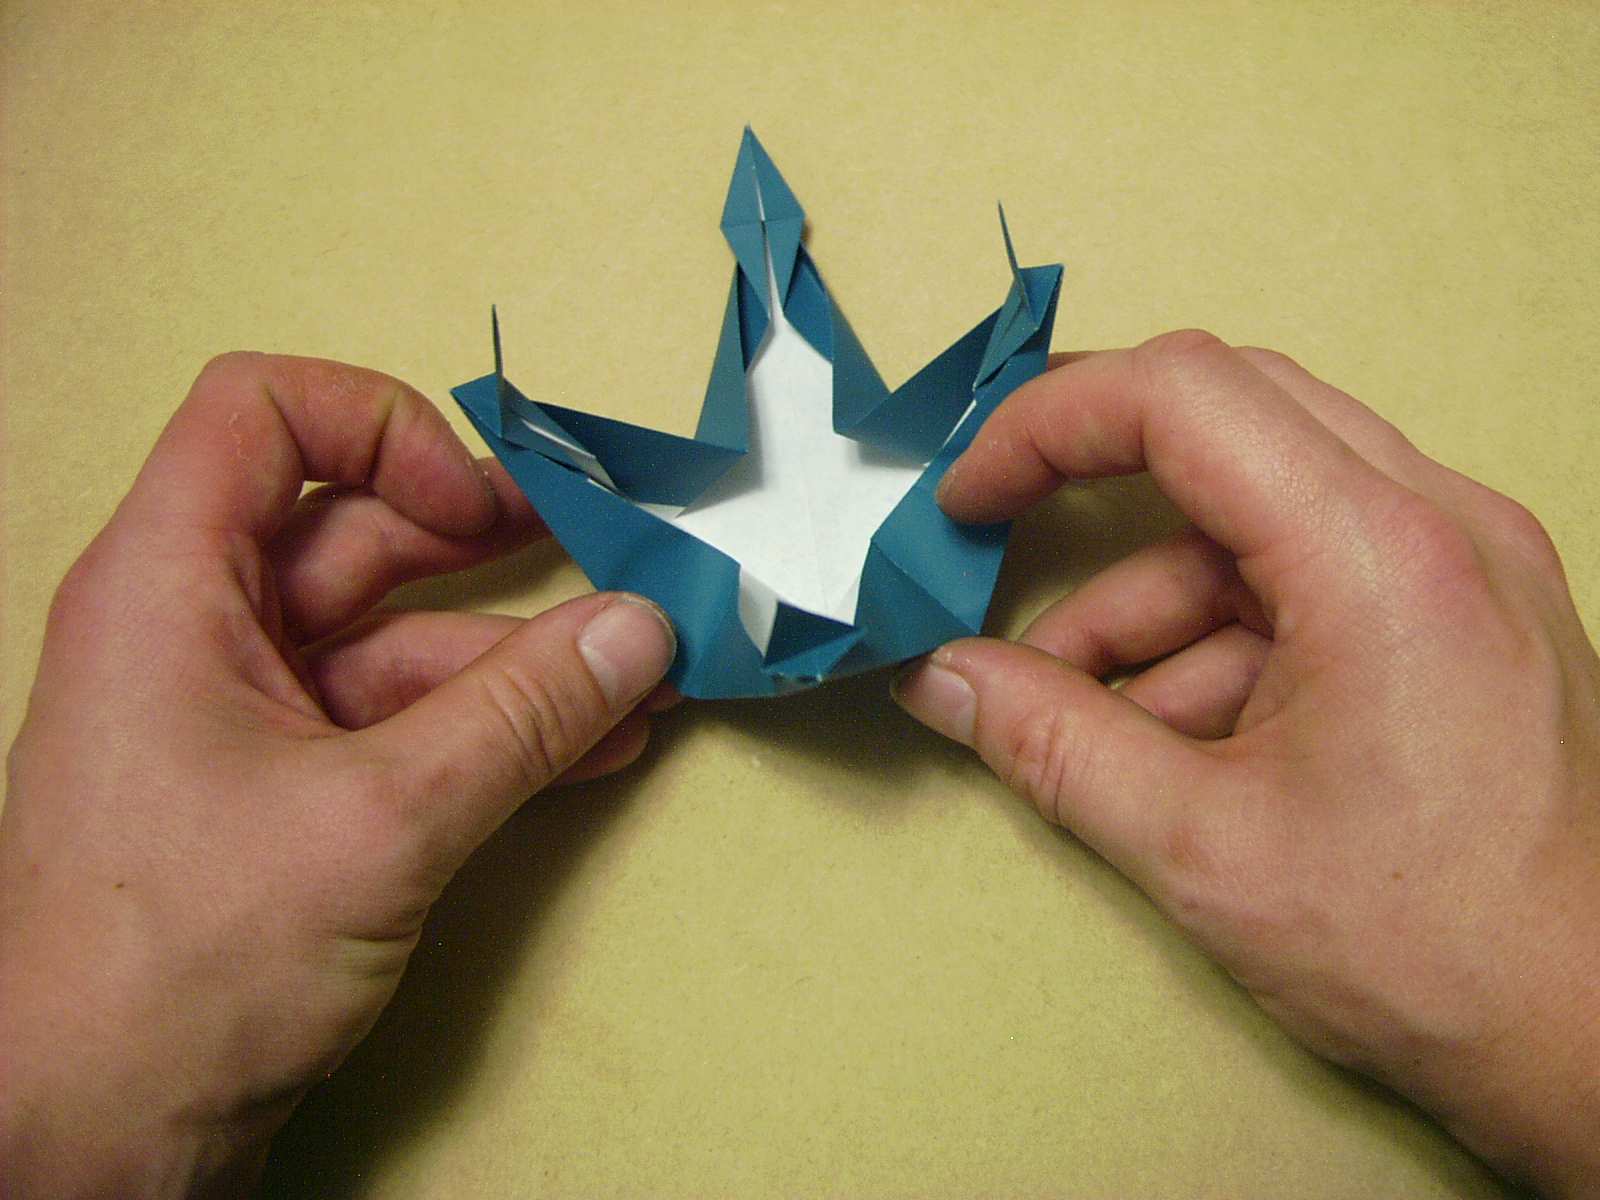 Doing Step 11
See? The corners up and the edges in. The bird base.
 Step 12
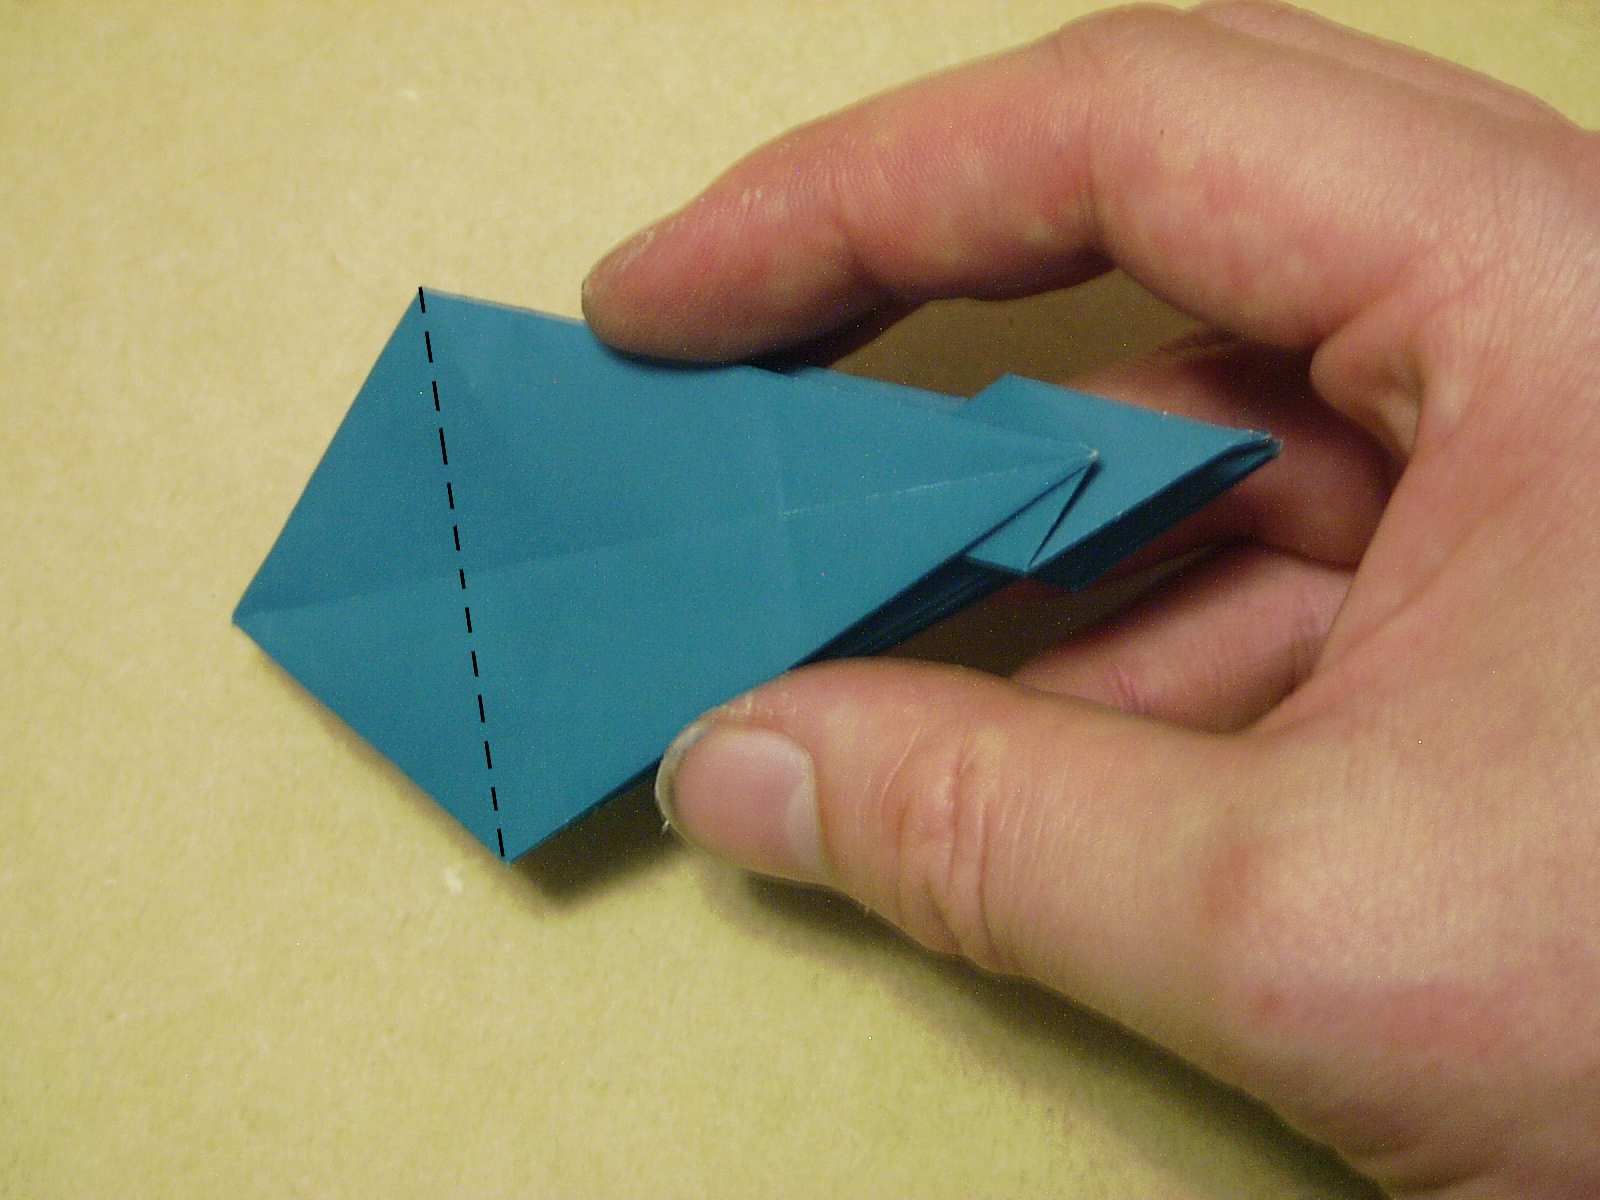
Valley fold and unfold where shown.
 Step 13
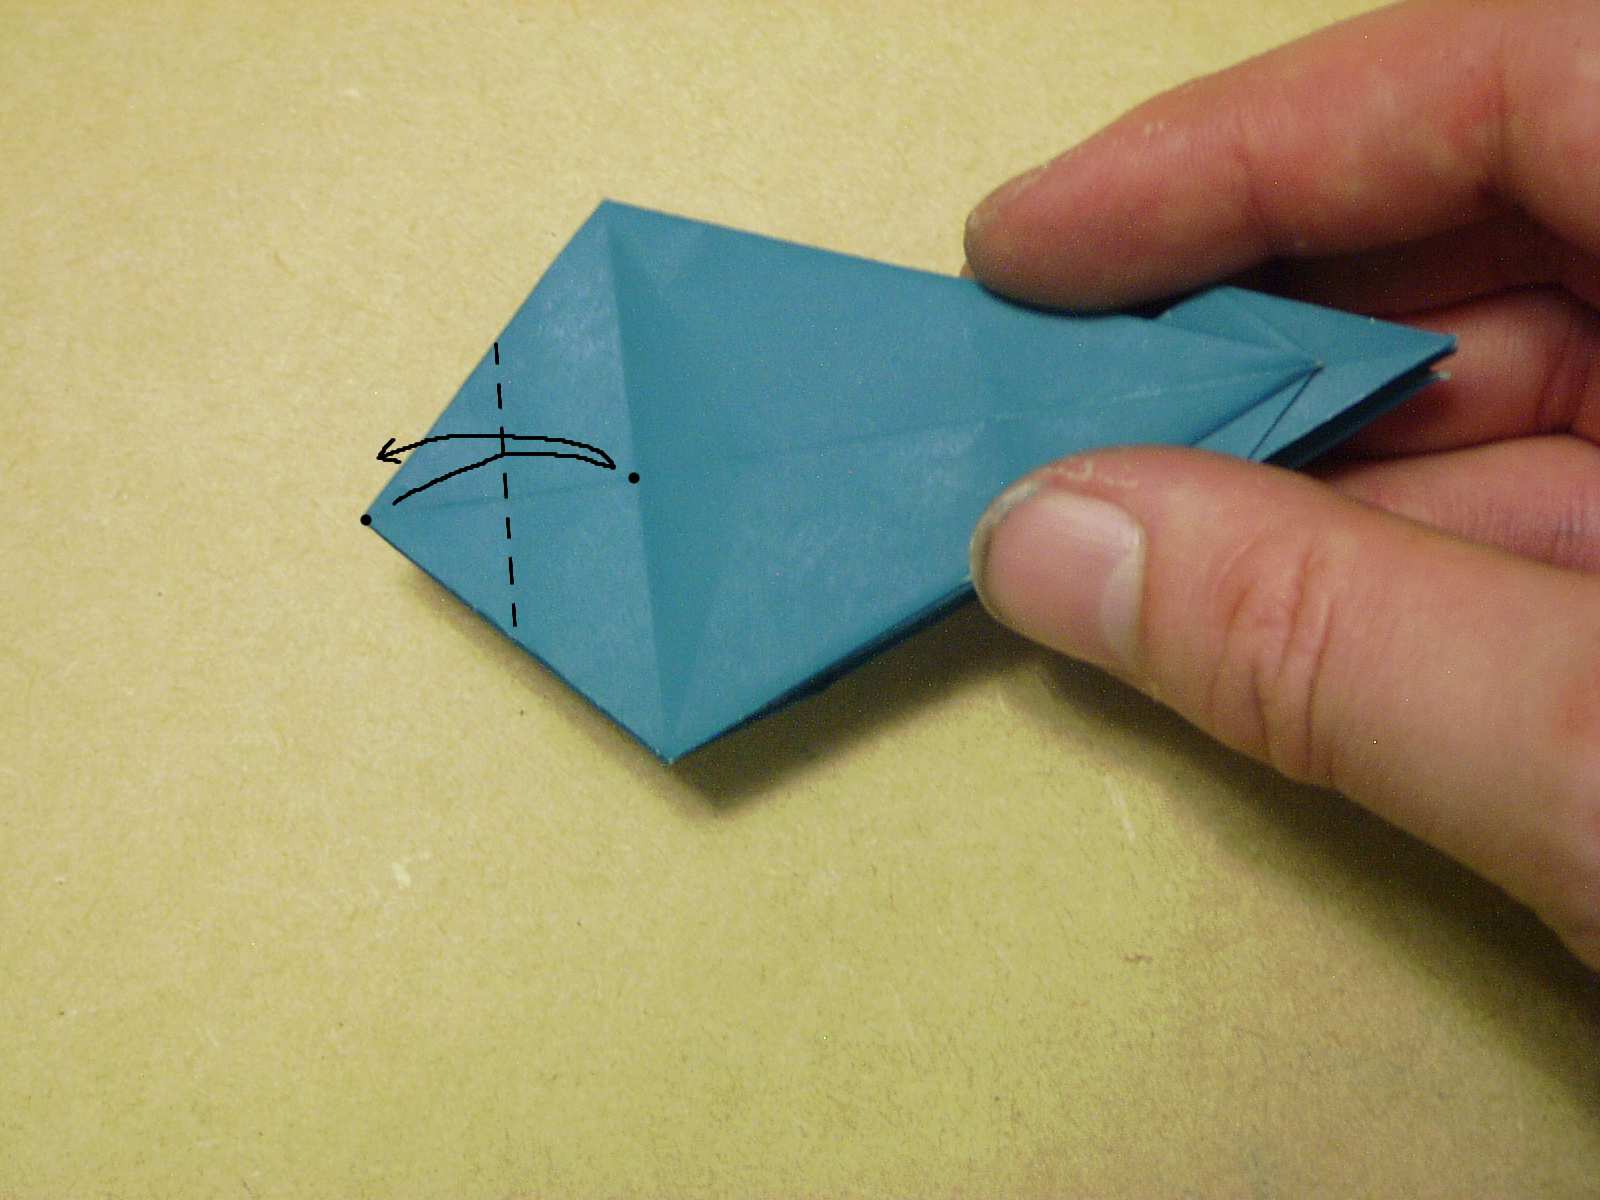
Valley fold and unfold where indicated.
 Step 14
Fold all four of the points over. Start with the top point by using the same crease from step 12.
A quick note.. in step 17, you sink fold the point from the last step. You can actually sink fold it right now and it might make the rest of the process a little easier.
 Doing Step 14
There's not really much explaination necessary here - just do what it shows - so I'll take a moment to say that I'm going into a lot more detail in this part of the process because in the older set of photos, lots of people got hung up at this point... mostly because the last photo and this photo was all I had. The point is that by asking questions,I know where I need to make improvements. Anyway, moving right along...
 More Step 14
This is what you should have after folding the first point over... turn it over...
 Step 14 Continued
And do it again!
 Still Step 14
Now you have to do the same thing with the other two points, but unfortunately they're folded in half. valley fold the top layer as shown.. repeat on the other side.
 Step 15? no. Still Step 14
This shows what I mean in the description of the previous photo.
 Step 14 continued
Fold the top flap over, yet again.
 Like so
I'd rathar have too much detail than too little.
 Flip it over
Now you should have three points over.... turn it over and fold the last point over.
 Yes, Still Step 14
Fold that last flap over.
 That's it for 14
Step 14.. that's all there is to it.
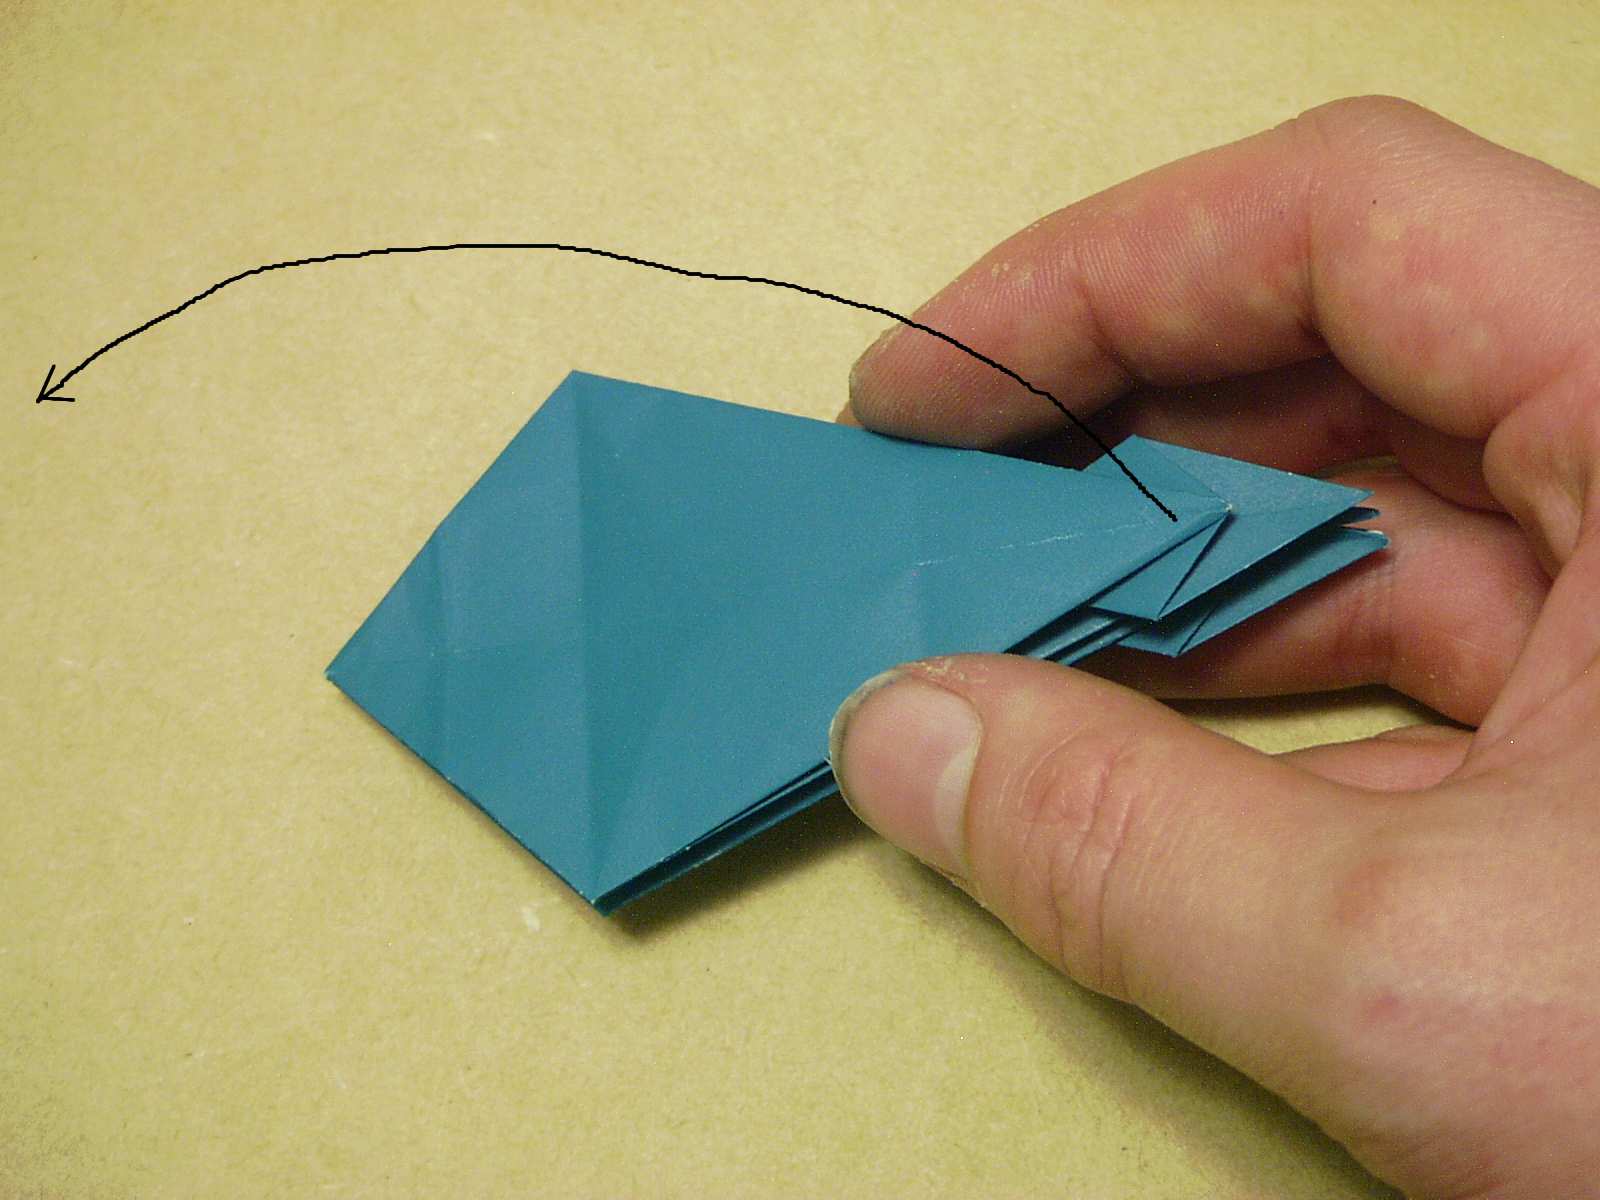
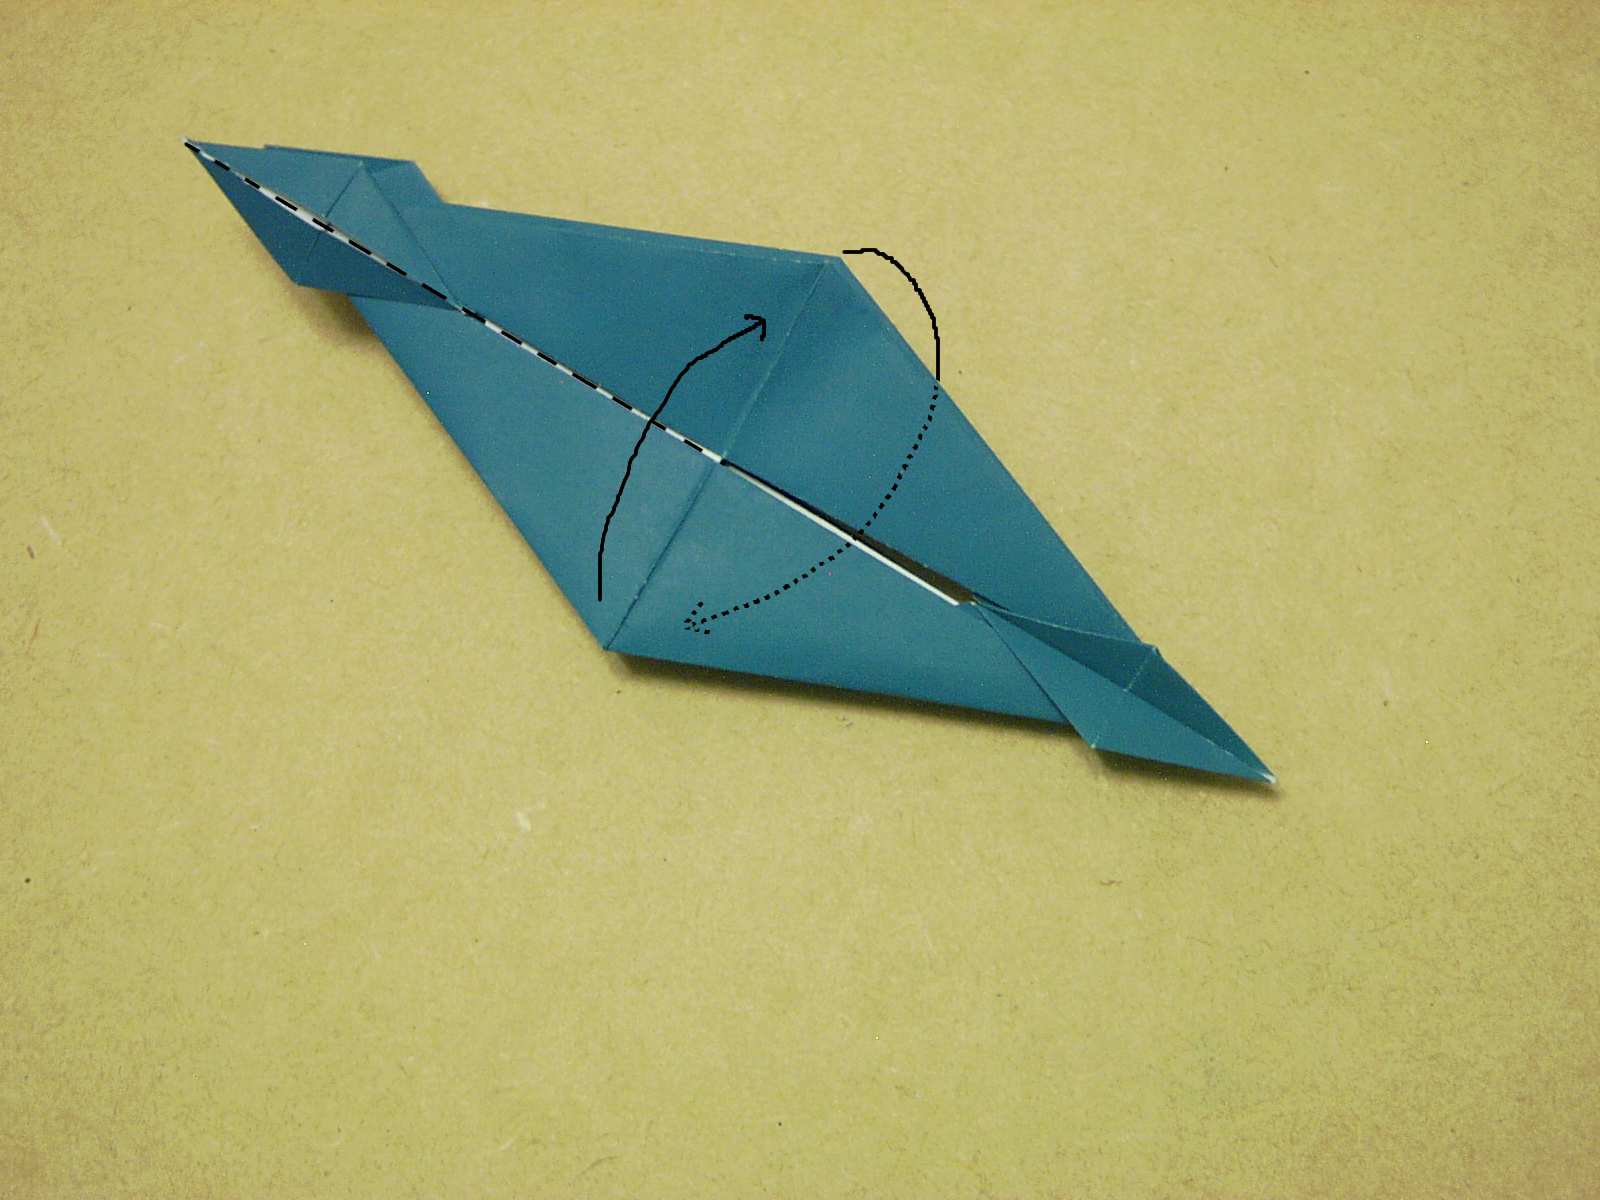
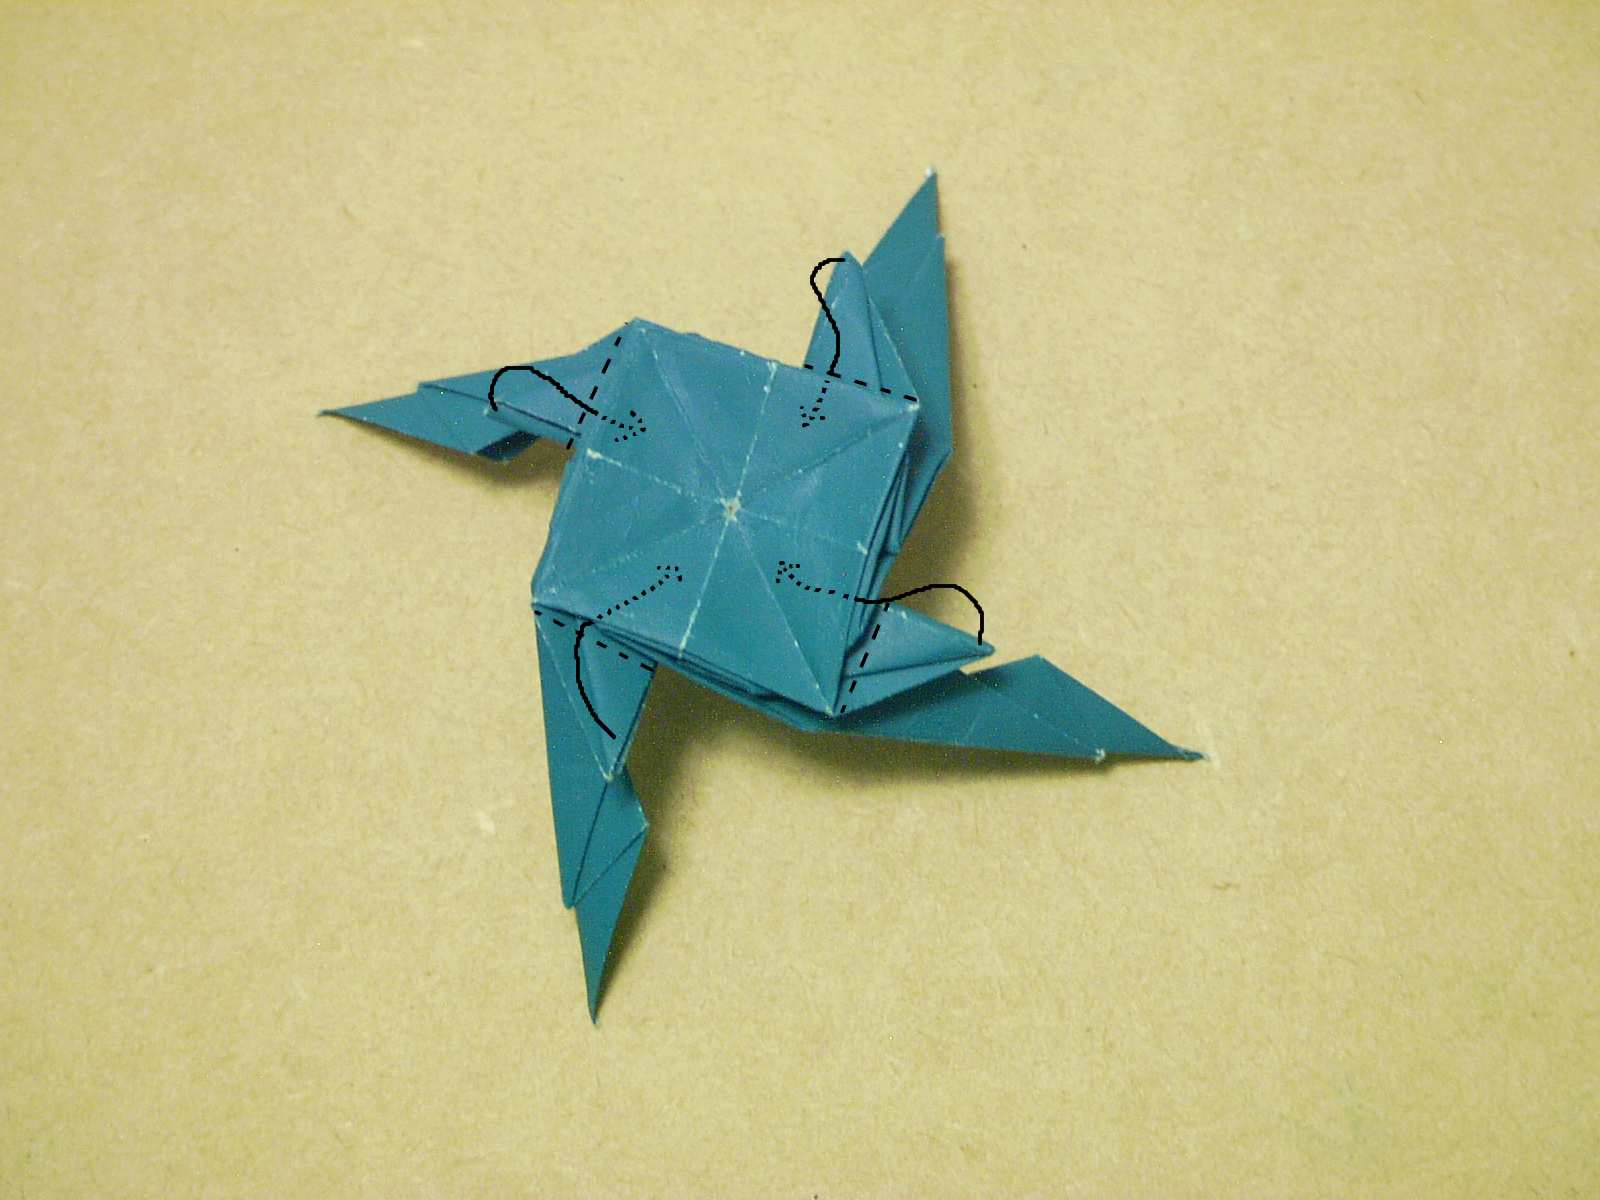
 Step 15
Rabbit ear each of the points. When looking at the rose, if it spirals clockwise from the inside to the outside, then fold the point to the right (as shown). If you don't know what I mean by "rabbit ear", it's just a convenient name for that particular crease pattern.
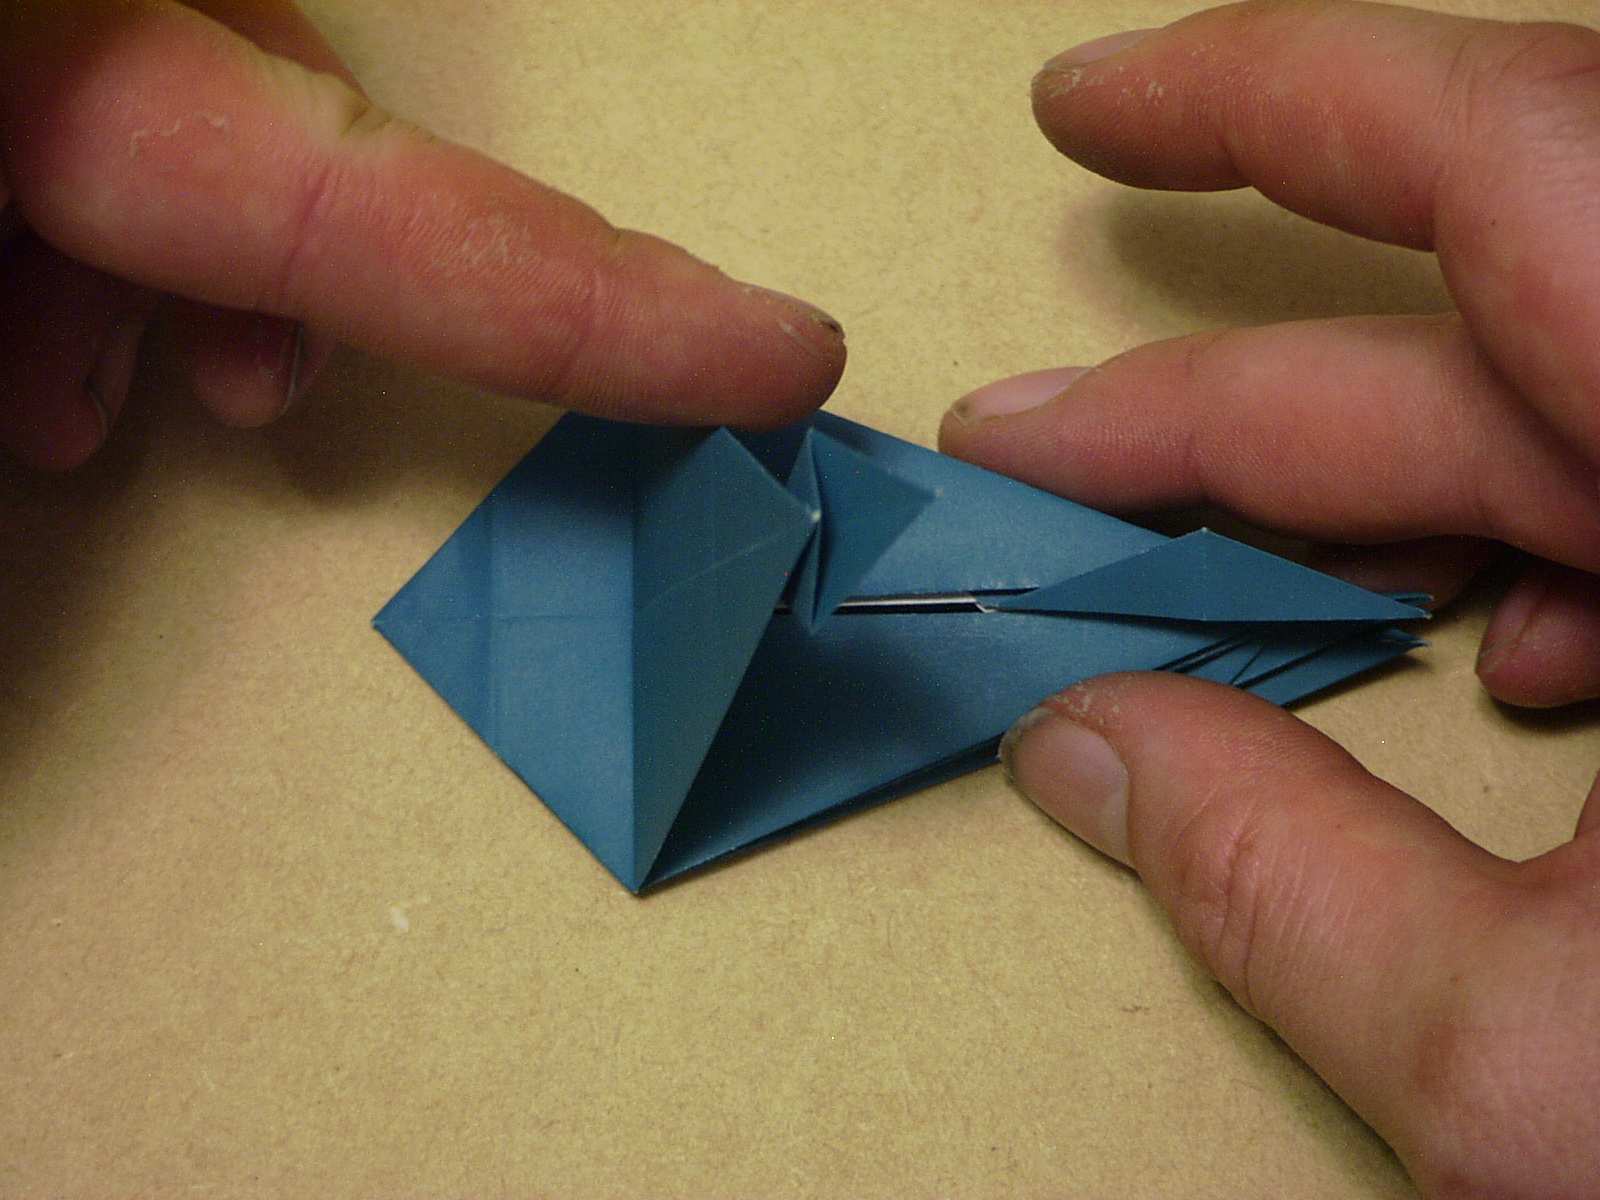
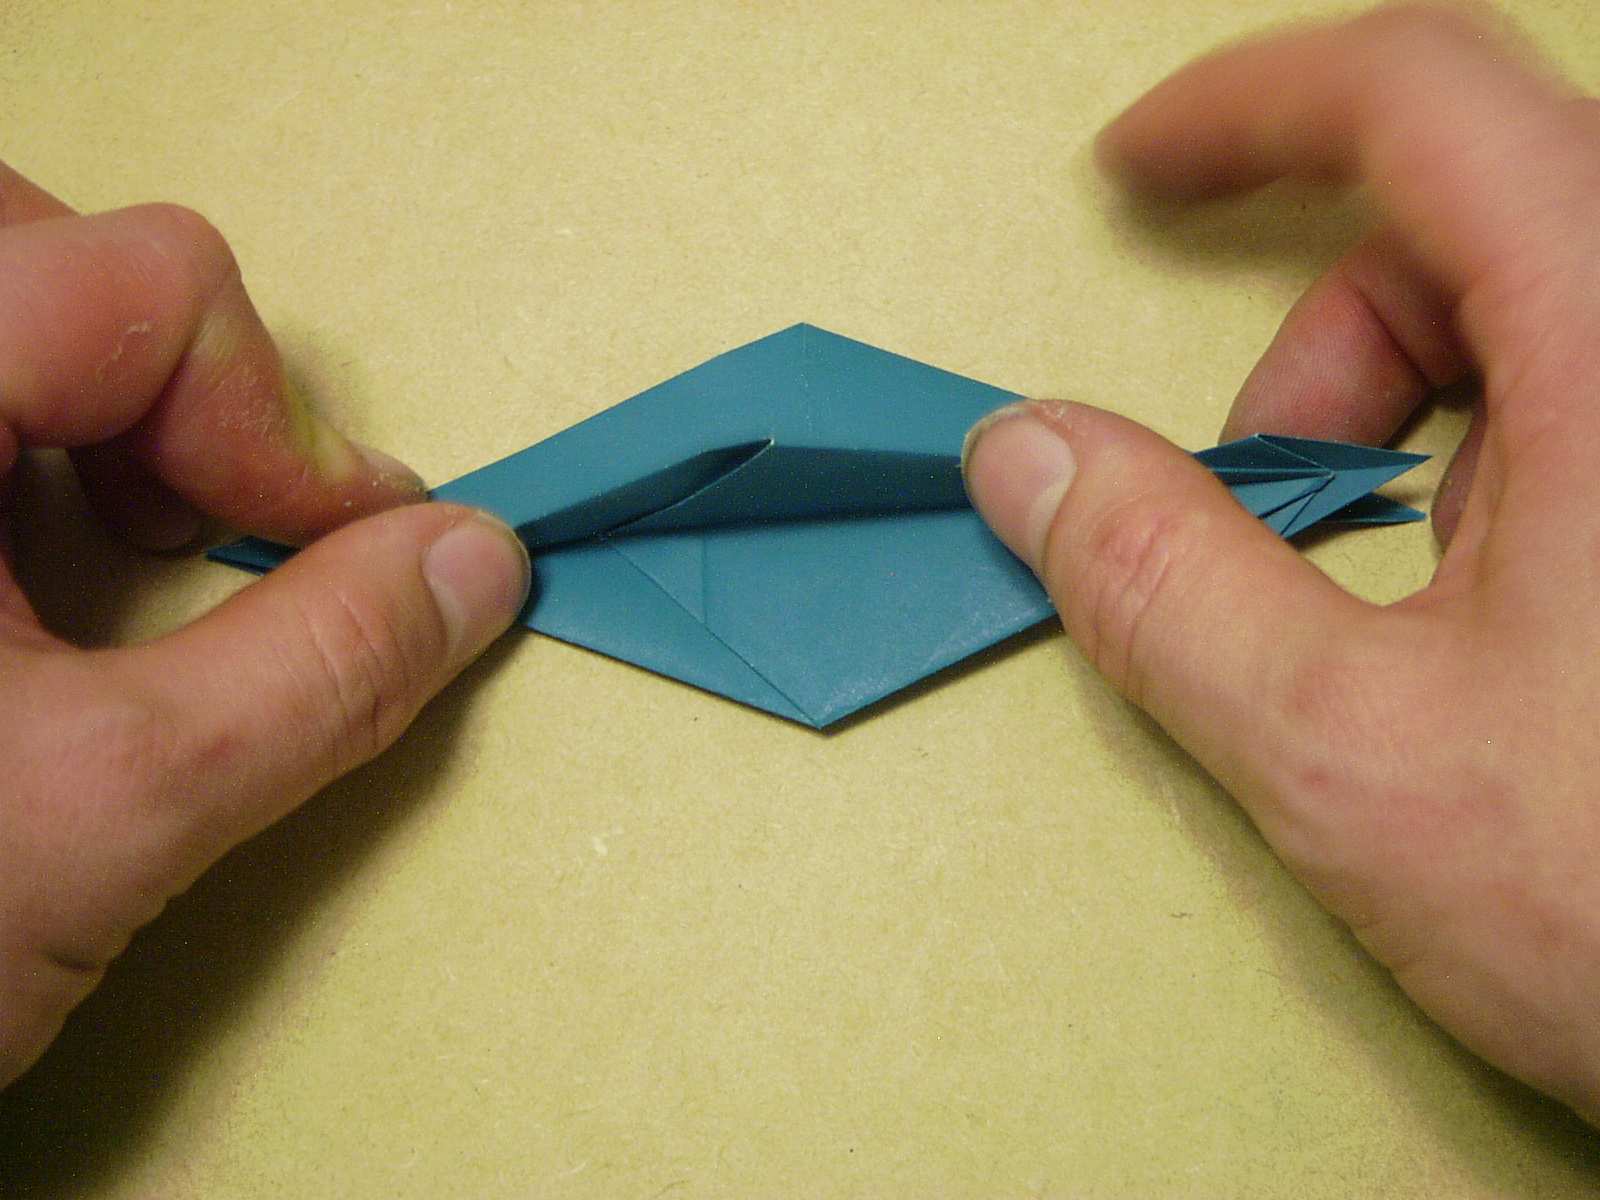
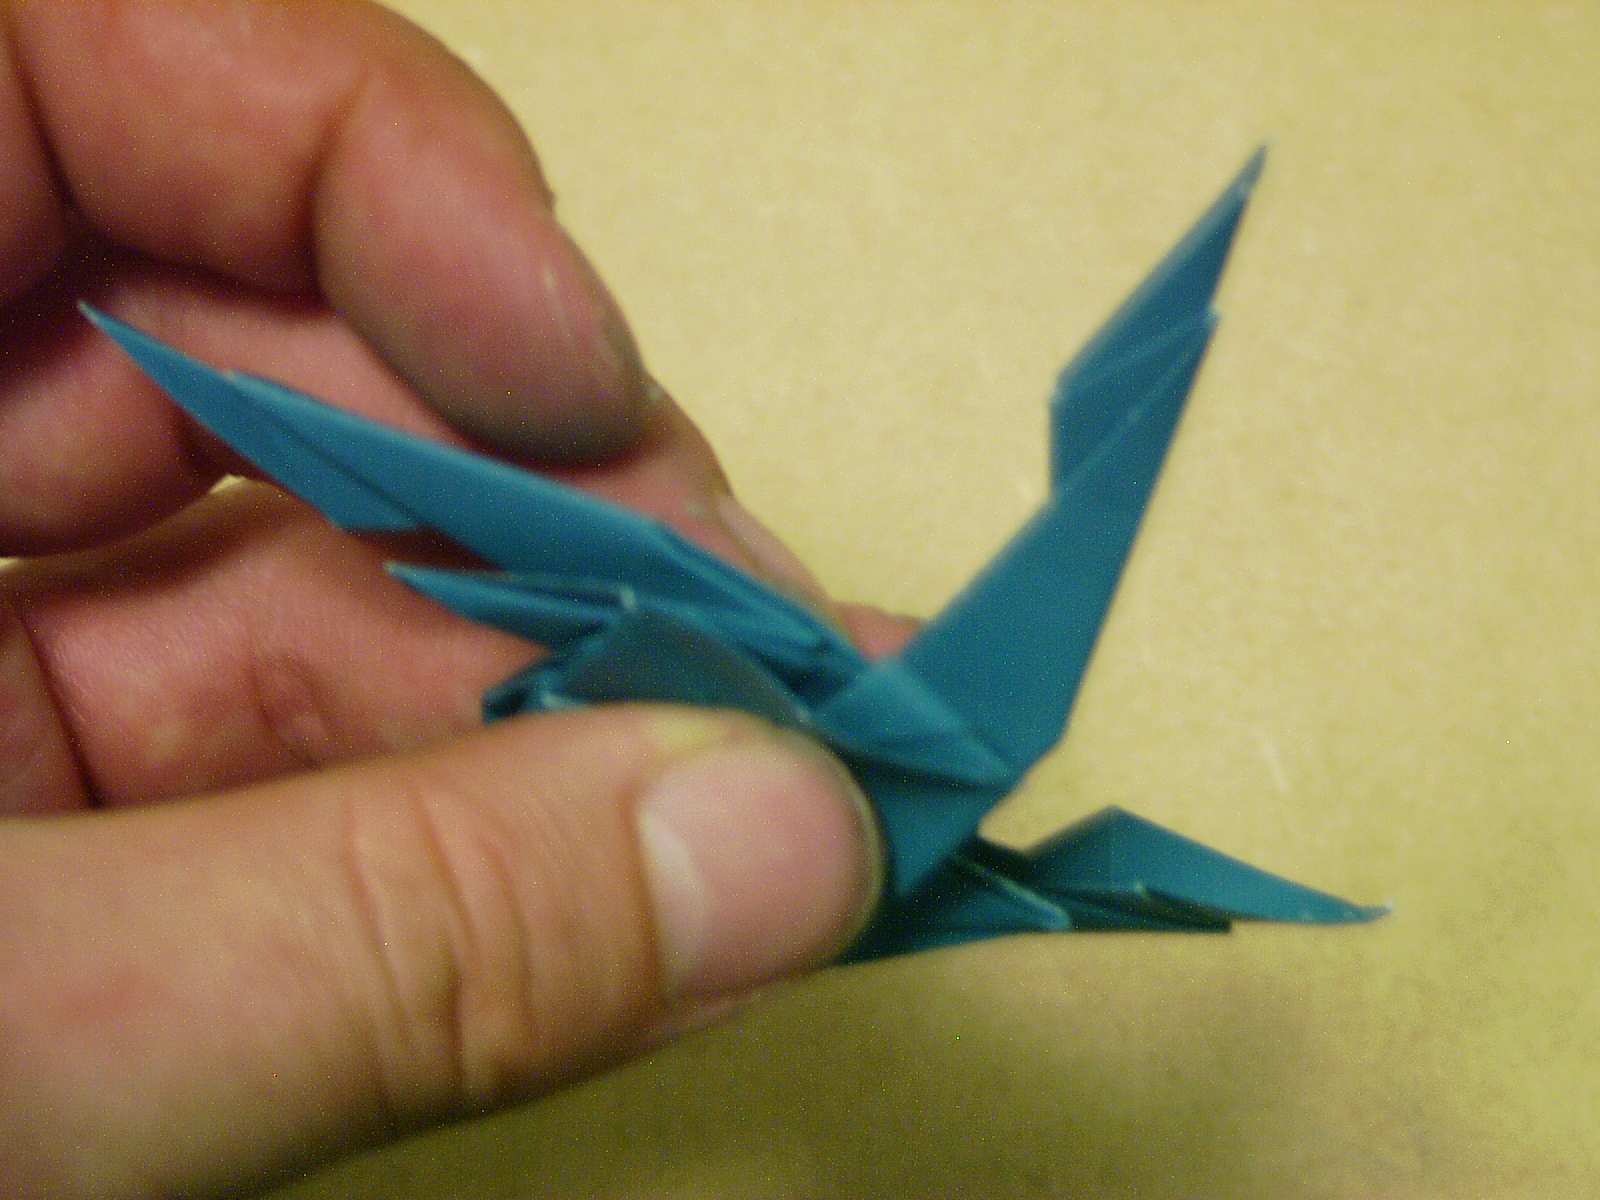
 Doing Step 15
As mentioned previously, if the rose spirals clockwise from the center to the outside, fold as shown. If the rose spirals counter-clockwise from the outside to the inside, just fold the point to the left instead.
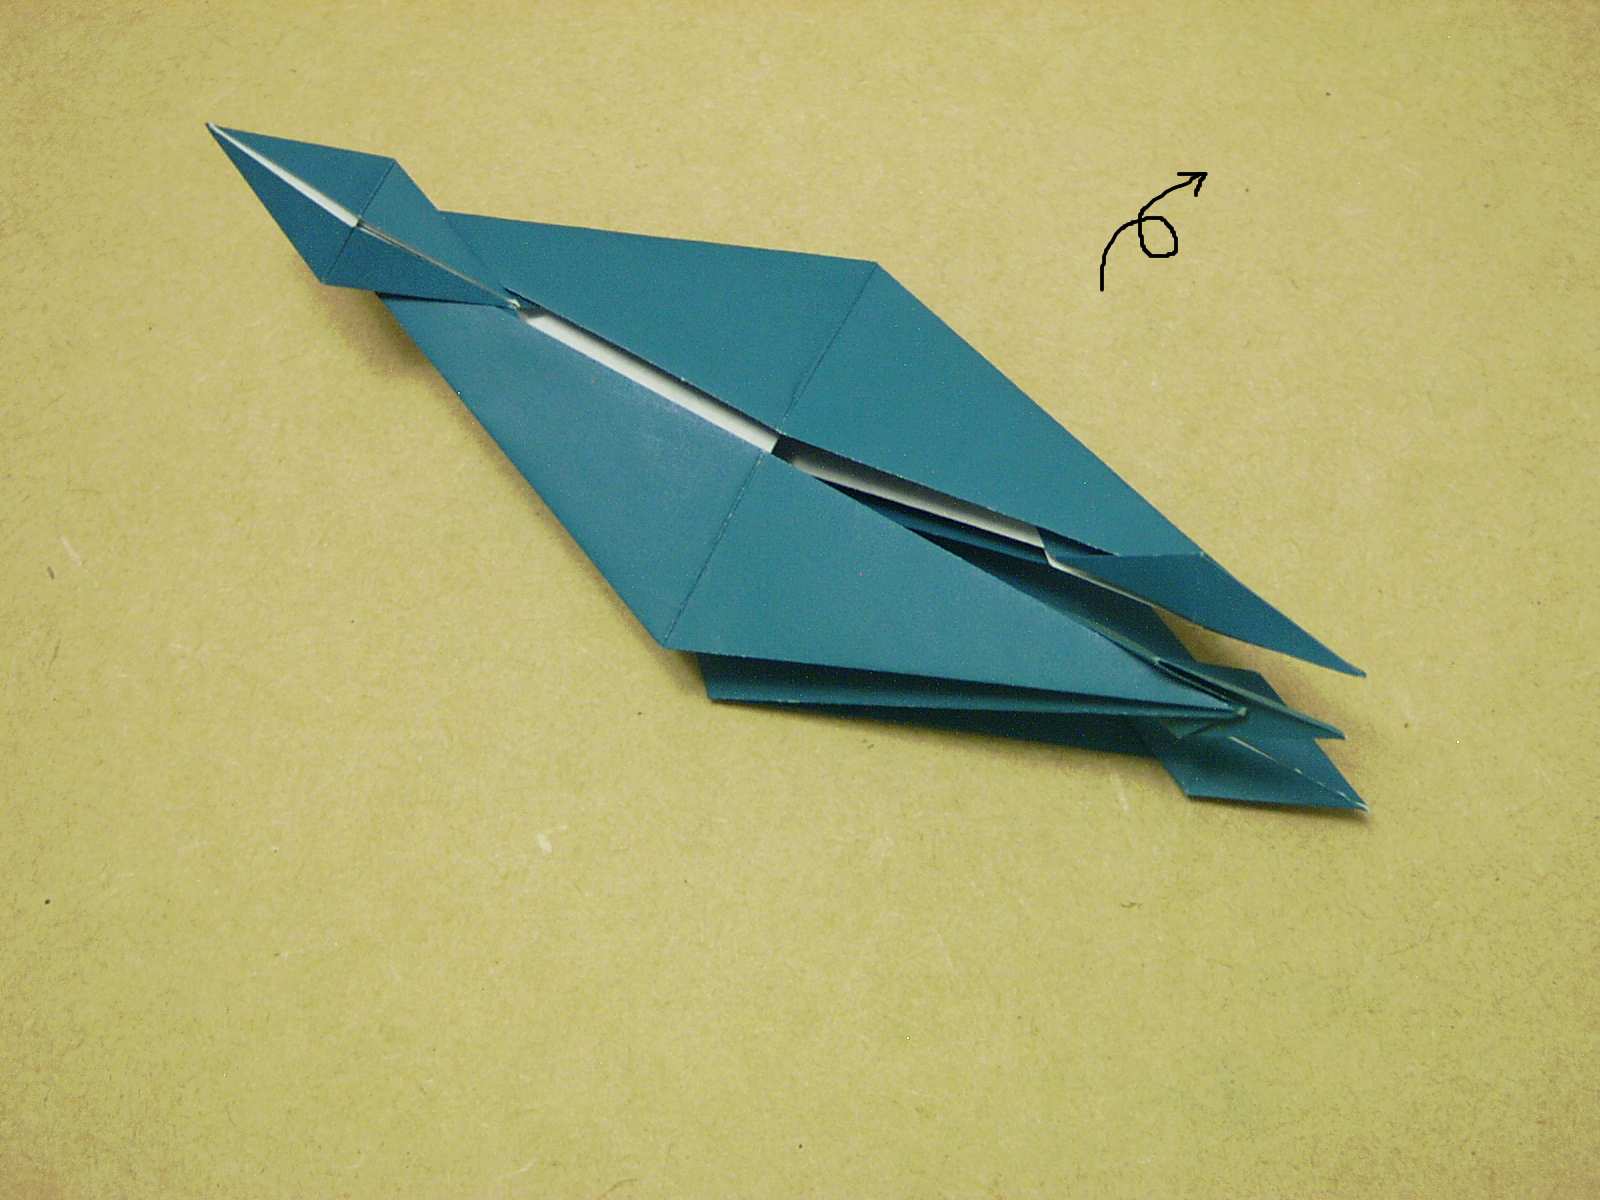
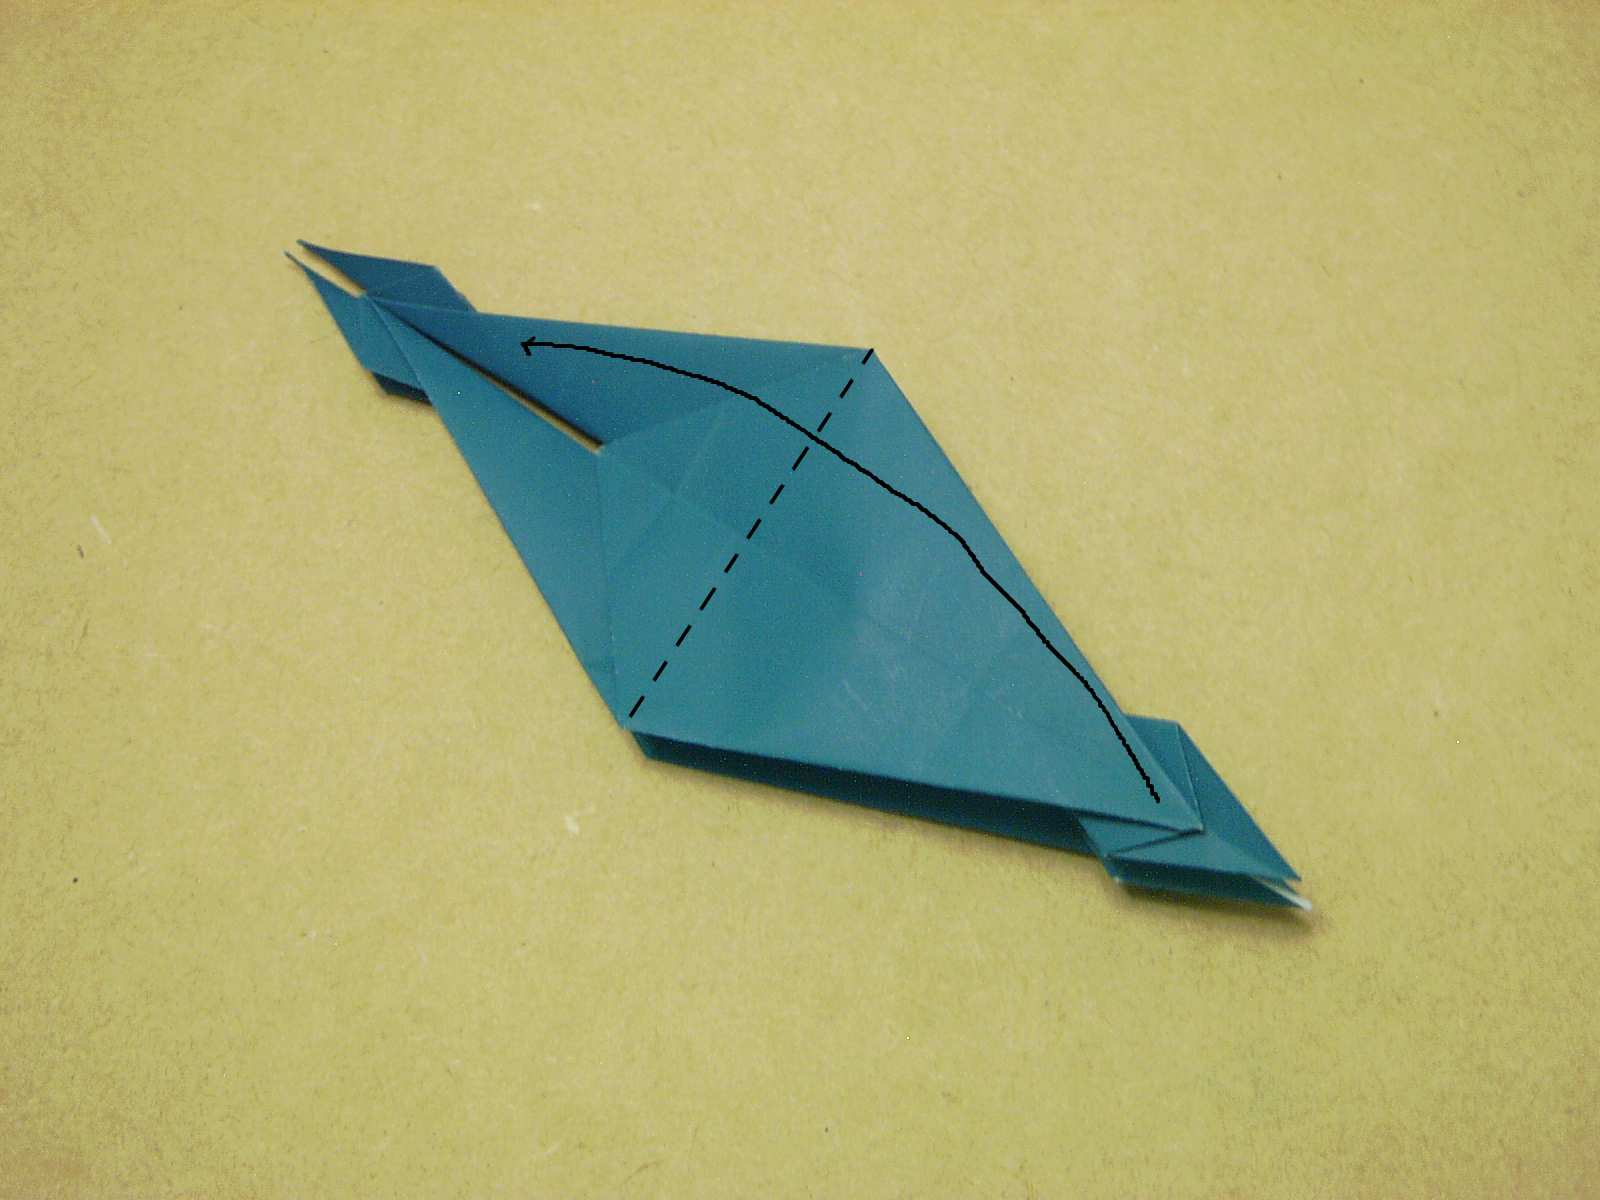
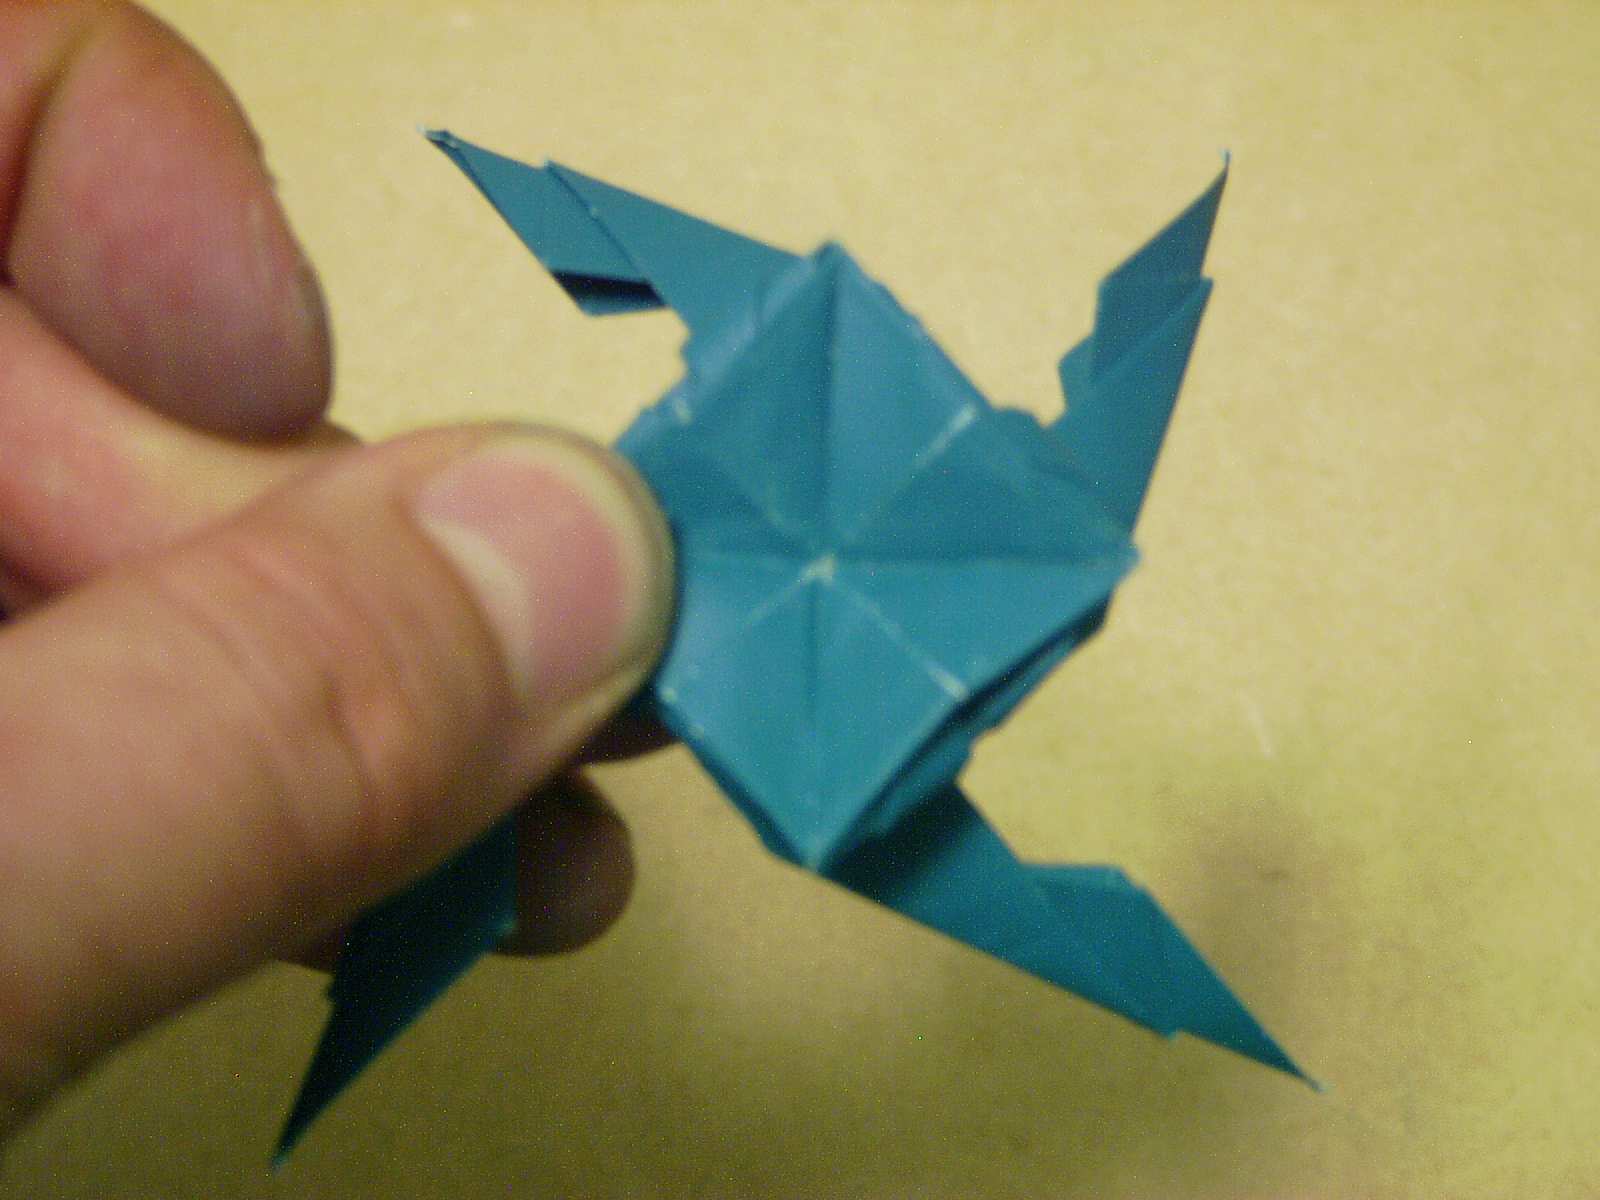
 Step 15 - Result
This is what you should end up with. Repeat on the remaining three points.
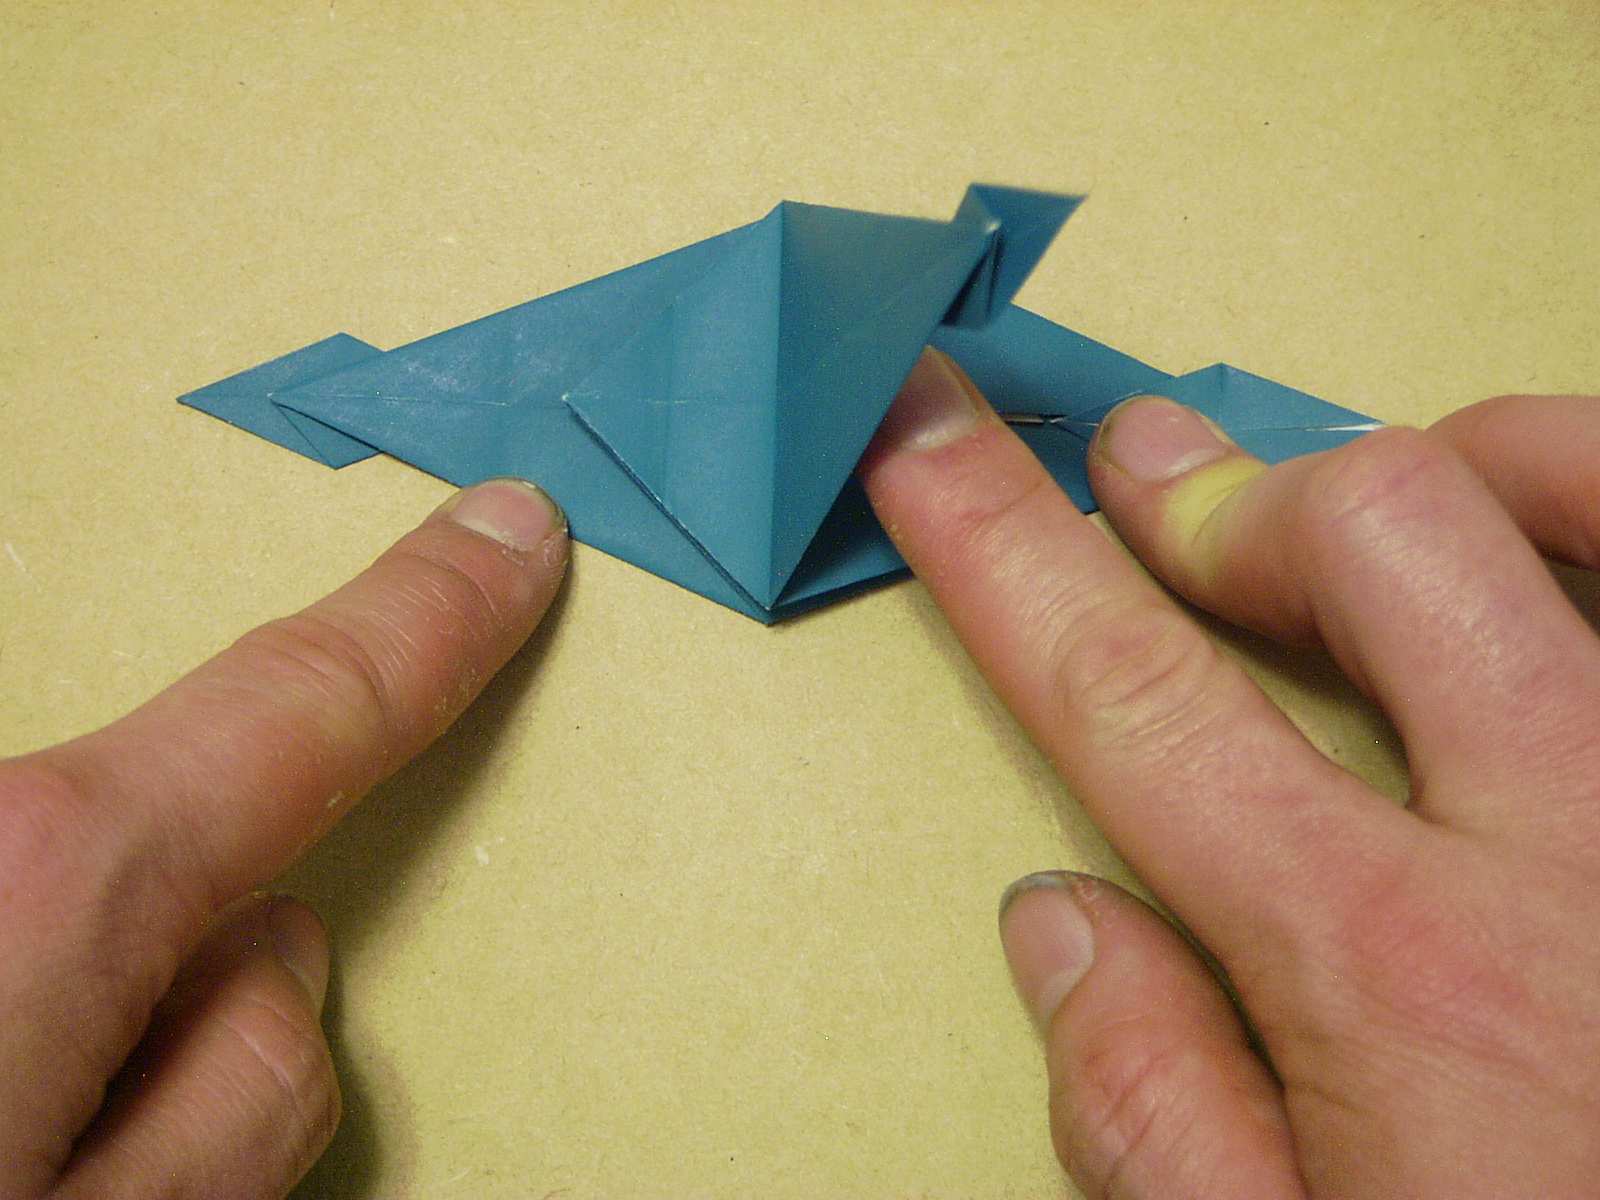
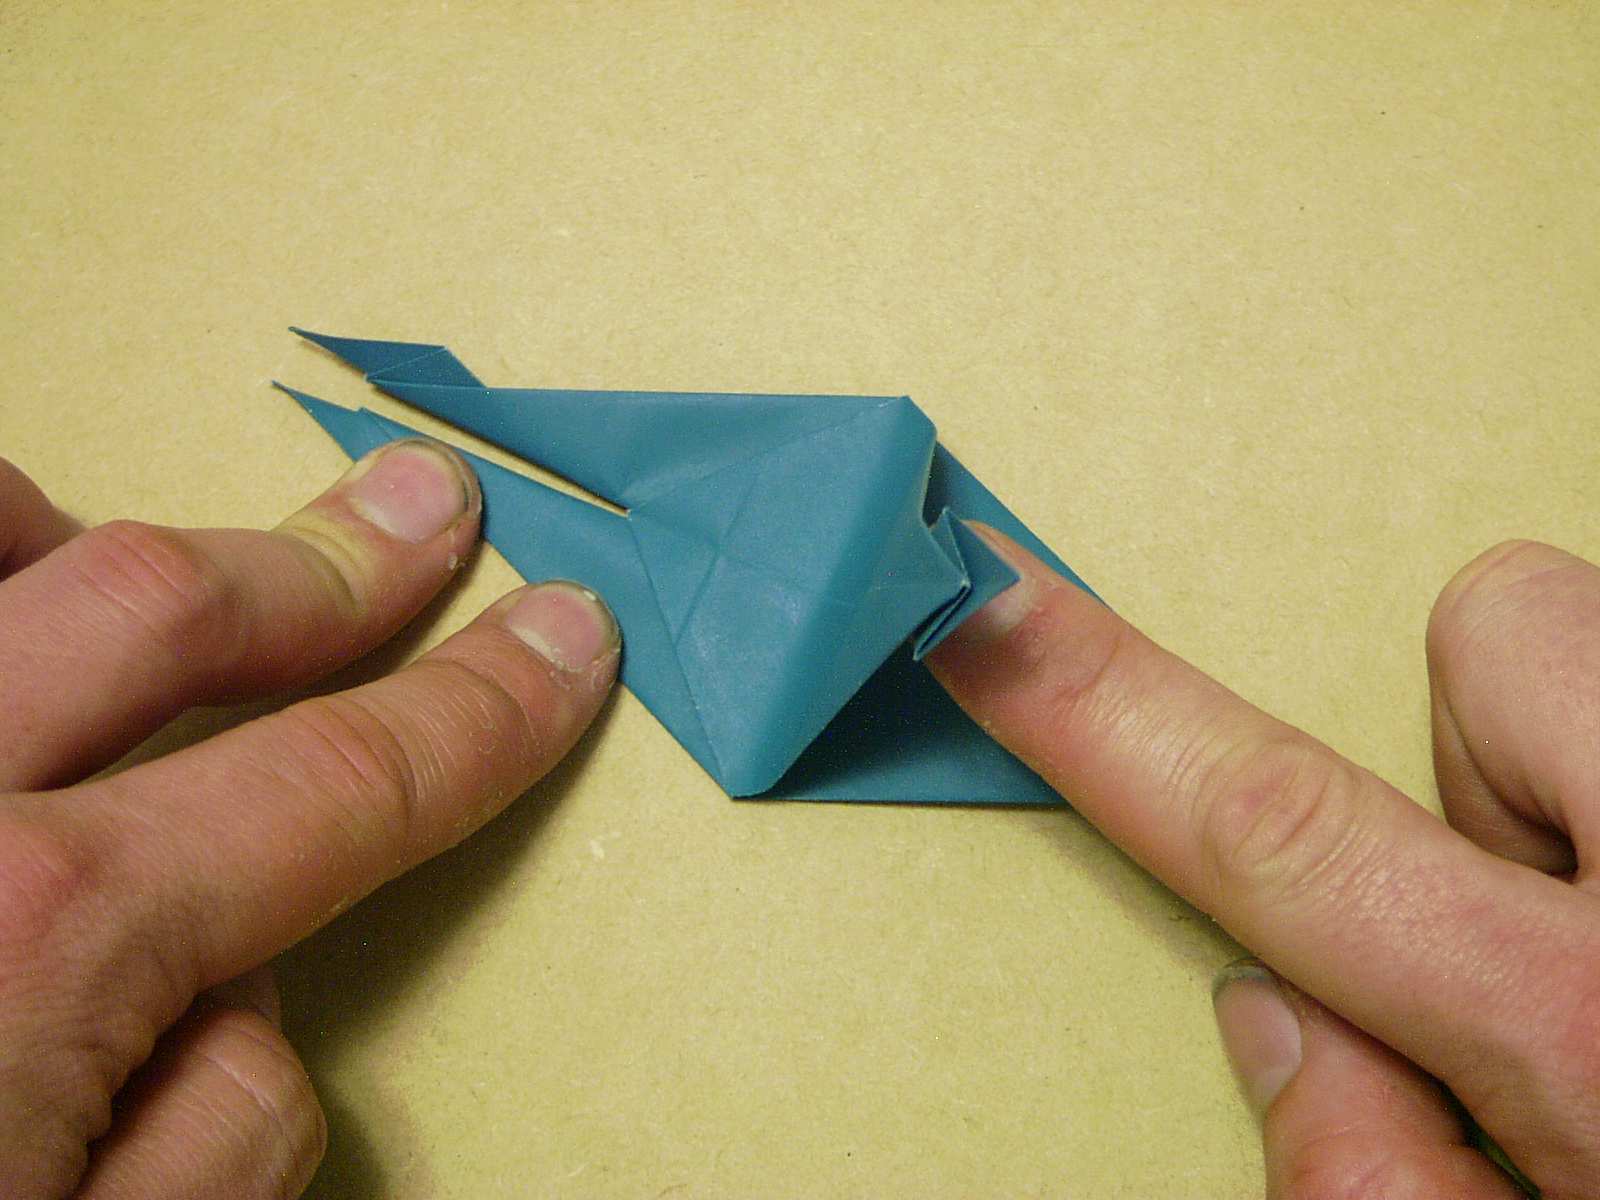
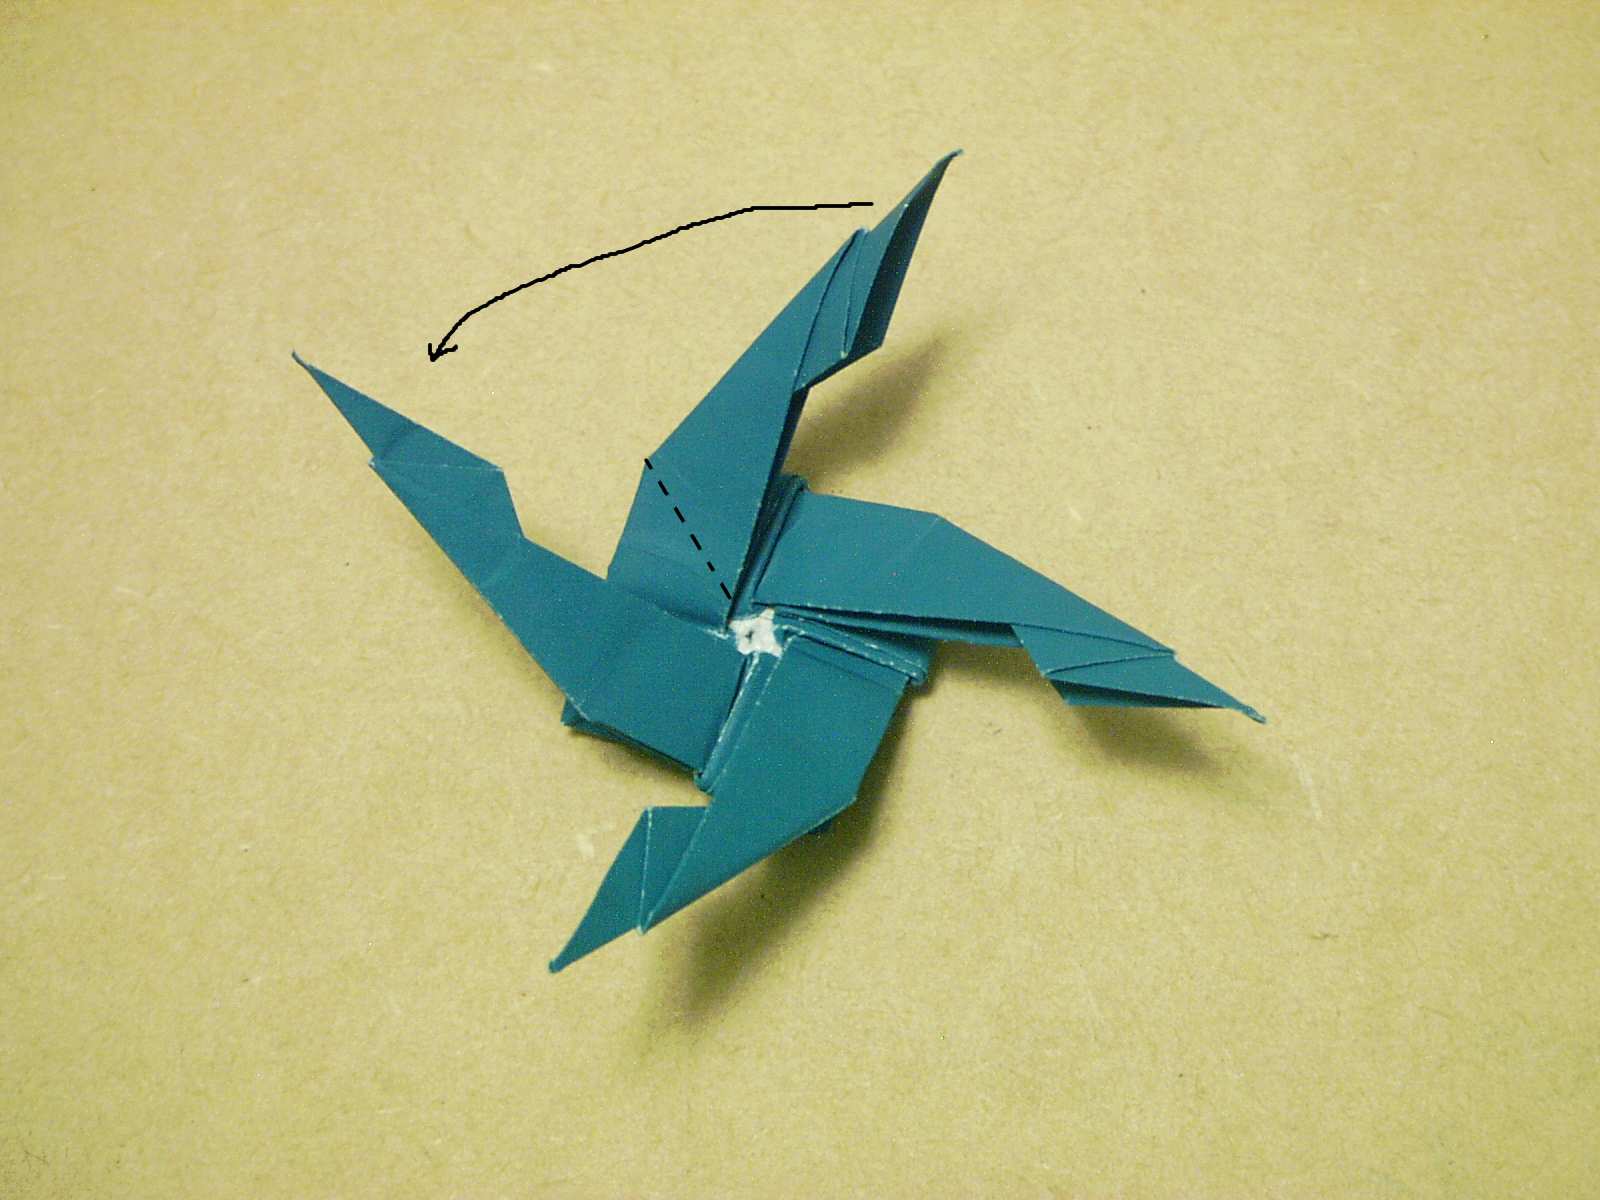
 Step 16
Now you've got four long points and four short points. Fold the short points up. There are several layers of paper in the short points so it won't necessarily be a good sharp crease. Just thought you'd like to know.
 Doing Step 16
Fold the short points like so... I'm aware the image is kinda blurry but it should be clear enough to give you an idea what's supposed to be done.
 Step 17
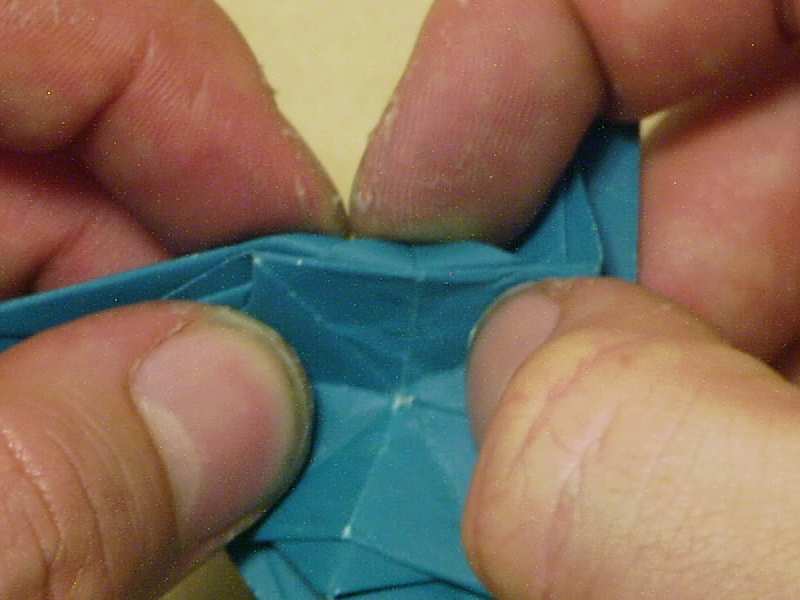
squash that center point... flatten it out.. it turns into a square. The precrease that you made in step 13 outlines the square thats formed in this step.
As mentioned earlier, this sink fold can actually be done between steps 13 and 14 which might make flattening the model easier for some people.
 Doing Step 17
It's not exactly a good clean fold, but this is more or less what it should look like while you're doing it.
 Step 18
This is what it should look like once you've completed step 17. For step 18, sink the top of the blunt point of the rabbit ear fold from step 15 so that it lines up with the edge of that center square.
 Doing Step 18
Fold it over to precrease...
 Step 18 - Result
and sink it. It should look more or less like this. Do on all four sides.
 Step 19
Take the short points and fold them over and tuck them into the pocket between the layers under the center square. Again, there are a lot of layers of paper so it may not want to stay on its own right away.. if it pops out, stuff it back in. If it still doesn't cooperate, don't worry too much.. it's just to make sure those short points are inside the rose.
 Doing Step 19
This shows one of the short points stuffed into the pocket.
 Step 19 - Result
This is what you should end up with. Turn it over.
 Step 20
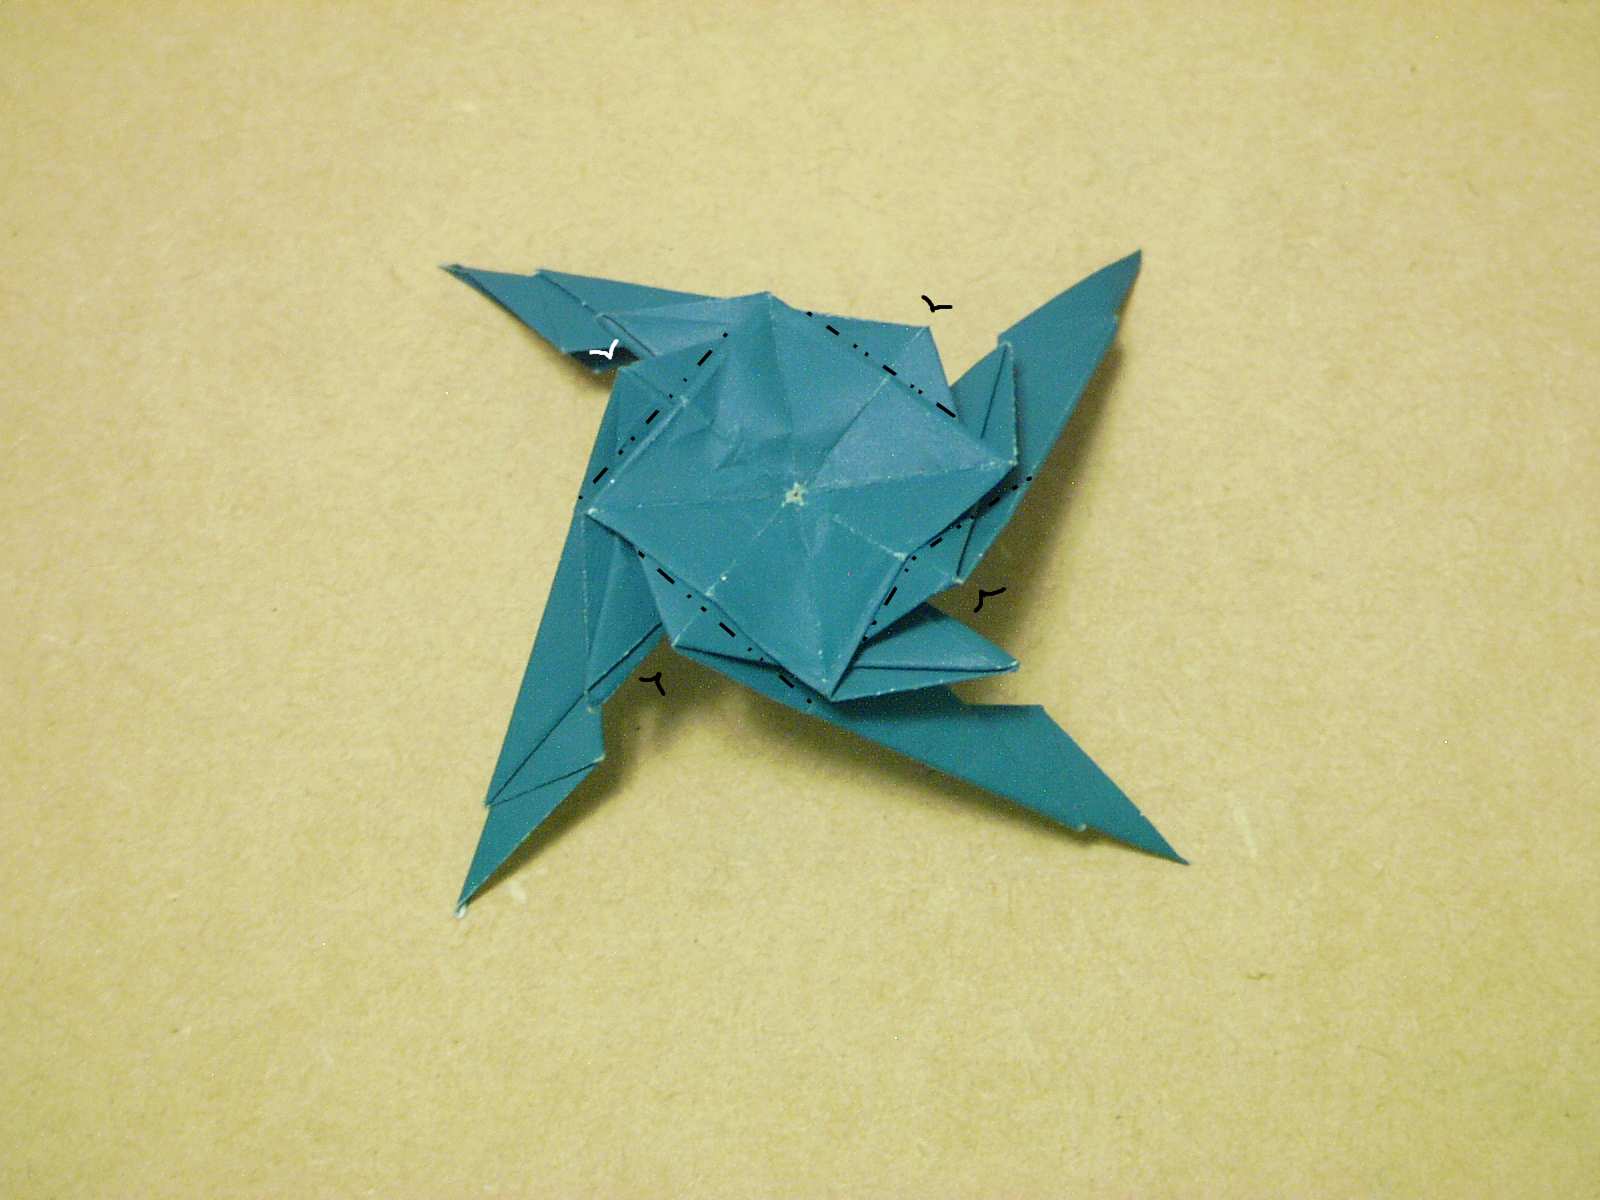
Valley fold the long point from the center to the end of the sink fold.
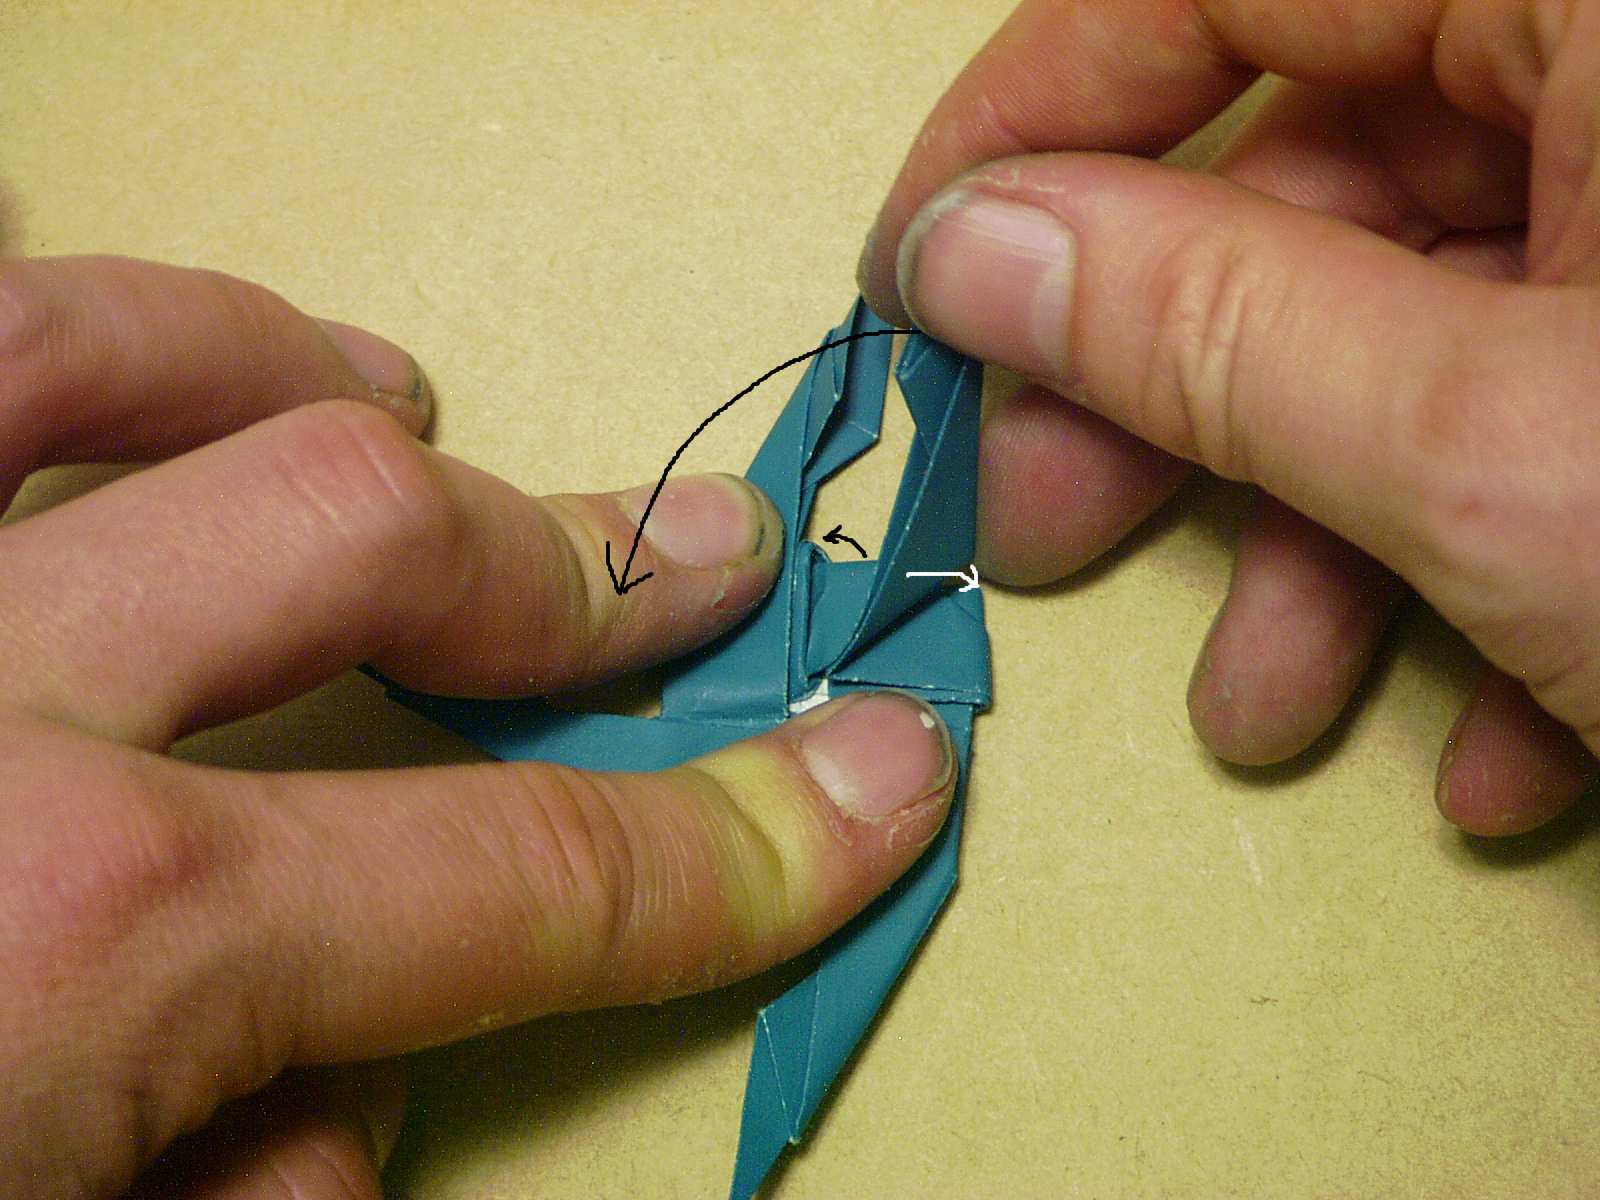 Step 21
Spread the two layers. and flatten the point towards the opposite side.
 Doing Step 21
Like so...
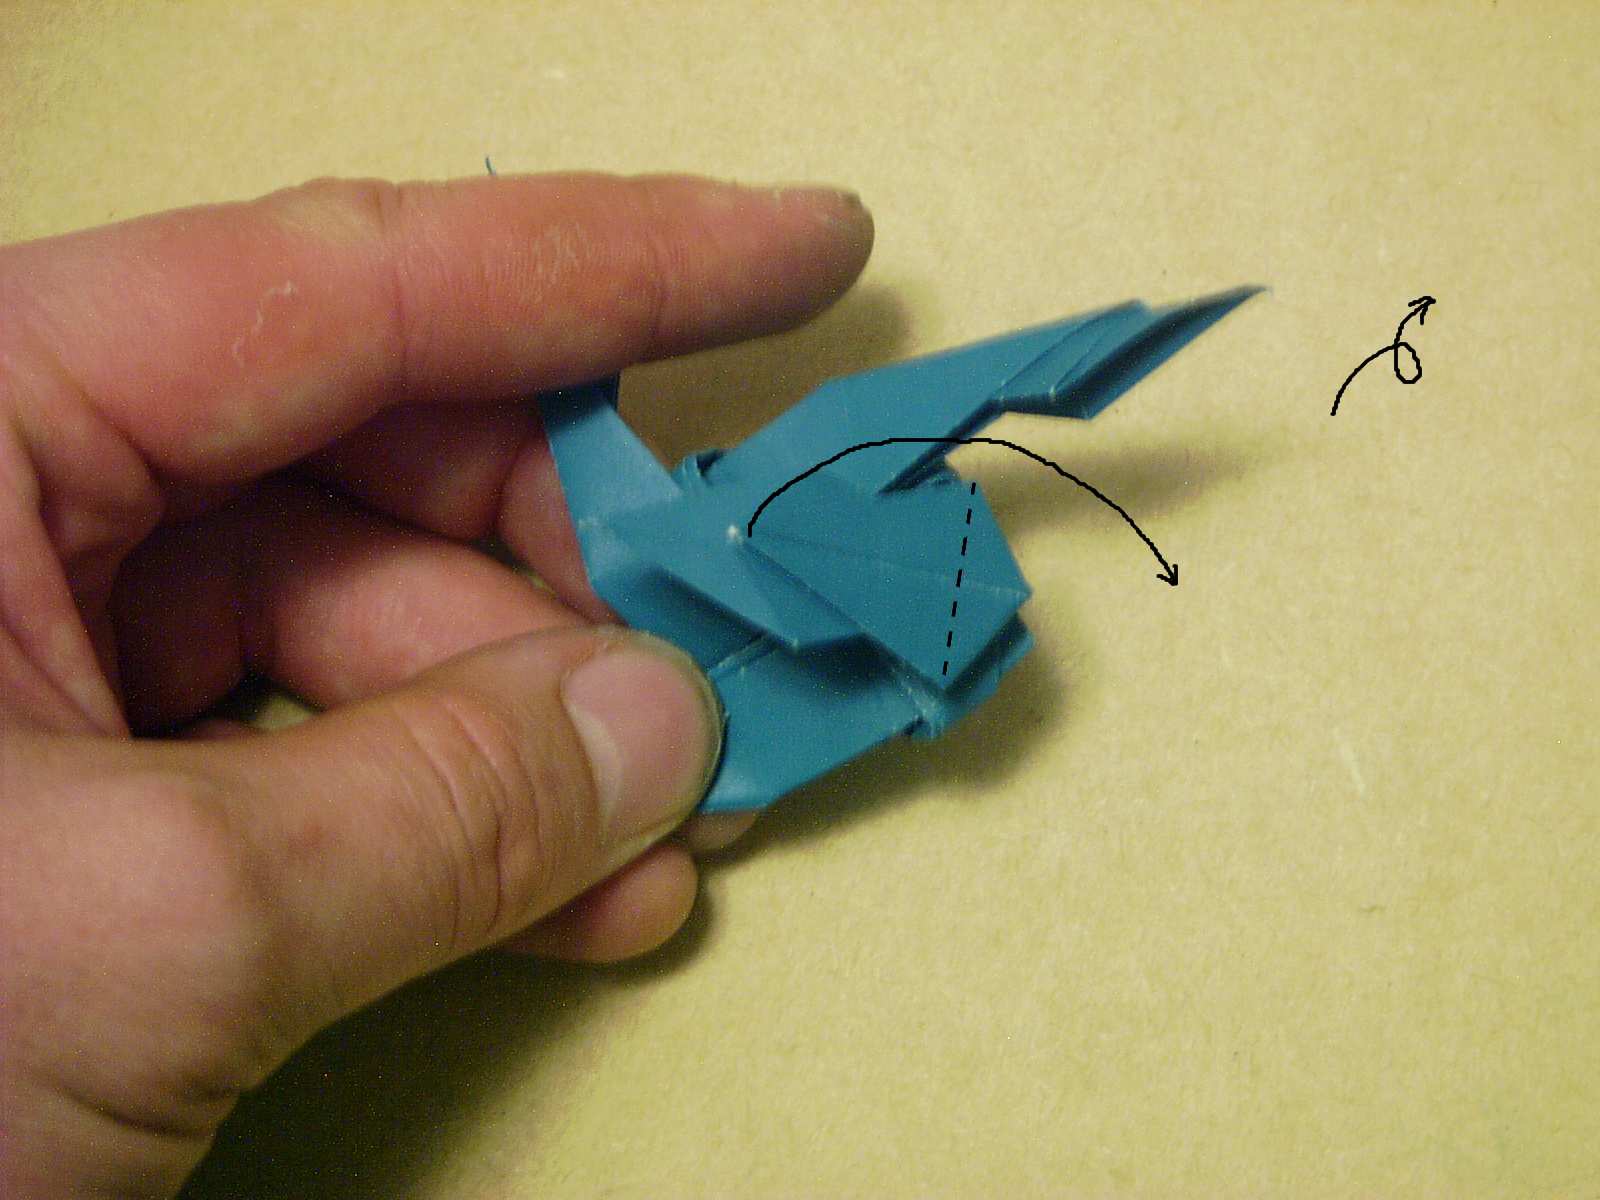 Step 22
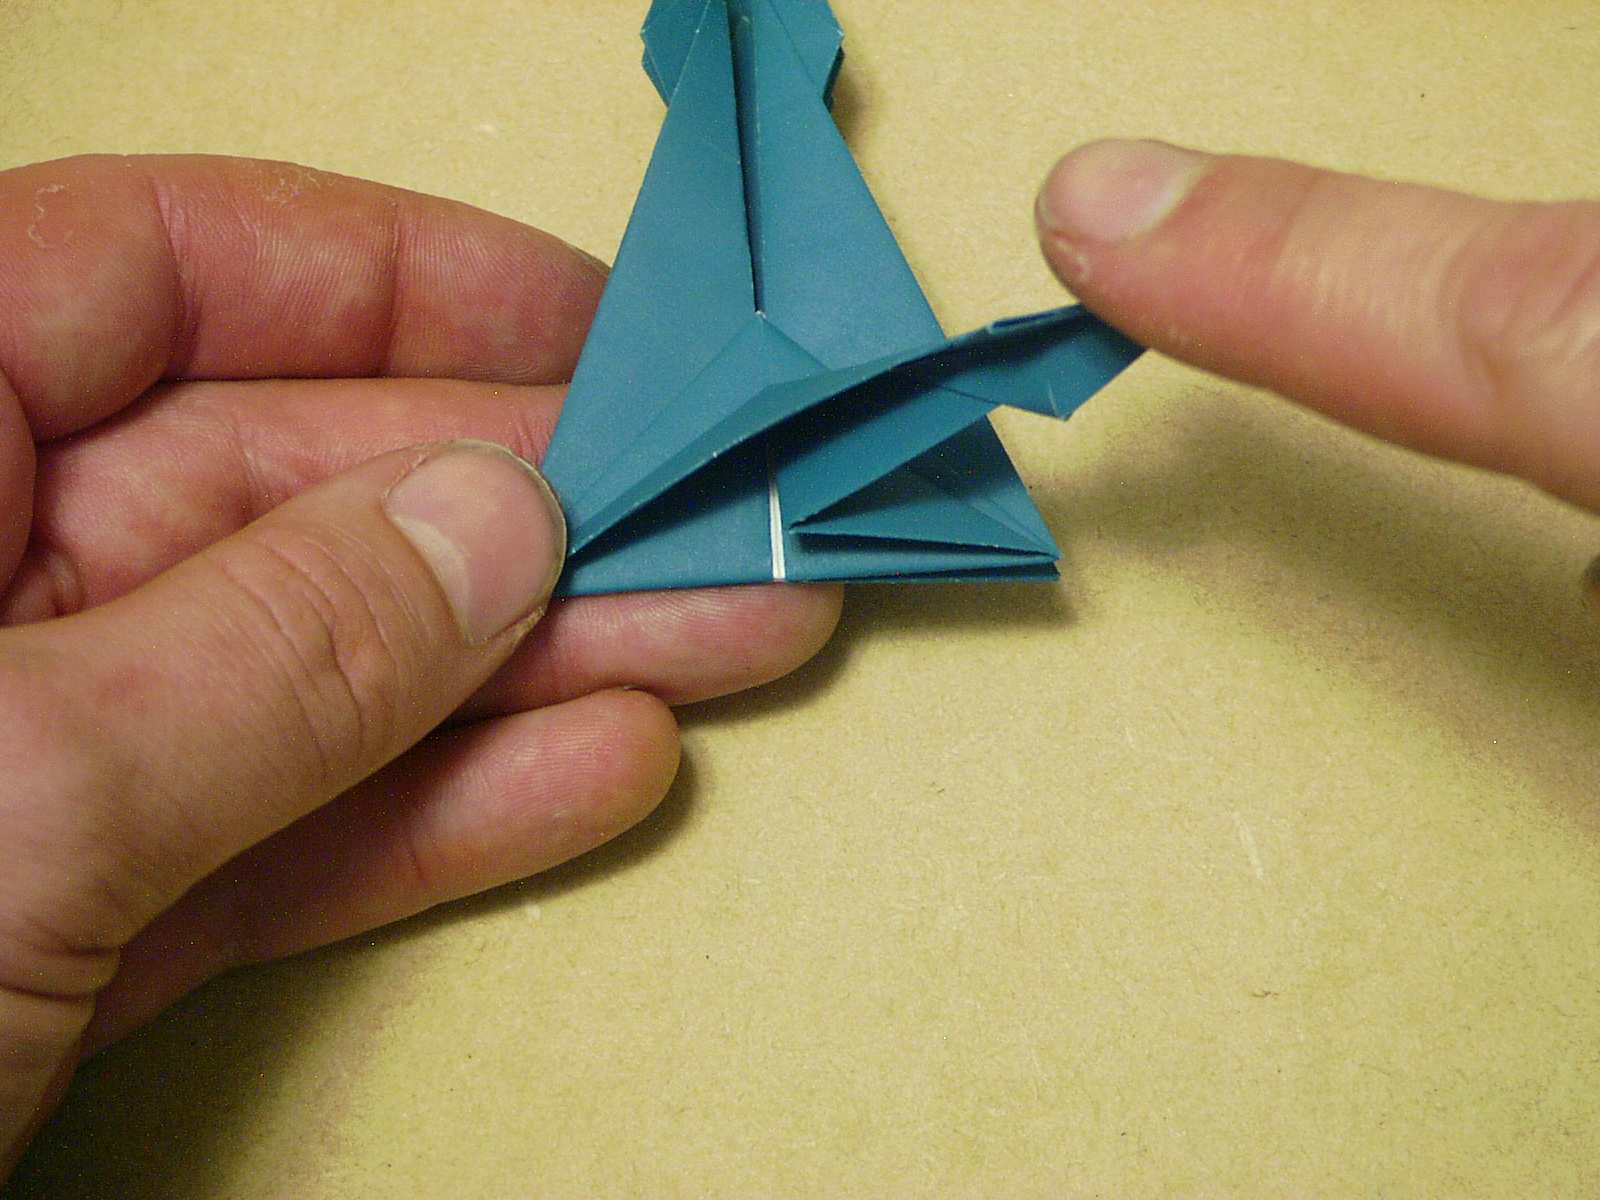
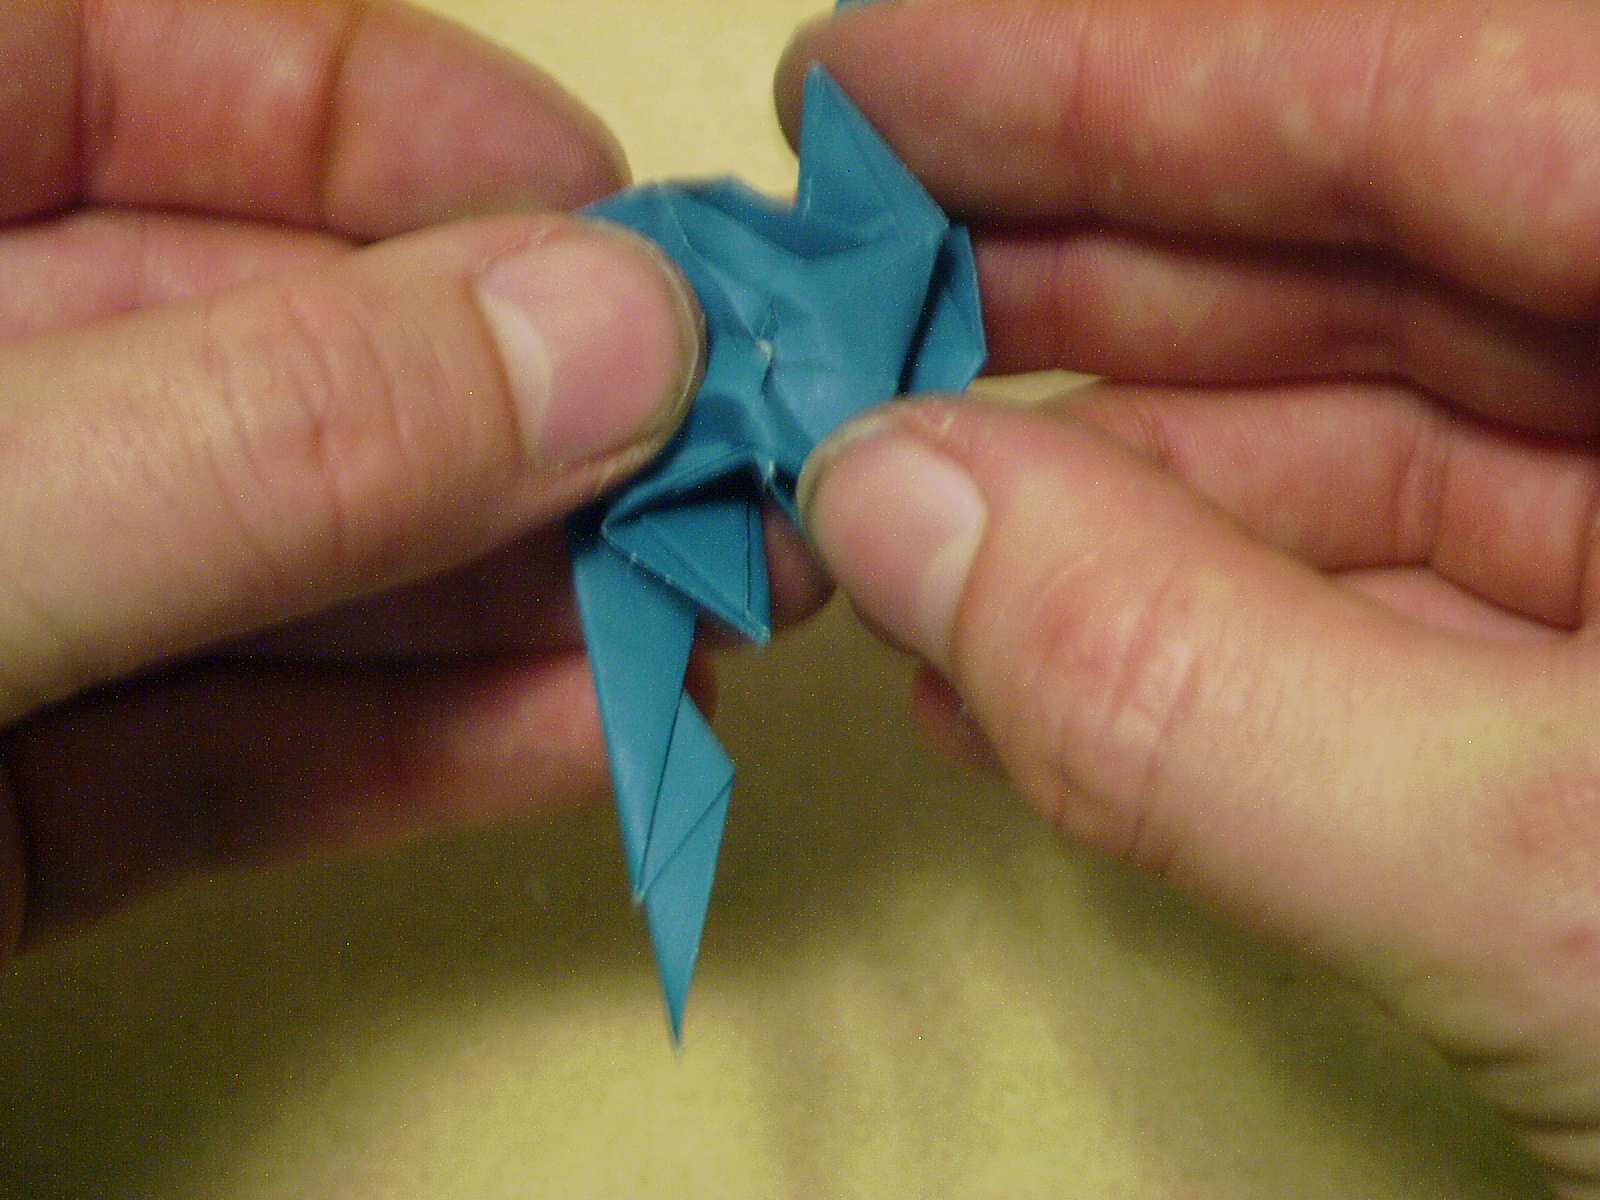
Once you've finished step 21 on one point, valley fold the point back out where indicated. That gives you a small pocket that you can wedge the stem into. Repeat steps 21 and 22 on the remaining three points.
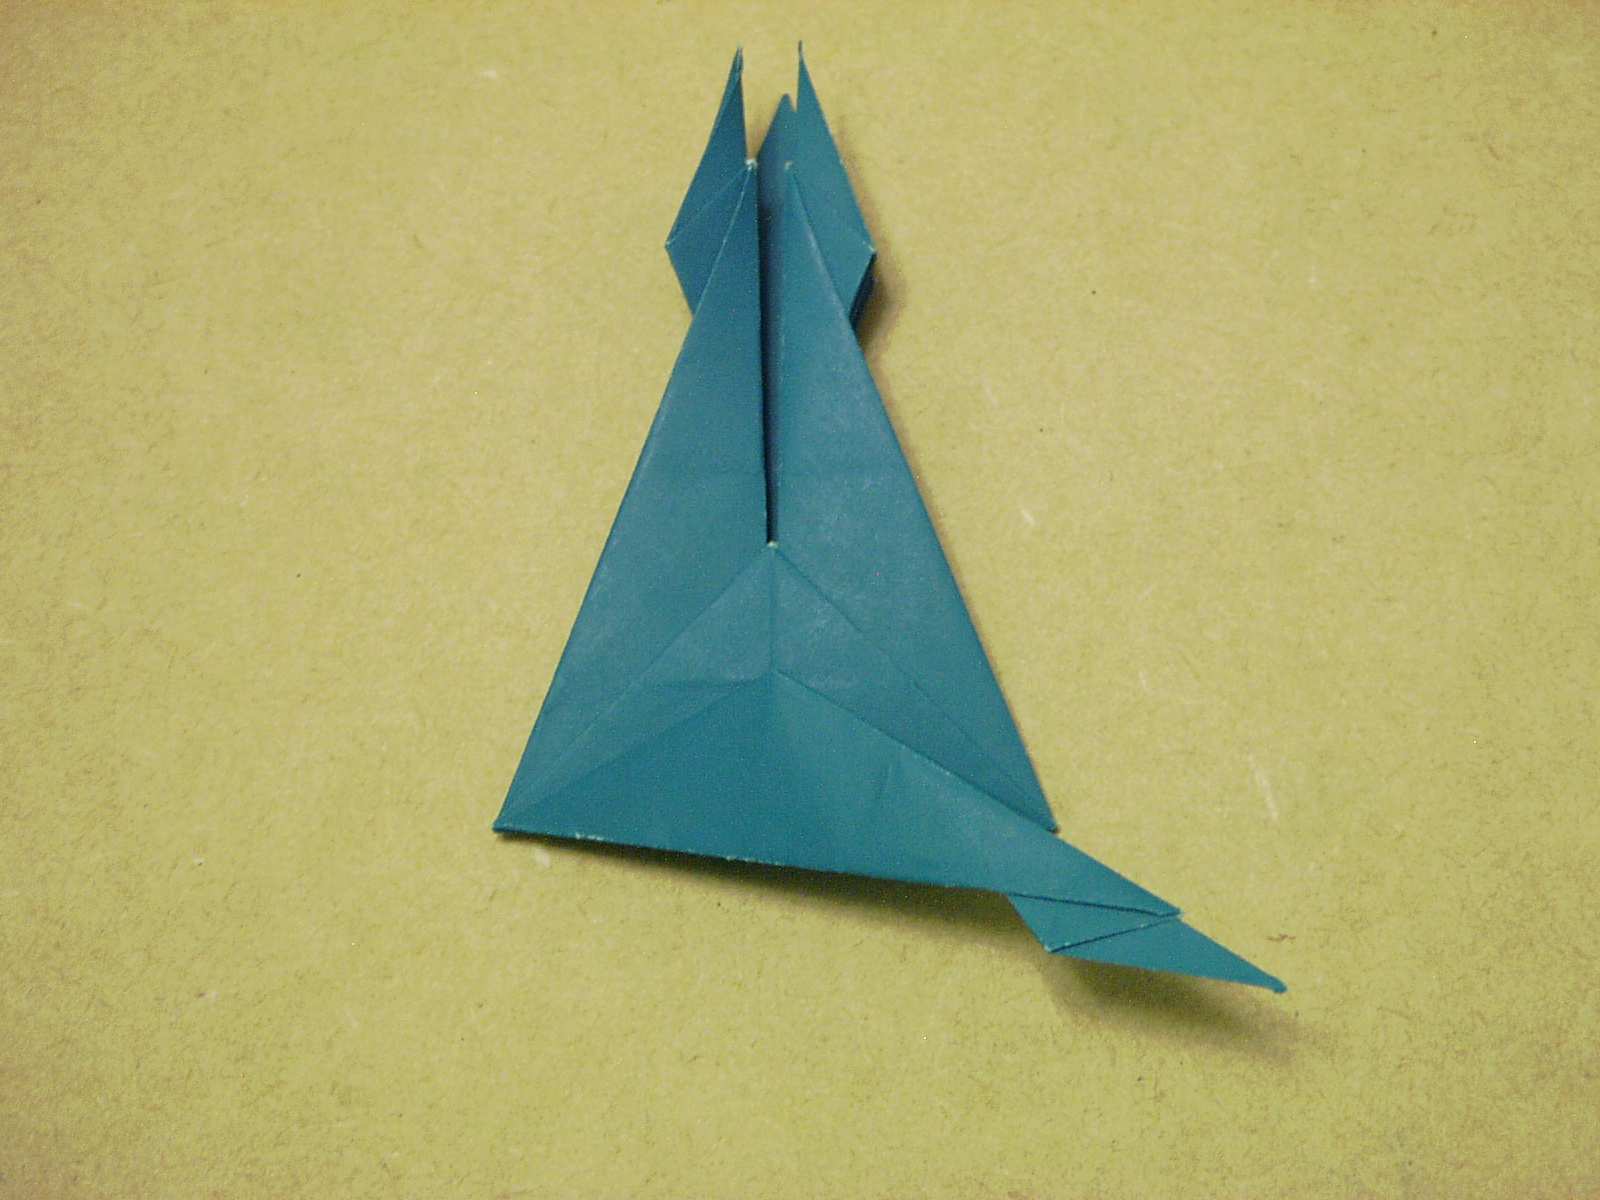
 Step 23
Valley fold the the weird points from the first few steps as shown and stuff the paper in between the layers.
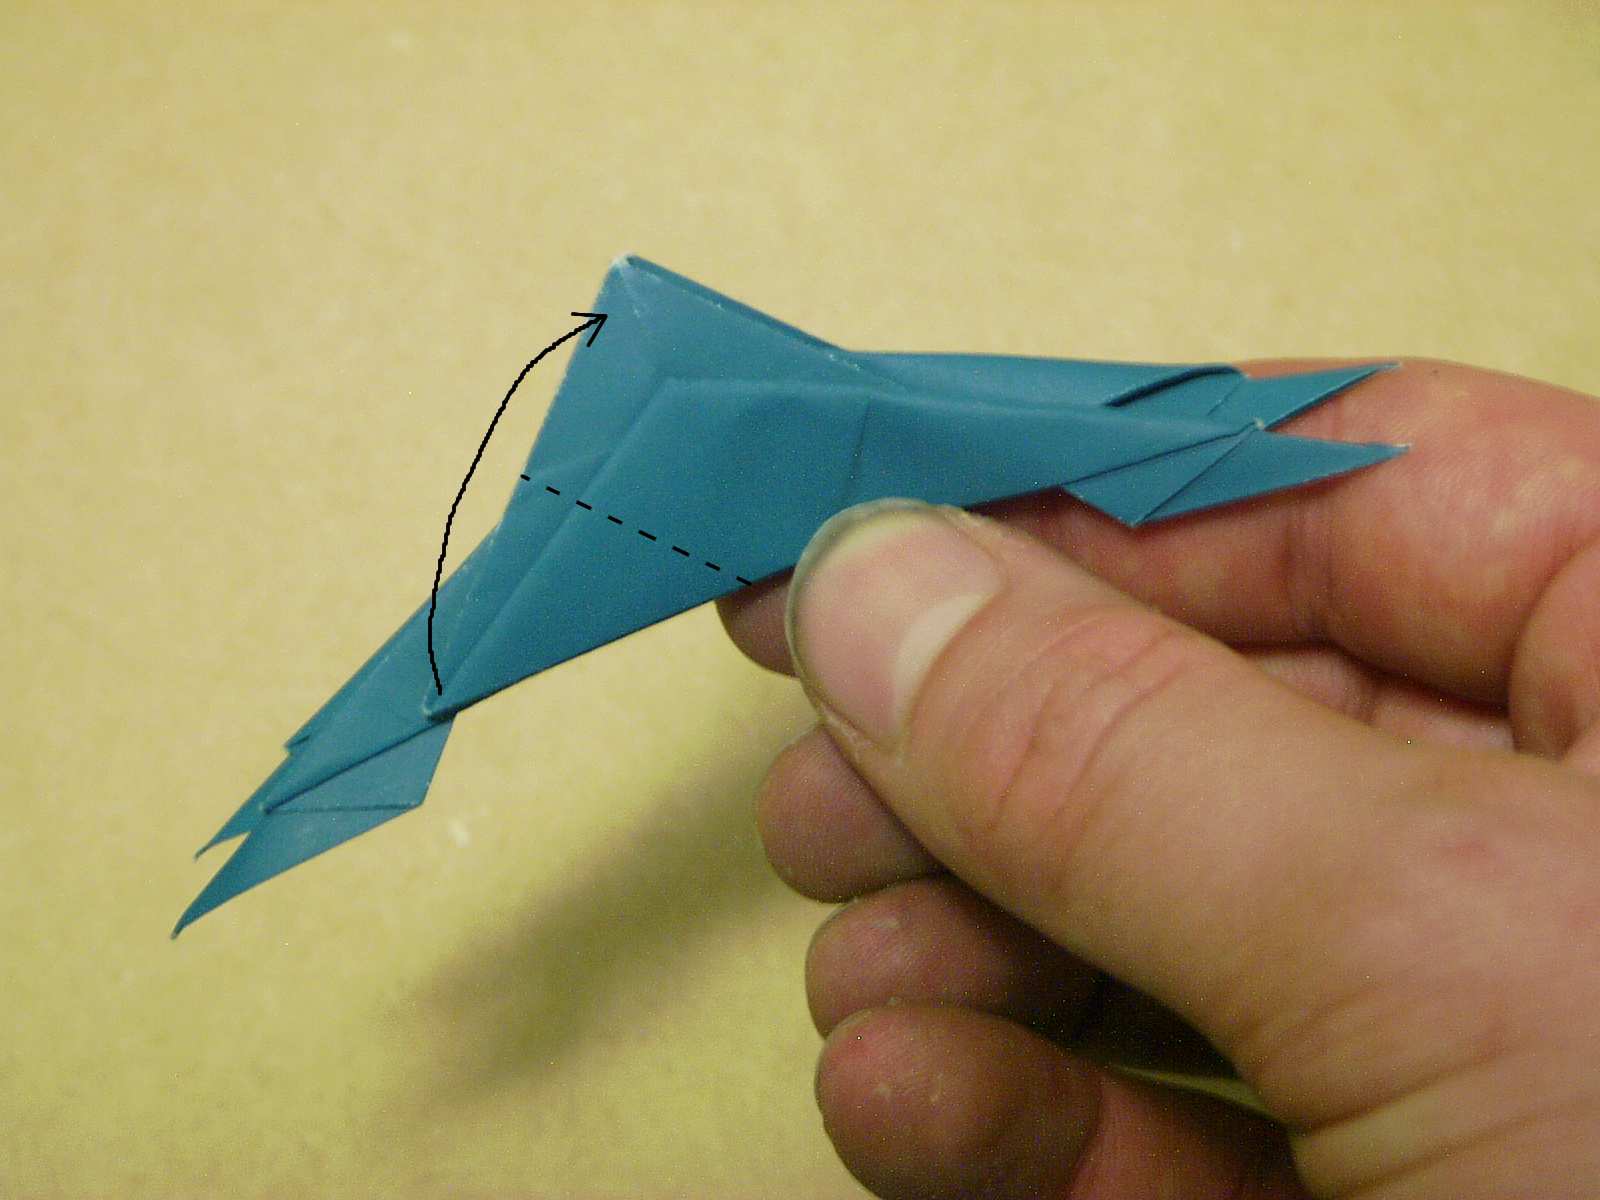
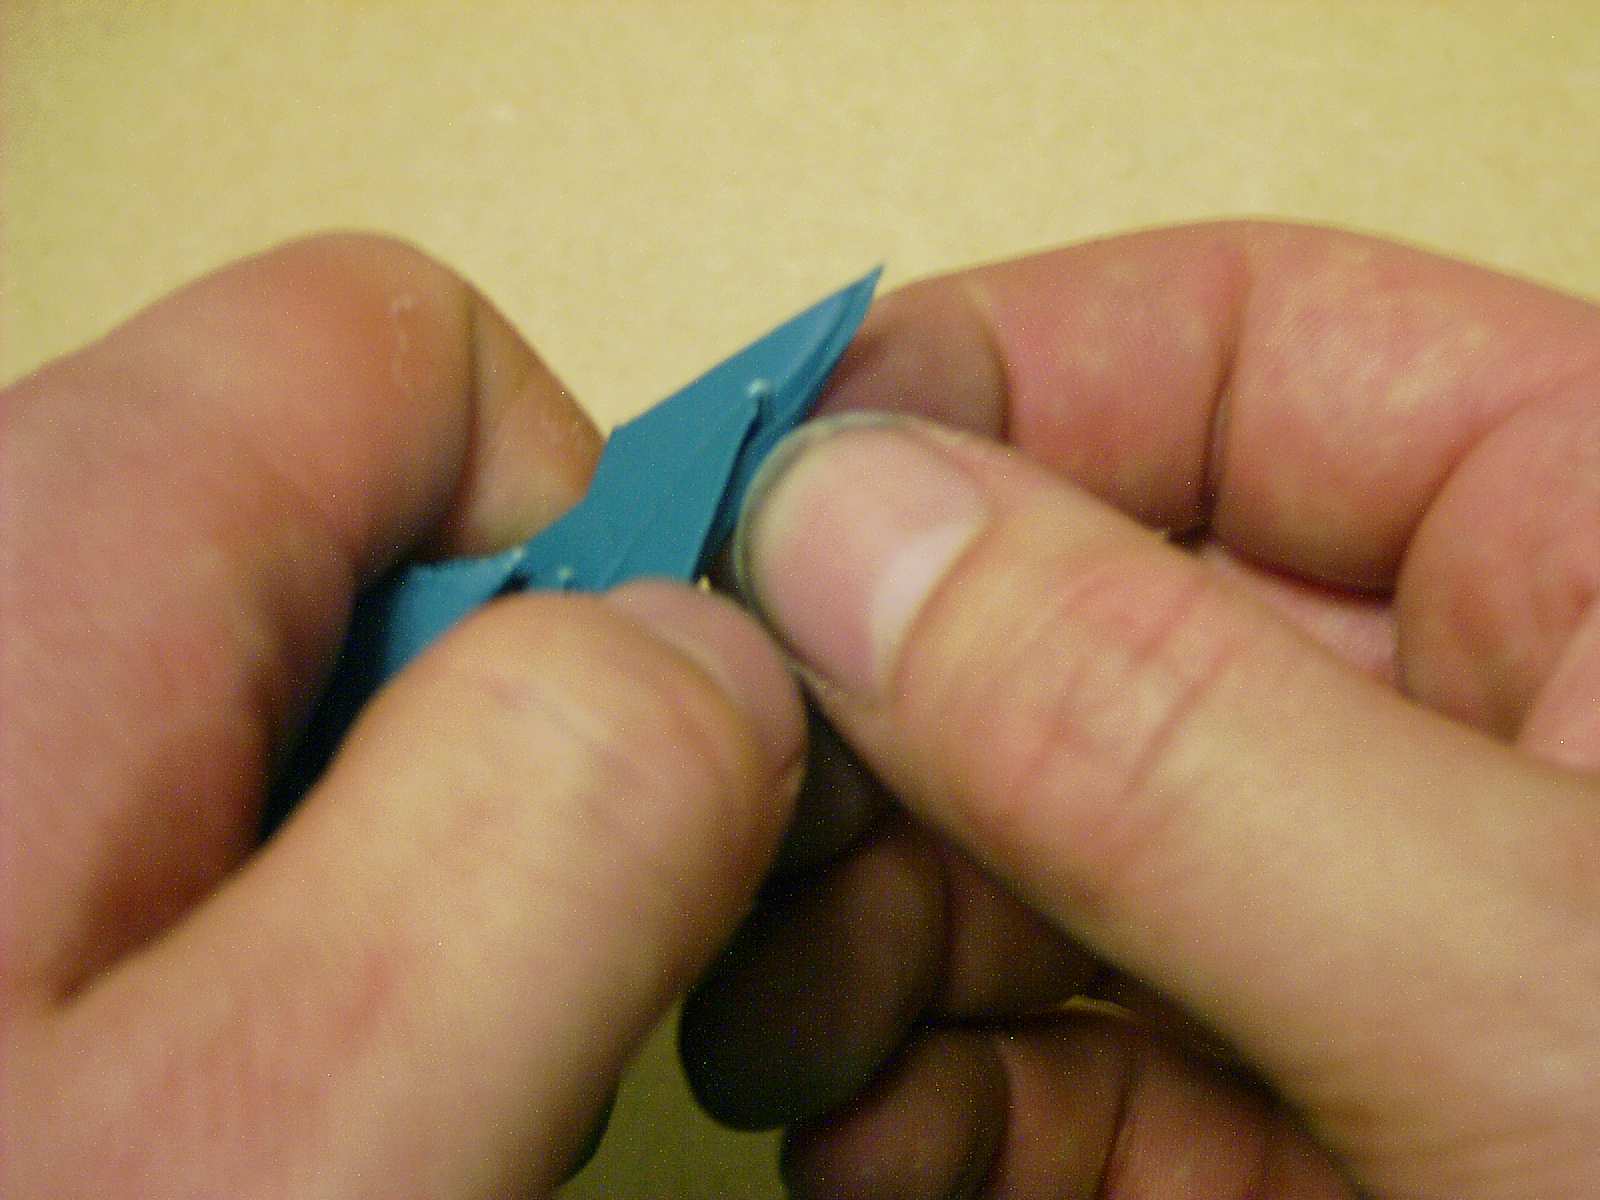 Doing Step 23
Zoom in for a better look..
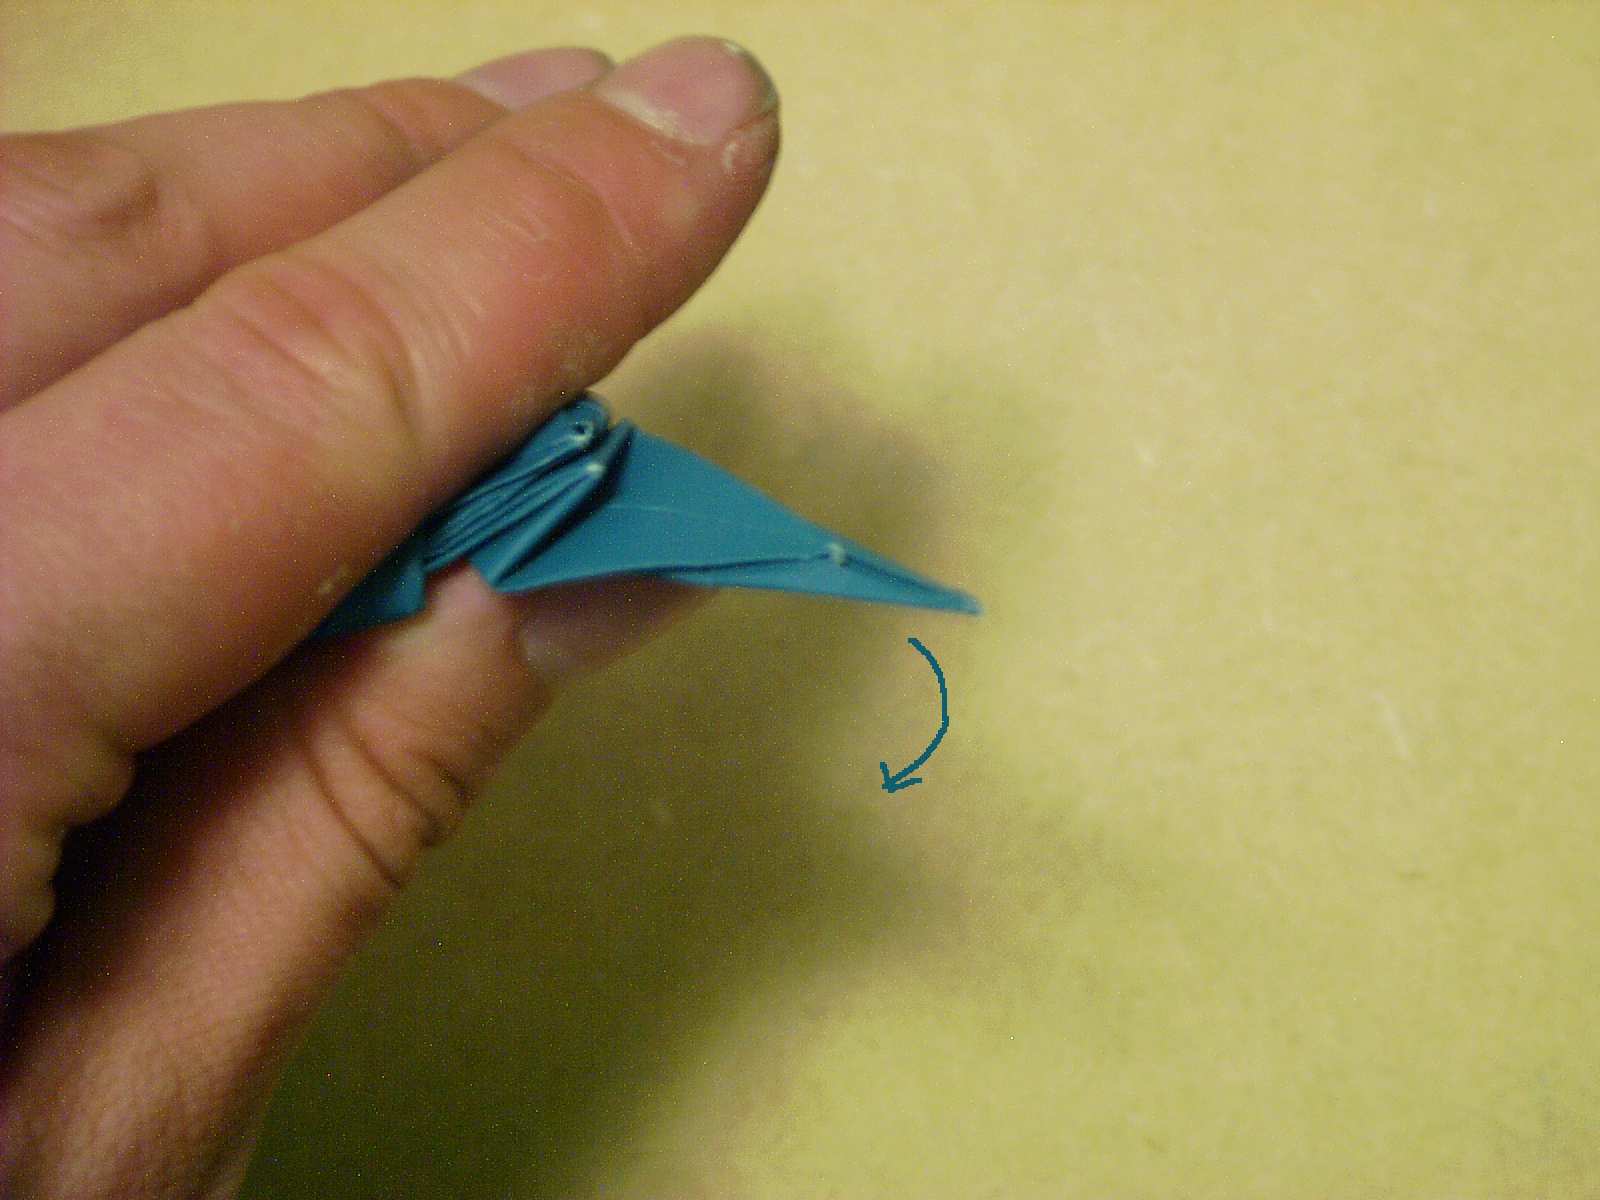 Step 24
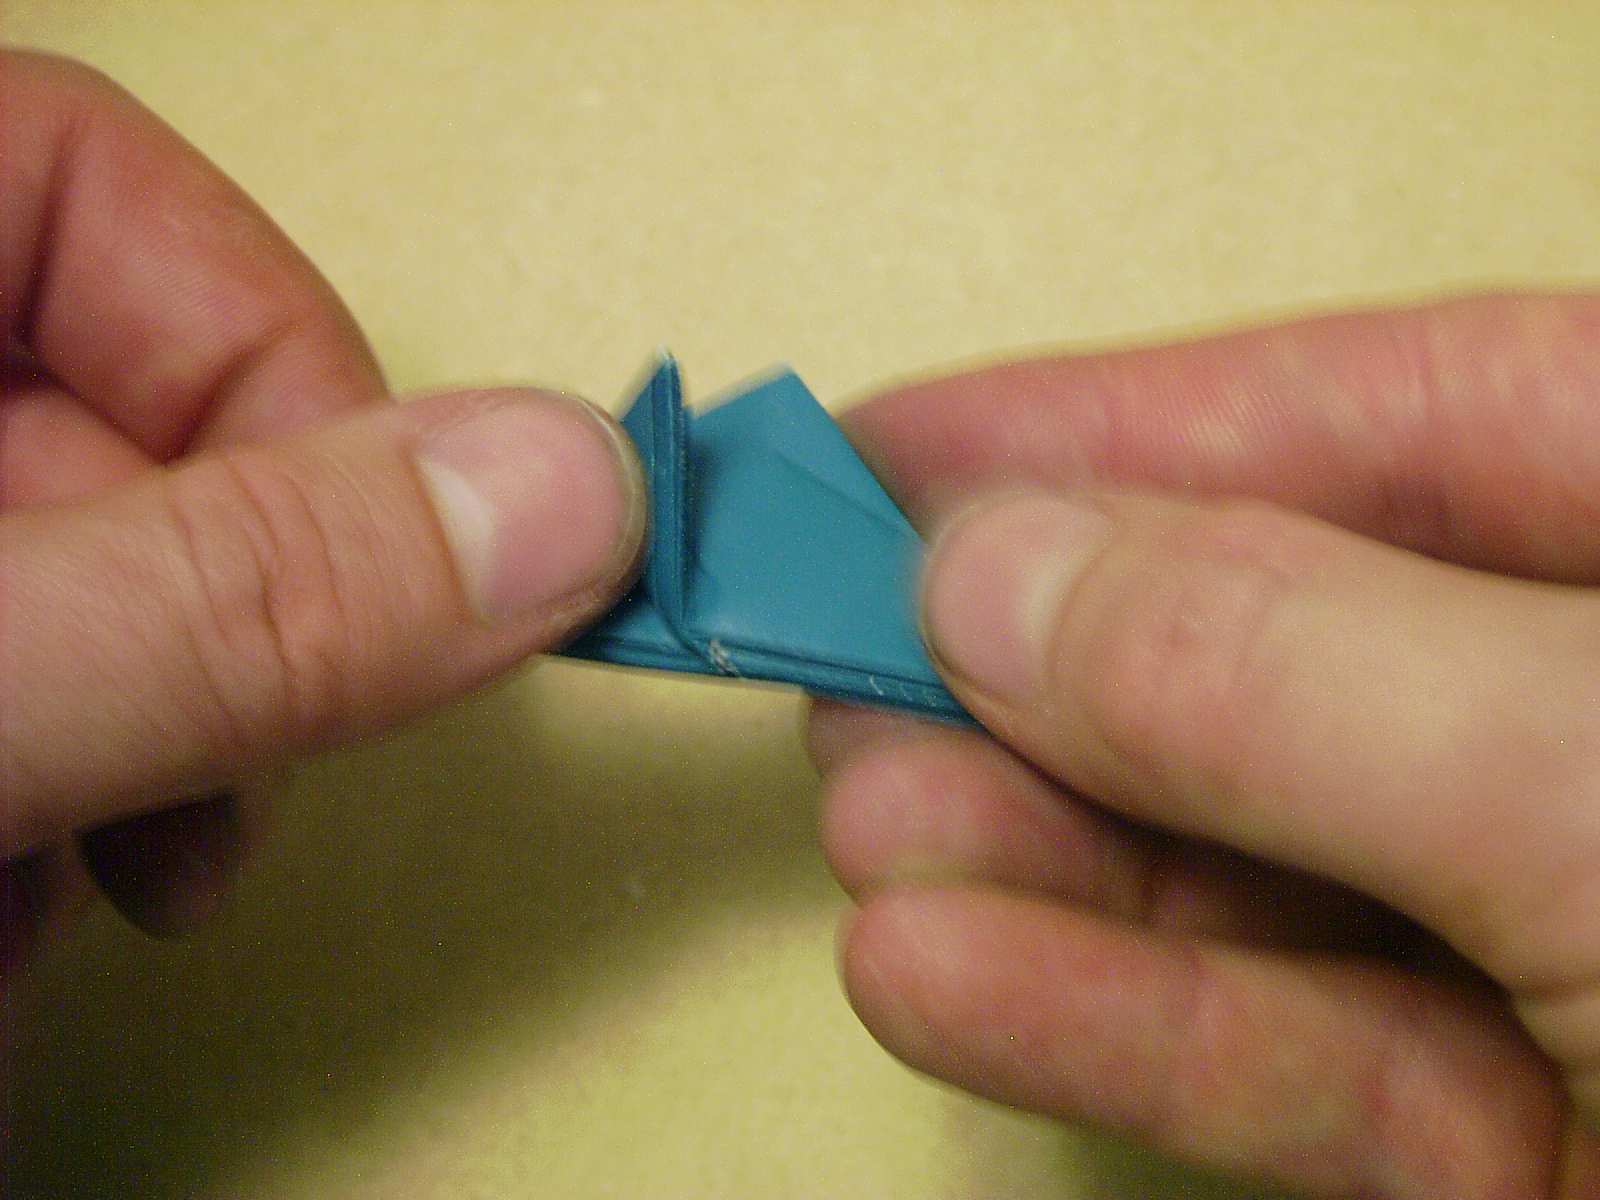
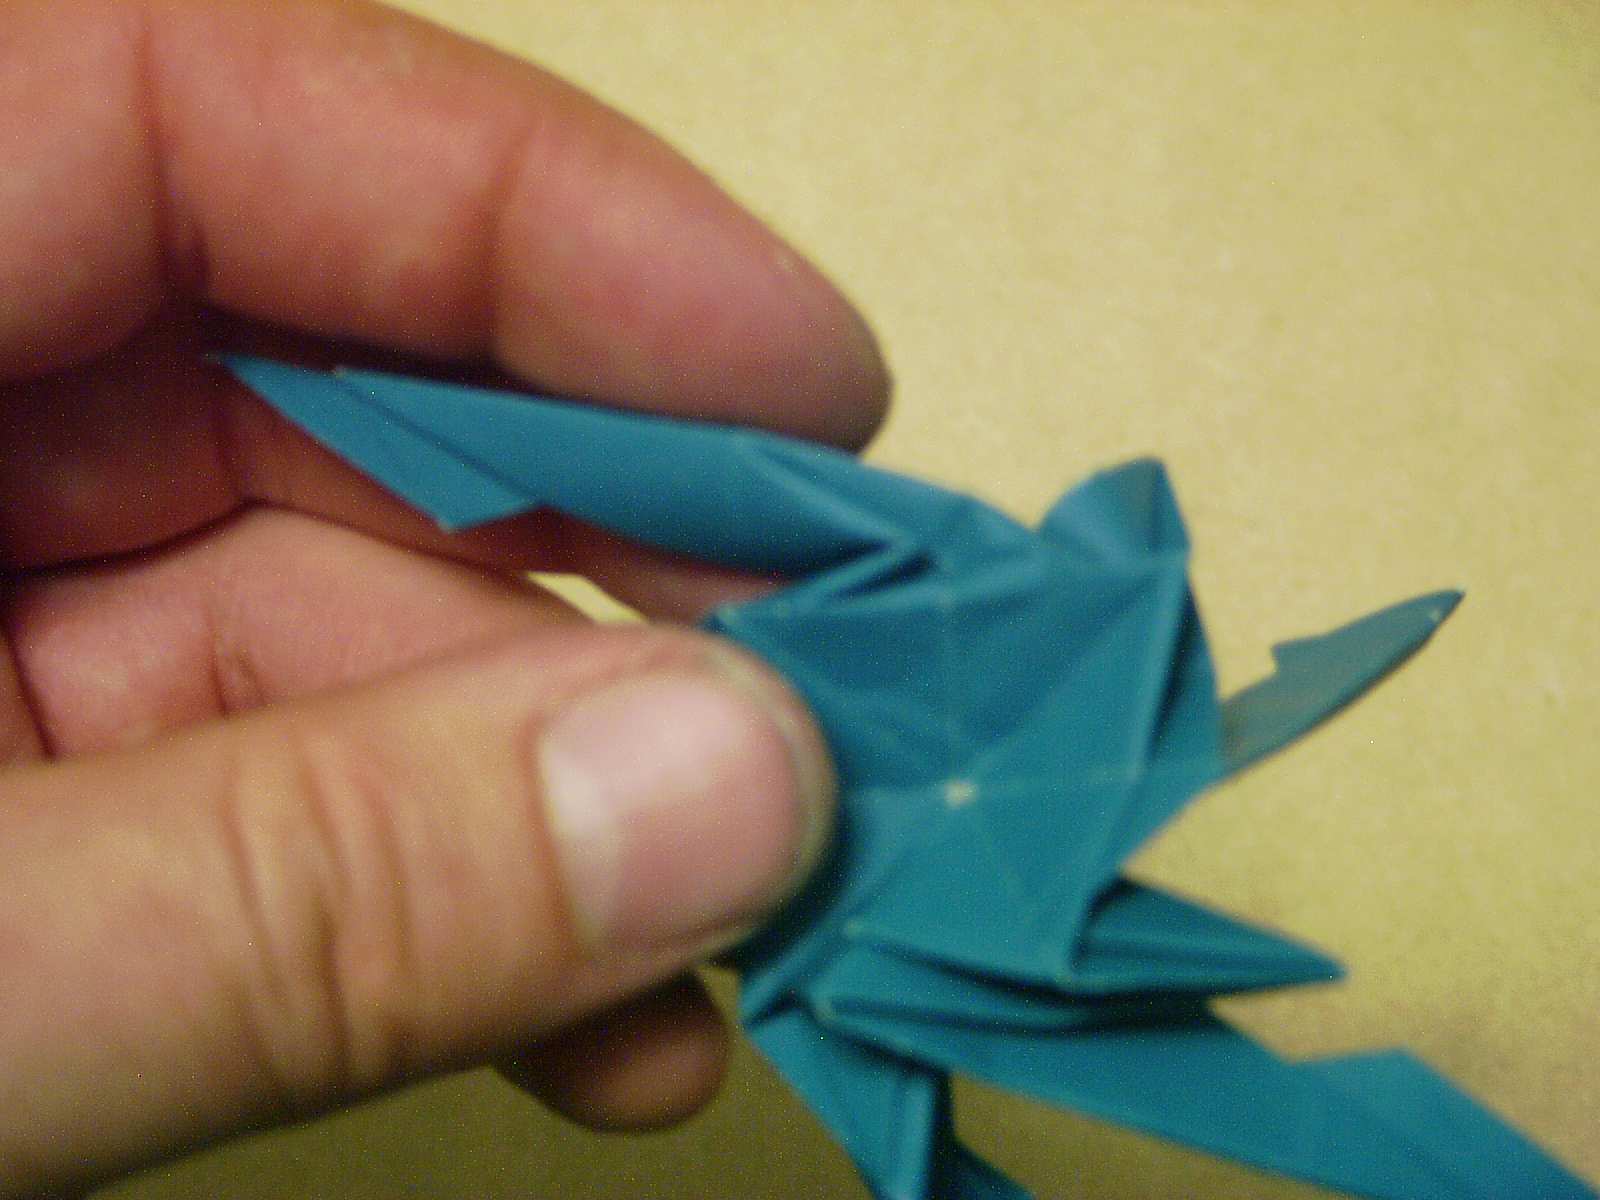
Curl the point. That helps to keep the paper in place after step 23 is completed.
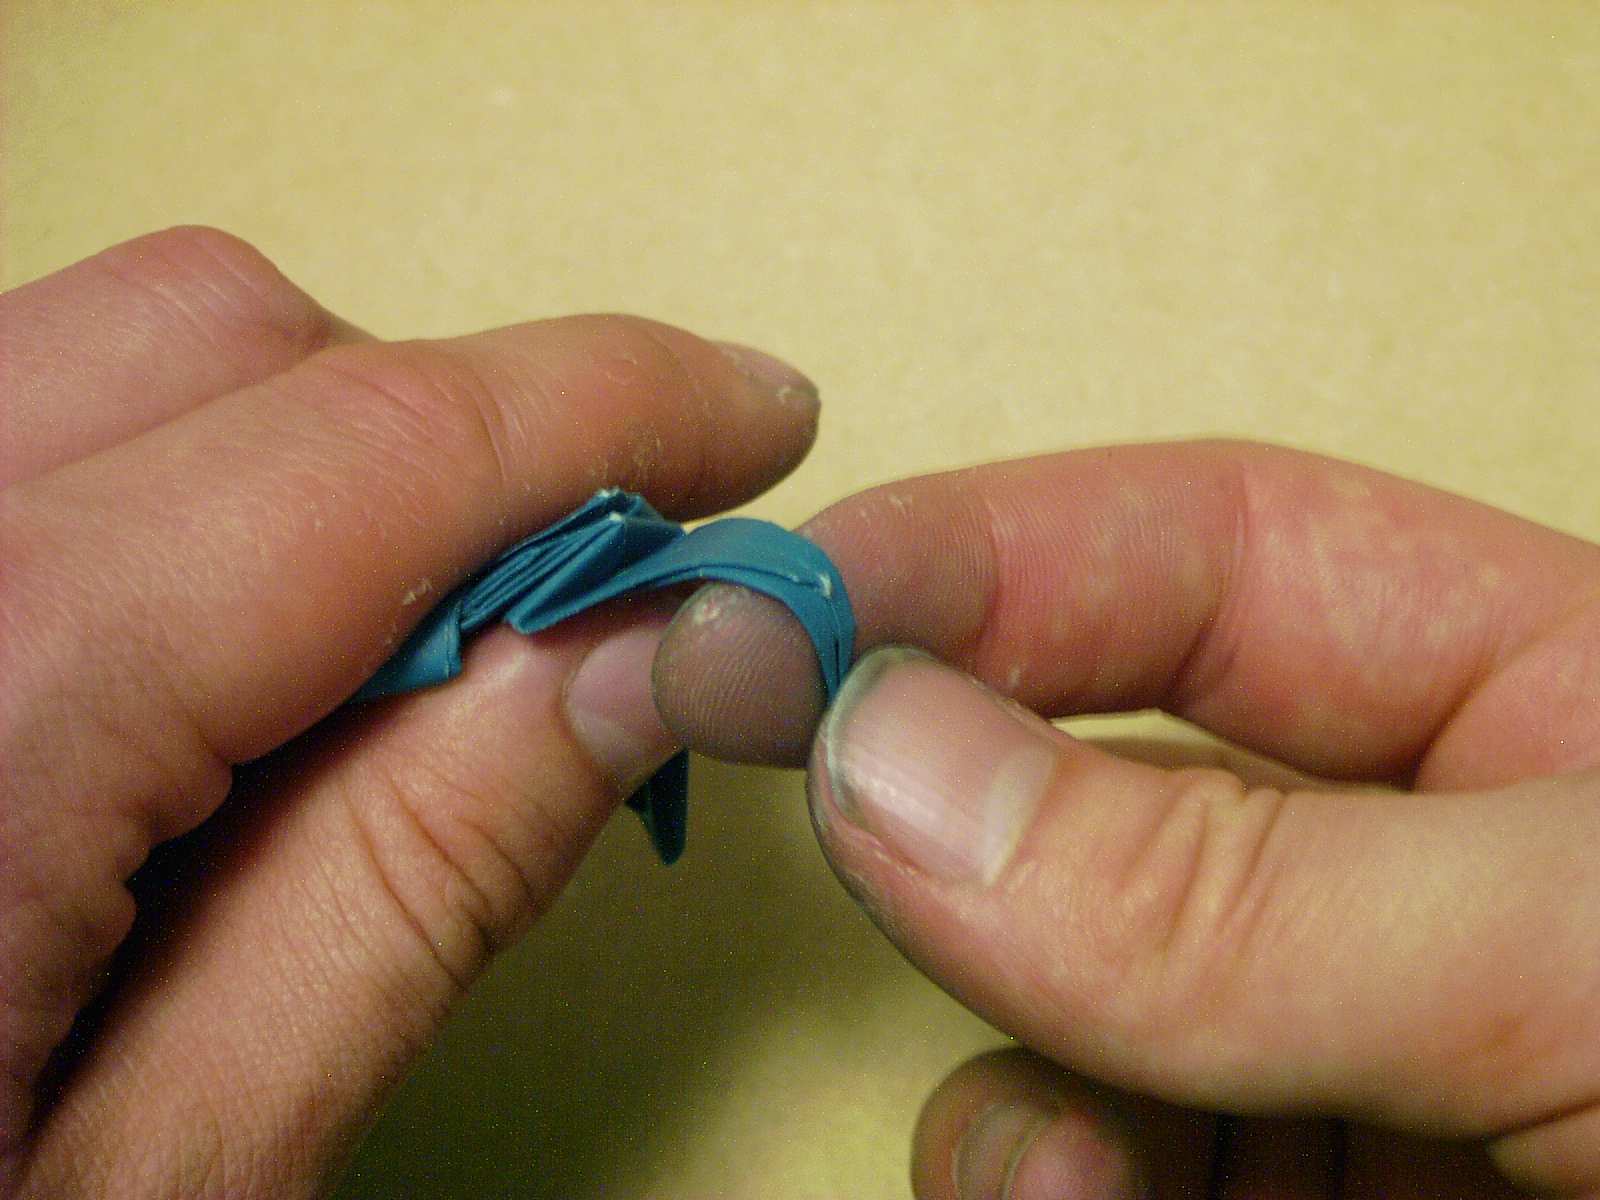 Doing Step 24
Like so...
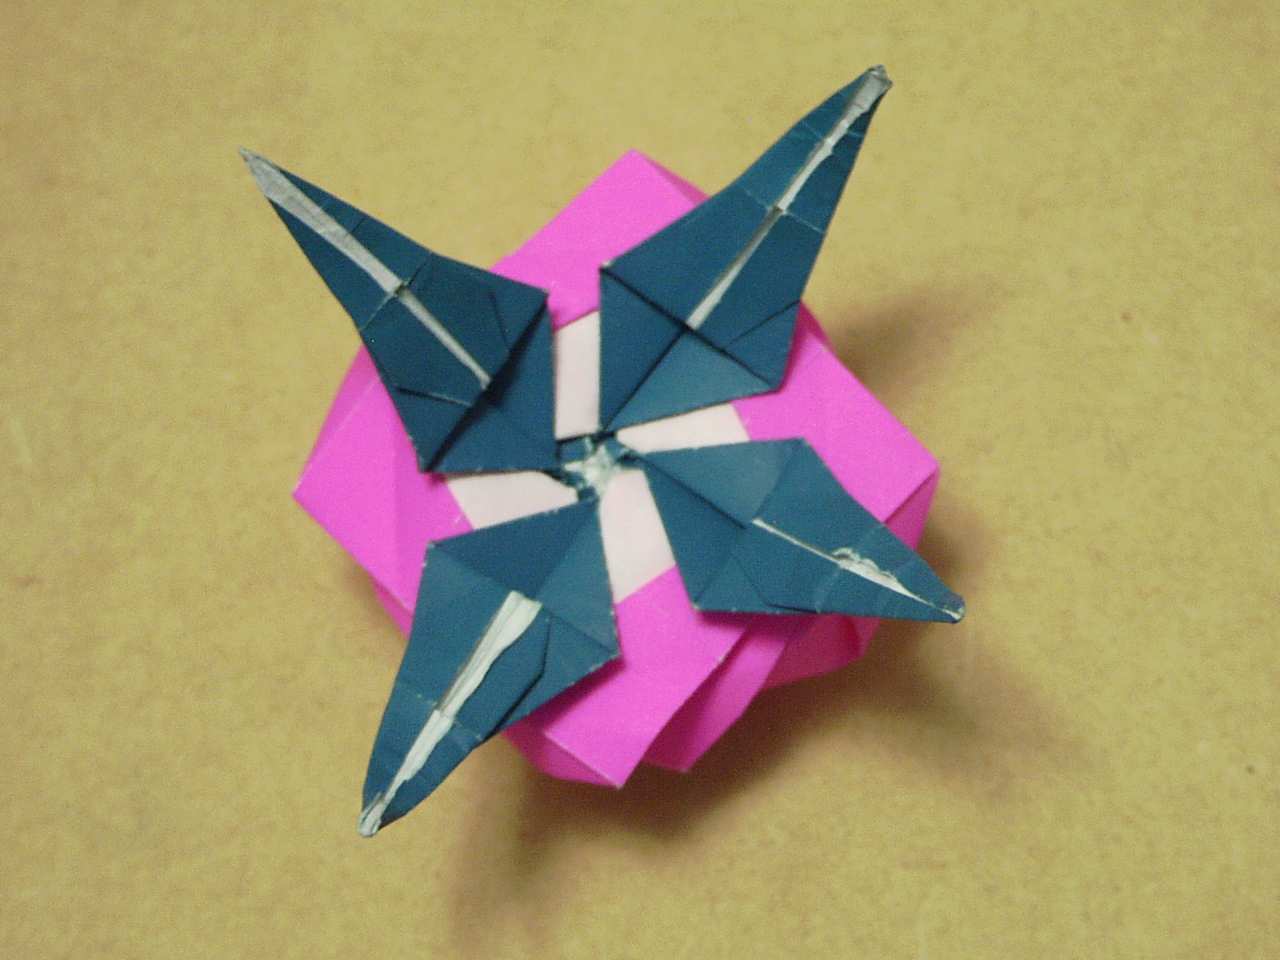
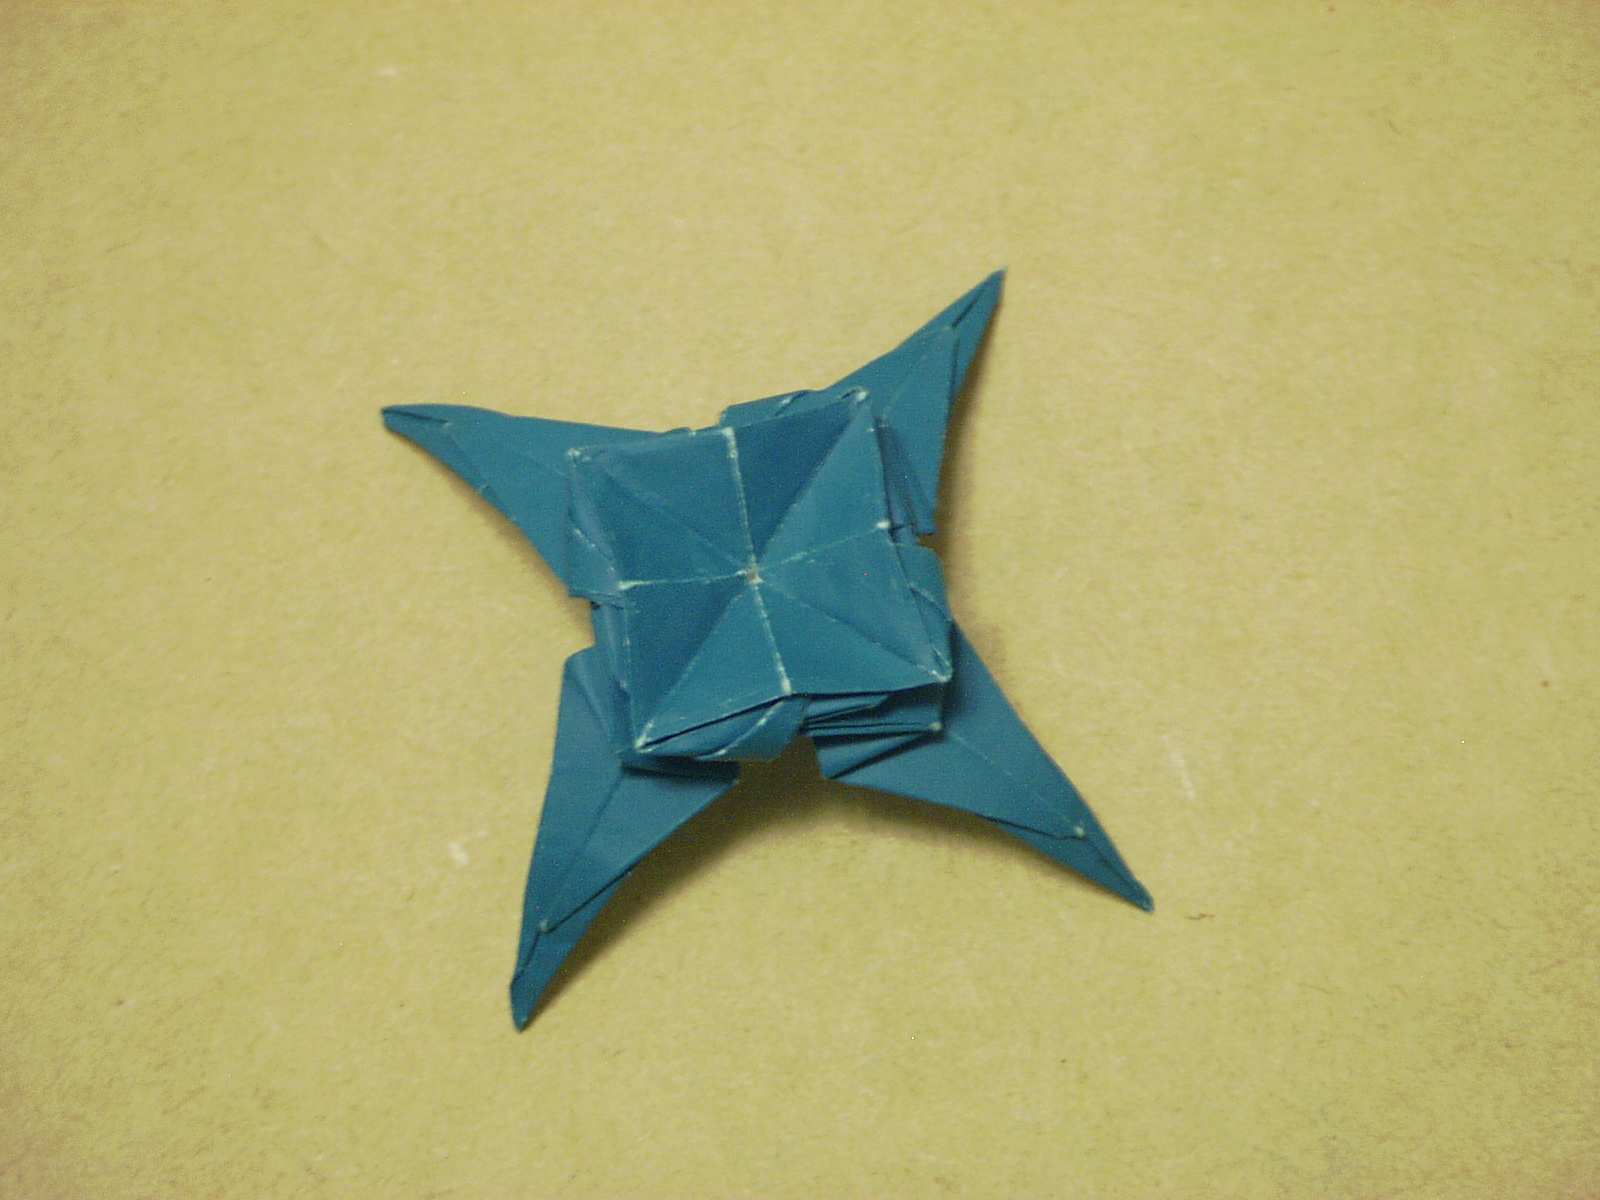 Done with the base
That's what you should end up with.
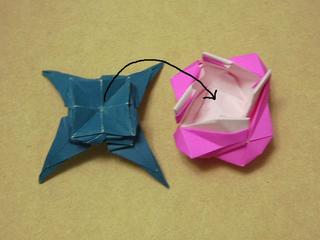
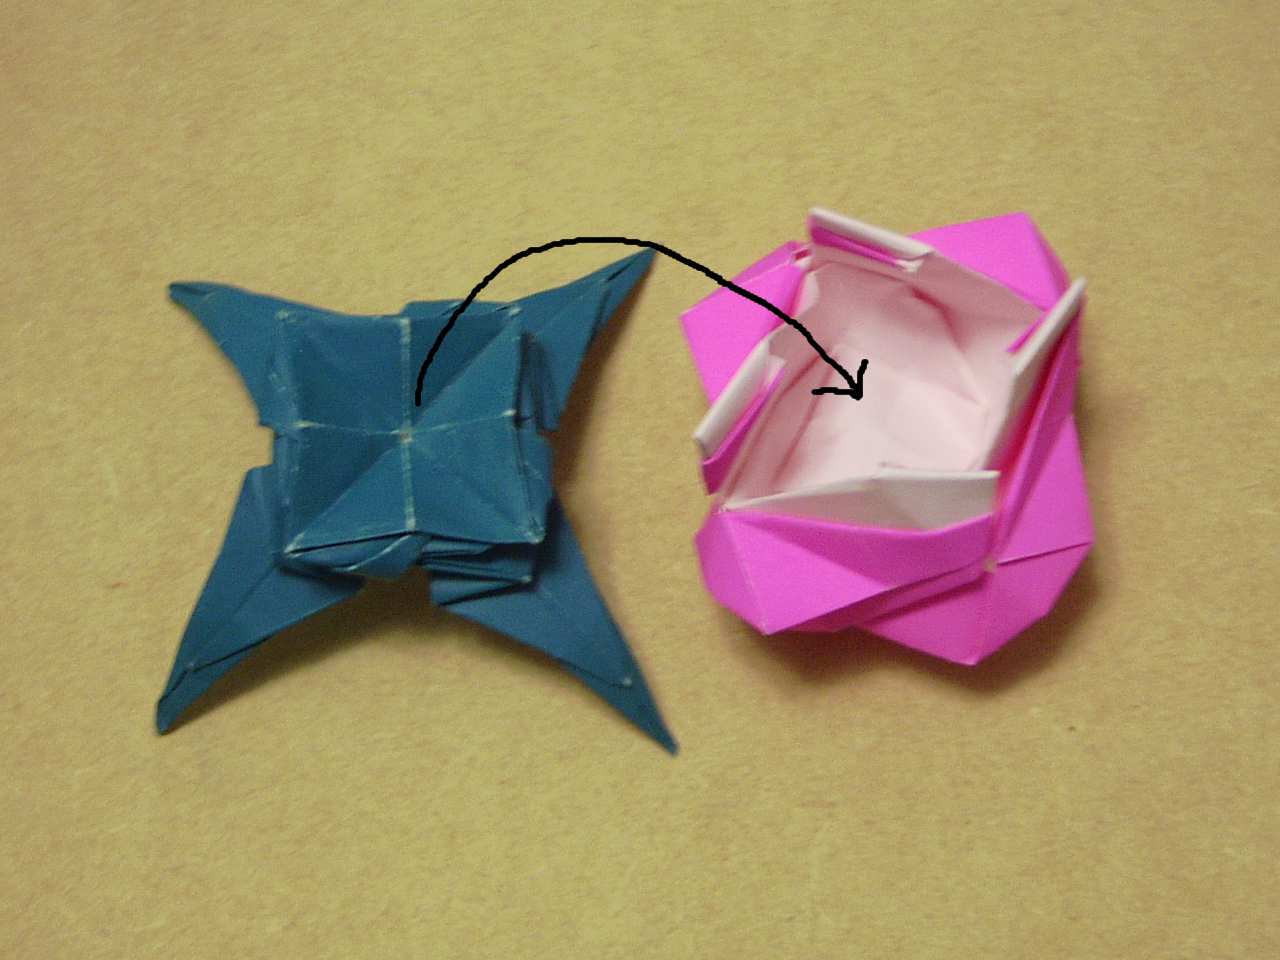 Attach to Rose
Take that center square and stuff it inside the rose. tuck the four points of the underside of the rose between the layers of the center square and the layers of the points.
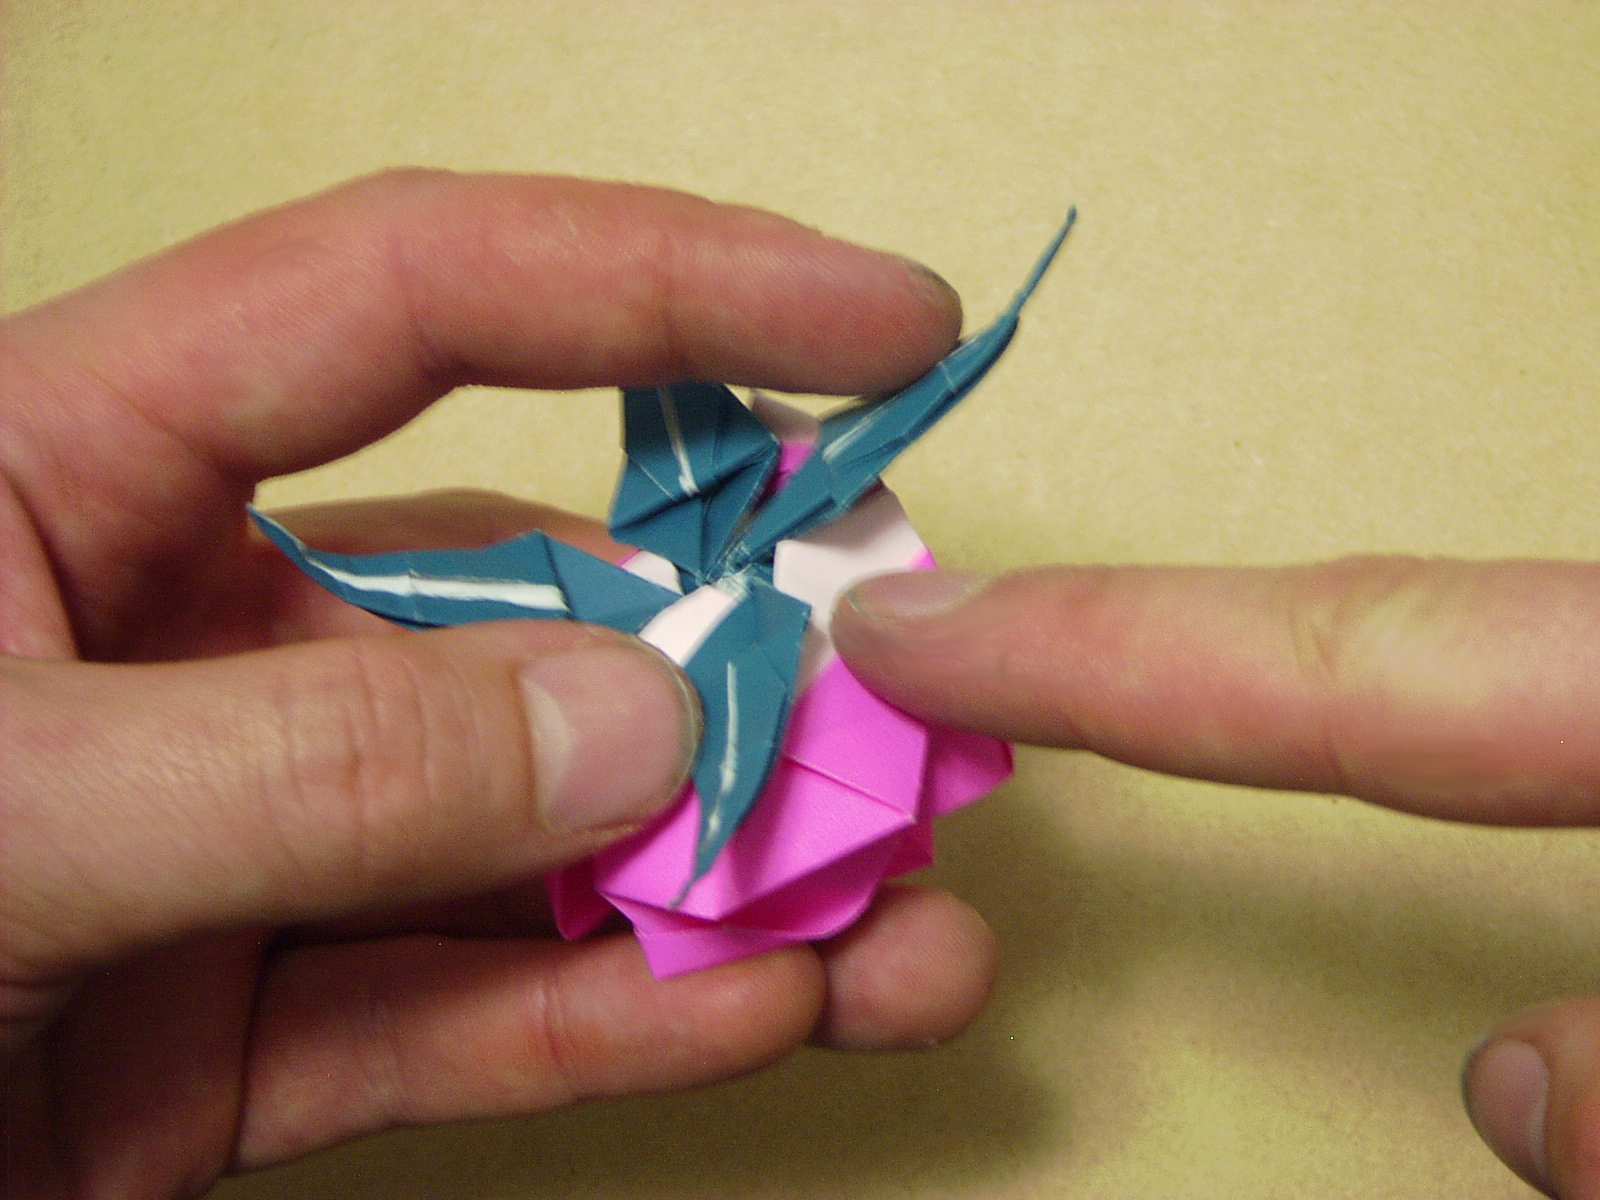 Almost Done
This shows one of the points of the rose being stuffed under one of the points of the base.
 Now for the stem
This is what it should look like once you've attached the base to the underside of the rose.